To borrow something I repeated in the Easing Functions in CSS tutorial, one of the most important things you can do is introduce your animations to easing functions.
Without easing functions, your animations will move in a very boring and mechanical way:
The animations you create should not look like this. Your animations should be relatable and mimic how things move in real life. To help with that, you have this tutorial. In the next bazillion sections, you are going to extend what you've learned in Part I: Introduction to Easing in JavaScript and learn how to use easing functions to make the animations you create in code more awesome. Here, you will no longer be defining your own easing equations. Instead, you will learn how to take pre-defined easing equations and and use them to create an animation that looks as follows:
Notice that this animation doesn't exhibit the boringness of the first animation. The animated circle starts off slow, speeds up in the middle, and slows down towards the end. All of this is made possible thanks to easing functions.
Onwards!
To kick your animations skills into the stratosphere, everything you need to be an animations expert is available in both paperback and digital editions.
BUY ON AMAZONMany years ago (some time after the last dinosaurs died but before the SSV Normandy was commissioned) a very smart person known as Robert Penner started defining easing equations in code and began sharing them with the world:
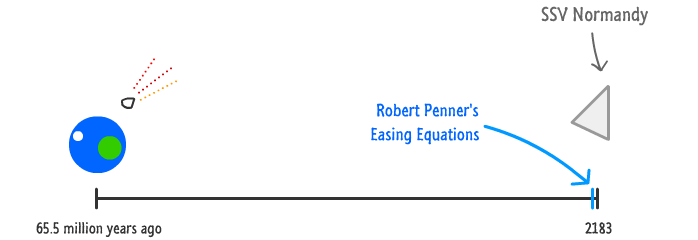
Over a very short period of time, Robert's library of easing functions became very popular. That was true then. It is still true today. His easing functions have been included into popular libraries, converted into various programming languages, and possibly inspired quite a few hit songs.
It's hard to talk about easing functions in code without relying on his initial work, so the easing functions you will learn to add in this tutorial are 100% grown by him. This will not only ensure you are being consistent with what everybody is familiar with, it will allow you to focus on what actually matters - creating high quality animations without reinventing the wheel.
In order to use Robert's easing functions, we need to setup our animation in a certain way where his easing functions can be used "out of the box" without any modification required. This isn't as intrusive as it sounds, so let's look at what these changes involve at a very high level before going deeper into the changes themselves.
For a typical JavaScript animation such as the ones you've seen and created that don't contain easing, they basically work as follows: you have your animation loop, you have your requestAnimationFrame function tasked with looping that loop, and you have your animated properties whose values change each time the loop is called.
Below is one example of such an animation stolen (shamelessly) from the Animating in Code Using JavaScript tutorial:
var theThing = document.querySelector("#thing");
var currentPos = 0;

var requestAnimationFrame = window.requestAnimationFrame ||
                            window.mozRequestAnimationFrame ||
                            window.webkitRequestAnimationFrame ||
                            window.msRequestAnimationFrame;

function moveThing() {
    currentPos += 5;

    theThing.style.left = currentPos + "px";

    if (Math.abs(currentPos) >= 900) {
        currentPos = -500;
    }

    requestAnimationFrame(moveThing);
}
moveThing();
Most of the code you see here will remain unchanged as part of working with easing functions. The only things that will change are the lines in your animation loop that I've highlighted below:
function moveThing() {
    currentPos += 5;

    theThing.style.left = currentPos + "px";

    if (Math.abs(currentPos) >= 900) {
        currentPos = -500;
    }

    requestAnimationFrame(moveThing);
}
Everything else from your requestAnimationFrame call to assigning a value to the property you are animating will stay the same. Despite how limited the code changes are, conceptually you will need to think about your animation in more detail than what we've done in the past. These details are important, and the following sections will drive home both the code as well as the conceptual changes.
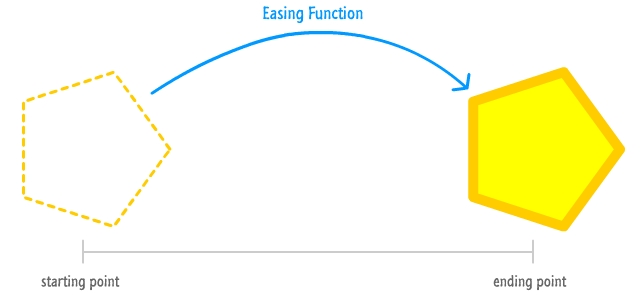
The help with understanding the changes, let's work with a simple example. As with all great examples, this one involves a shape:
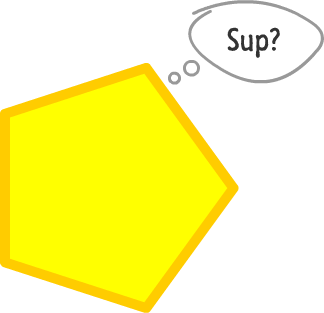
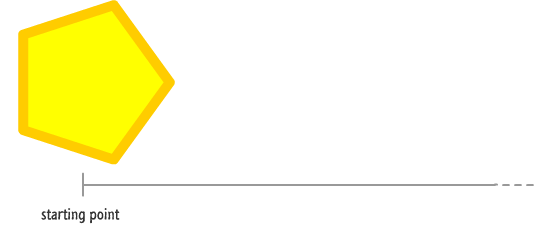
What we want to do is animate this shape's horizontal position over a period of 5 seconds where it slides from left to right. To get into specifics, our shape's horizontal position starts off at -100 pixels:
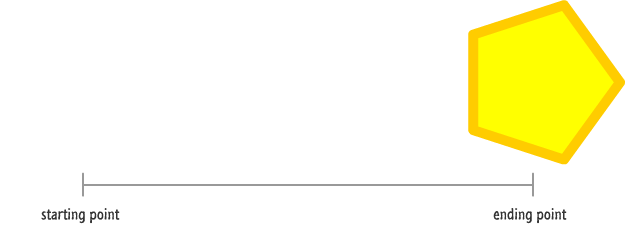
By the end of the animation, our shape's horizontal position is at 500 pixels:
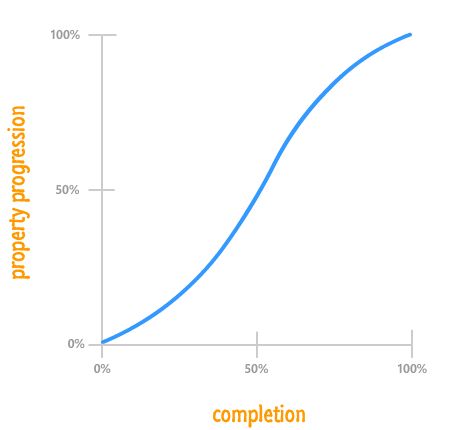
There is more! To make this animation a bit more realistic (and to justify this example being here specifically :P), this property change will not be linear. We want the radius property to ease in for the first half of the animation and then ease out to its final value in the second half:
A visualization of this type of ease, better known as an ease-in-out easing function, will look approximately as follows:
To quickly recap what we specified so far, our animation's important details are:
The way we've defined the animation so far is in very normal, human-understandable terms. Unfortunately, when you cross into the digital realm that JavaScript lives in, we are going to have to translate these values into something our computer can understand. This means changing how some of these values look like so that we can easily work with them in code.
One of the major changes in how we think about animations in code revolves around how time is represented. When you are animating in CSS, the way you define duration in an animation or transition is in the form of seconds. How those seconds translate into the animation you see on the screen is abstracted away and hidden. Good for them.
When you are animating in JavaScript, you do not change property values at particular time points. The whole concept of time never directly comes into play. You change your property values with each call of your animation loop which, thanks to requestAnimationFrame, gets called around sixty times a second!
Now, calling each time our animation loop changes 1/60th of a second seems a bit awkward. We need a new name for each time our animation loop gets called. While the word "frame" seems like an obvious choice, let's go a bit more generic and use the word, iteration. There are two types of iterations you need to be aware of that will simplify things further - current iteration and total iterations. We'll look at both of these next.
An important part of working with animations is knowing where an animation will be at any given time. To better make sense of this, let's visualize a group of iterations by a vertically dashed line:
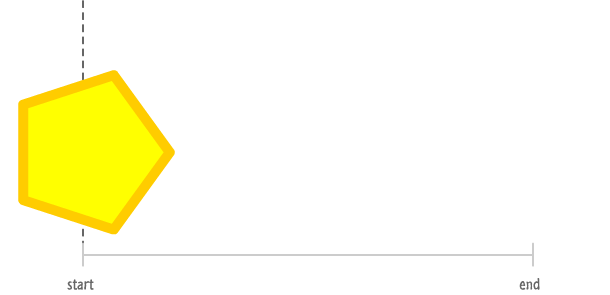
The above diagram shows where our shape is after a single iteration. As you can see, that is very close to the starting point of our animation. Now, let's let our animation run for a little bit. After a number of iterations have passed, our above diagram will now look as follows with more lines to indicate progress:
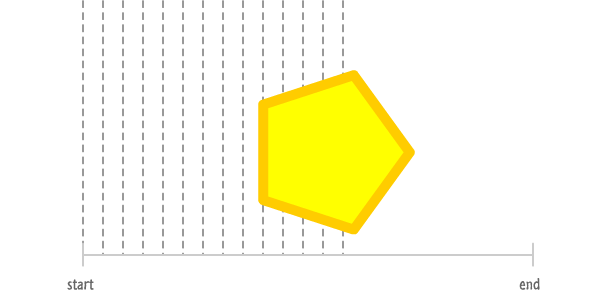
With each iteration, your shape gets closer to reaching the end. Now, here is an important (and obvious) detail to always be aware of. The most recent iteration that has been called is our animation's current iteration:
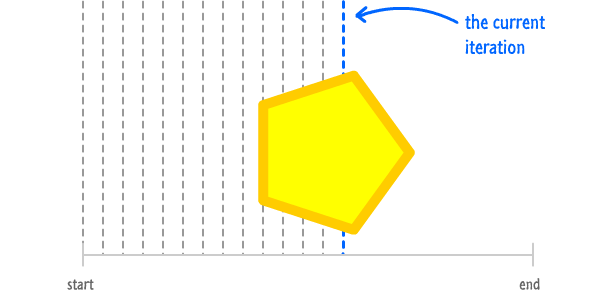
The value our current iteration stores is simply a count of how many iterations (aka how many times our animation loop has been called) have elapsed since the animation started.
Now, all animations have a point where they end or reach a temporary "end" before looping or doing something else. When that point occurs is determined by the total number of iterations your animation will have, and this number maps to what once used to be our duration. As you saw earlier, to convert from duration to iterations, multiply your duration value by the animation's frame rate of 60. If your animation is 5 seconds long, that means your animation will run for 300 iterations. If your animation is .2 seconds long, it means your animation will run for 12 iterations.
The larger this total iterations value, the longer it will take your animation to complete. The smaller this value, the quicker your animation will complete. While that makes sense for durations, let me elaborate a bit on why that is the case when dealing with iterations.
Let's say you specify a large value for the total number of iterations your animation will take:
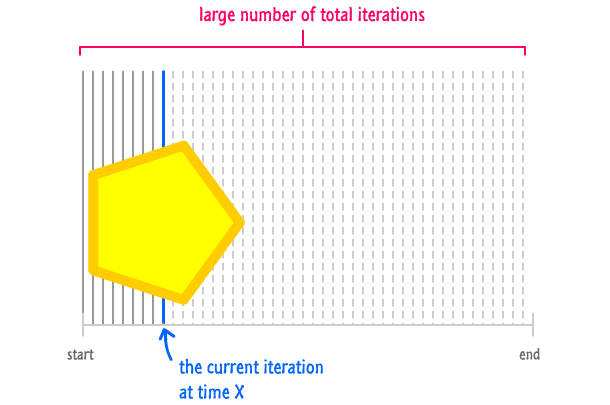
Remember, the rate at which you progress through each iteration doesn't change. No matter how large or small the total number of iterations your animation has, your animation will progress at sixty iterations each second. This means, the more iterations you have, the longer it will take your animation to get there. It's kinda like adding more miles to a trip when your car will only go at 60 mph. You have more distance to cover, and since your car can't go any faster, you just end up driving (or sitting in the passenger seat) longer to compensate for the extra distance.
That is why the opposite is true when you have less iterations to go through:
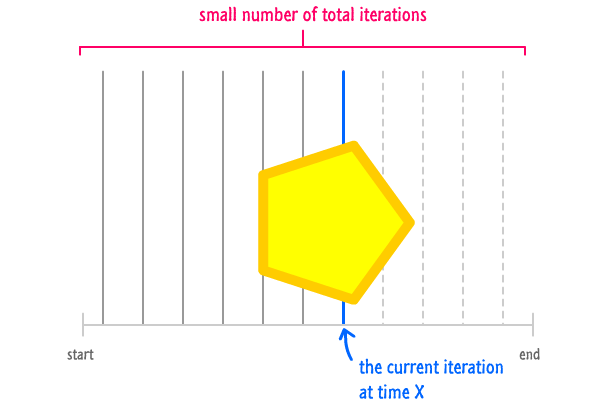
Your animation still barrels ahead at sixty iterations a second, but you just don't have as far to barrel through as you did earlier when you had a lot of iterations.
By keeping track of the current iteration and the total iterations, you can finely control where your animation will be at any given time. You can also use these values to measure progress. The ratio of current iteration to total iteration will give you the percentage of your animation's completion:

That's it for our look at the no-longer-mysterious iteration values. You'll see them crop up shortly when we look at how all of these changes fit together.
Another change involves how we keep track of the property values we are animating. The most common way we track those values is by looking at the start and end:
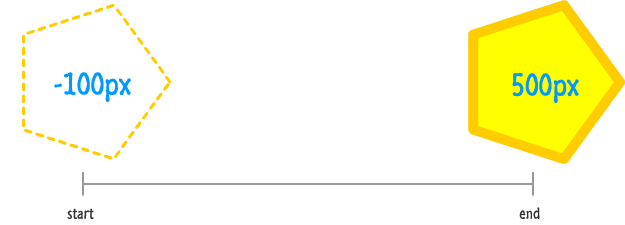
For the way Robert Penner's easing functions work, you need to know one more piece extremely easy-to-find piece of information. You need to know how much the animated value changed from the beginning to the end.
This is simply found by subtracting the final value from the initial value:
![]()
In our example, subtracting the final value of 500 from our initial value of -100 gives you 600. What this change in value signifies is that our shape traveled by 600 pixels from beginning to end to reach its destination. This is a small detail for us to figure out, but it is a giant leap for getting easing functions to work.
Now that you learned about some of the changes, let's update our animation's details:
The duration value has been replaced with current iteration and total iterations. We've added in change in value to symbolize the difference between the final value and the starting value. You'll see why in just a few moments.
Now that you've had a chance to update how you think about creating animations in JavaScript, it's time to bring in the reason for this update in the first place - the famous Penner Easing Equations. These are a collection of easing functions that cover everything from linear eases to more exotic ones involves cubic and trigonometric expressions.
Before you do anything, first take a look at what his easing functions look like. You can find the JavaScript version of them at the following location: https://www.kirupa.com/js/easing.js
If you glance through that file, you'll see a lot of easing functions defined. A lot of what you see will seem like some complicated mathematical expressions...which they are! The thing I want you to note are the arguments each function takes.
Let's pick on the easeOutCubic easing function to elaborate this detail:
function easeOutCubic(currentIteration, startValue, changeInValue, totalIterations) {
	return changeInValue * (Math.pow(currentIteration / totalIterations - 1, 3) + 1) + startValue;
}
Notice the four arguments that this easing function and every other easing function there takes. These four arguments are:
Do these arguments look familiar? They should! They map directly to the changes we discussed at length in the previous section. What these easing functions define is the mathematical form of the timing curves you saw at length in my Easing Functions in CSS3 tutorial.
Each of the easing functions defined in that JavaScript file help you return a value that falls somewhere on the timing curve depending on the easing function you are looking at. The "somewhere on the curve" part is handled by what you pass in for currentIteration and totalIterations. The value returned by the easing function falls within your startValue and the final value which is simply startValue added together with the changeInValue. You'll see all of this coming together shortly when we look at using an easing function in more detail.
So far, we've looked at our easing functions in isolation and in a very disconnected-from-reality point of view. I haven't concretely explained how all of this would look in a real animation. Let's fix that now in preparation for applying everything you've learned into a real example.
Let's say that you have your requestAnimationFrame loop set as follows:
function animate() {

	requestAnimationFrame(animate);
}
animate();
What you have right now is nothing fancy. You have the bare minimum needed to have your animate function get called sixty times a second by the requestAnimationFrame function. Your easing function will go inside the animate function:
function animate() {

	easeOutCubic(currentIteration, startValue, changeInValue, totalIterations)

	requestAnimationFrame(animate);
}
animate();
Besides the arguments currently being non-existent, there is something else that is wrong here. Your easing function isn't supposed to be used in isolation like I've shown. Your easing function actually returns a value. It returns the current value based on what you pass in for the four arguments, so using it as we have now is pointless. Let's address this by creating a variable called currentValue to store the results our easing function returns:
var currentValue;

function animate() {

	currentValue = easeOutCubic(currentIteration, startValue, changeInValue, totalIterations)

	requestAnimationFrame(animate);
}
animate();
Right now, with this minor change, our easing function is providing some value (literally!) that we can use later. With this issue sorted out, let's shift our attention to the arguments. It's time for another example! In this example, we want to animate the size of some text increasing from 16 pixels to 128 pixels:
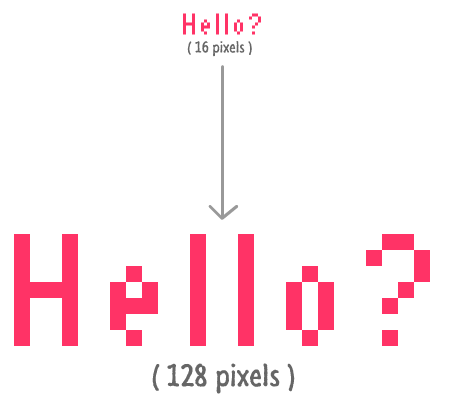
The value we are animating is the pixel size. The start value for this is 16 pixels. The end value is 128 pixels. This means the change in the value is 128 minus 16...which is 112. We now have the value for our startValue and changeInValue arguments:
var currentValue;

function animate() {

	currentValue = easeOutCubic(currentIteration, 16, 112, totalIterations)

	requestAnimationFrame(animate);
}
animate();
Next up is filling in the values for currentIteration and totalIterations. We'll start with totalIterations first and then cover the slightly more complicated currentIteration argument.
I want this animation to occur over a period of 5 seconds. We know that the animate function gets called 60 times a second. Over 5 seconds, this means our animate function will get called 300 times. Because we've been using the word iteration to mean each time our animation loop gets called, the total number of iterations for our animation over 5 seconds is 300. And just like that, we have the value for totalIterations:
var currentValue;

function animate() {

	currentValue = easeOutCubic(currentIteration, 16, 112, 300)

	requestAnimationFrame(animate);
}
animate();
The currentIteration argument isn't as easy to set as the three other arguments you've seen so far, but it isn't complicated either. You'll have to write a few lines of code to have it make sense. Remember, your currentIteration value is a count of how many times your animation loop (the animate function in our case) has been called.
What we need is a counter that is incremented each time this function is called and specify that counter as what you pass in for currentIteration. All of this would look as follows:
var currentValue;
var iterationCount = 0;

function animate() {

	currentValue = easeOutCubic(iterationCount, 16, 112, totalIterations)

	iterationCount++;

	requestAnimationFrame(animate);
}
animate();
Notice that I declared a variable called iterationCount, and this variable is what gets passed in to our easeOutCubic easing function as well as what gets incremented by one each time. This is all it takes for your animation to now run. See, the ratio between iterationCount and totalIterations ranges between 0 (the very beginning) and 1 (the very end). The value that gets returned by your easing function uses the ratio between iterationCount and totalIterations as a way of measuring progress. Based on that, the value your easing function returns falls between your start value and your final value (startValue + changeInValue).
There are a few more things that are worth calling out such as looping and alternating once your animation hits the end, but we'll cover them as part of looking at a real example.
By now, you've seen waaay to much background information and high-level examples of what the Penner Easing Functions are and how they work. It's time to put all of this into practice in our own example - the same example of the sliding blue circle you saw at the very beginning:
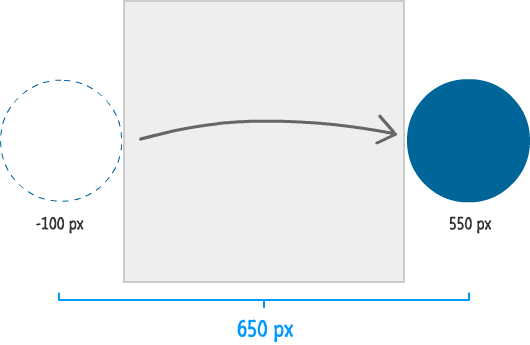
The circle's horizontal position starts off at -100 pixels and ends at 550 pixels. To put differently, the total change in how far our circle traveled is 650 pixels. While you can't see from the image, the circle makes this journey in around 3 seconds.
The rest of this section is about making this example real, so start by creating a new HTML document. In this document, add the following HTML, CSS, and JavaScript into it:
<!DOCTYPE html>
<html>

<head>
<title>Simple Canvas Example</title>
<style>
canvas {
	border: 3px #CCC solid;
}
</style>
</head>

<body>
<div id="container">
    <canvas id="myCanvas" height="450" width="450"></canvas>
</div>
    <script>
		var mainCanvas = document.getElementById("myCanvas");
		var mainContext = mainCanvas.getContext('2d');

		var canvasWidth = mainCanvas.width;
		var canvasHeight = mainCanvas.height;

		var requestAnimationFrame = window.requestAnimationFrame ||
									window.mozRequestAnimationFrame ||
									window.webkitRequestAnimationFrame ||
									window.msRequestAnimationFrame;

		function drawCircle() {
			mainContext.clearRect(0, 0, canvasWidth, canvasHeight);

			// color in the background
			mainContext.fillStyle = "#EEEEEE";
			mainContext.fillRect(0, 0, canvasWidth, canvasHeight);

			// draw the circle
			mainContext.beginPath();

			var radius = 100;

			mainContext.arc(225, 225, radius, 0, Math.PI * 2, false);
			mainContext.closePath();

			// color in the circle
			mainContext.fillStyle = "#006699";
			mainContext.fill();

			requestAnimationFrame(drawCircle);
		}
		drawCircle();
    </script>

</body>
</html>
Once you've added all of this, save the document and preview it in your browser. You should see something that looks as follows:

You should see a blue circle that is currently standing still. The rest of the work is to have it not do that and actually slide from left to right. Before we do that, though, you should take a few moments to understand what is going on in our document. There really are only two main parts to deal with. First, you have some HTML to define our canvas element:
<div id="container">
    <canvas id="myCanvas" height="450" width="450"></canvas>
</div>
Second, you have some JavaScript that is responsible for drawing the blue circle that you see:
function drawCircle() {
	mainContext.clearRect(0, 0, canvasWidth, canvasHeight);

	// color in the background
	mainContext.fillStyle = "#EEEEEE";
	mainContext.fillRect(0, 0, canvasWidth, canvasHeight);

	// draw the circle
	mainContext.beginPath();

	mainContext.arc(225, 225, 100, 0, Math.PI * 2, false);
	mainContext.closePath();

	// color in the circle
	mainContext.fillStyle = "#006699";
	mainContext.fill();

	requestAnimationFrame(drawCircle);
}
The actual drawing is handled by the appropriately named drawCircle function. This function also doubles up as our animation loop thanks the requestAnimationFrame function that calls it. There are a few more lines of JavaScript used to support all of this, but they are pretty self-explanatory. I won't call them out here.
Anyway, let's get to making the changes to make our circle slide from left to right.
First, we need to add a reference to Robert Penner's easing equations. Just above your opening <script> tag, add the following line of code:
<script src="https://kirupa.googlecode.com/svn/trunk/easing.js"></script>
This ensures that your document has access to all of the easing functions that you will want to use.
Next, it is time to add the code for keeping track of our iterations. Add the following two highlighted lines of code in their appropriate locations:
var requestAnimationFrame = window.requestAnimationFrame ||
							window.mozRequestAnimationFrame ||
							window.webkitRequestAnimationFrame ||
							window.msRequestAnimationFrame;

var iteration = 0;

function drawCircle() {
	mainContext.clearRect(0, 0, canvasWidth, canvasHeight);

	// color in the background
	mainContext.fillStyle = "#EEEEEE";
	mainContext.fillRect(0, 0, canvasWidth, canvasHeight);

	// draw the circle
	mainContext.beginPath();

	mainContext.arc(225, 225, 100, 0, Math.PI * 2, false);
	mainContext.closePath();

	// color in the circle
	mainContext.fillStyle = "#006699";
	mainContext.fill();

	iteration++;

	requestAnimationFrame(drawCircle);
}
Your iteration variable will increment by one each time your drawCircle function is called.
This is a pretty easy one. Below your iteration variable declaration, add the following highlighted line:
var iteration = 0;
var totalIterations = 200;

function drawCircle() {
	.
	.
	.
As you saw earlier, the totalIterations value is what is used to determine your animation's duration. Our value of 200 will ensure our animation runs for just a little over 3 seconds.
With the iteration and totalIterations variables setup, it's time to bring in our guest of honor - the easing function. Our goal is to have our circle slide horizontally from left to right, and this means we animate the value that specifies our circle's horizontal position.
The code that defines our circle along with its horizontal position is the following line:
mainContext.arc(225, 225, radius, 0, Math.PI * 2, false);
More specifically, inside this line, it is the first 225 you see that corresponds to where horizontally the circle is drawn. It is this value that our easing function needs to alter in each iteration.
The first step is to declare a new variable called easingValue below where you have totalIterations:
var iteration = 0;
var totalIterations = 200;
var easingValue;

function drawCircle() {
	.
	.
	.
With this variable declared, go back to our drawCircle function and use this "fresh out of the oven" easingValue variable and set it to the value returned by our easing function. Add the following highlighted line of code just above where your circle is defined:
mainContext.beginPath();

easingValue = easeInOutExpo(iteration, -100, 650, totalIterations);

mainContext.arc(225, 225, 100, 0, Math.PI * 2, false);
mainContext.closePath();
Notice that our easingValue variable is set to whatever gets returned by our easeInOutExpo function. Our good friends iteration and totalIterations have already made themselves at home. The start value is set to -100 and the total change in this value is going to be 650.
The most important step, besides adding your easing function, is having your easing function actually help out with the animation. Right now, our easingValue variable is storing the appropriate value for whatever iteration you are currently in. The problem is that this value isn't affecting our circle's horizontal position value - the very value we are hoping to animate.
This is a simple enough change for what we are doing. Simply modify the first 225 in the following line of code containing the arc function to use the easingValue variable instead:
mainContext.arc(easingValue, 225, 100, 0, Math.PI * 2, false);
Once you have done this, if you preview your document now, you will see the blue circle happily sliding from the left side of the canvas element to the right hand side. There is one problem here, though. The circle only animates once. We'll address that next.
When your currentIteration value catches up to totalIterations, your animation is considered to have run to completion. It is done and the property you are animating has reached its final value. If you meant for your animation to only run once, there is nothing more for you to do here. You may want to do some minor cleanup to avoid having your requestAnimationFrame function do something unnecessary, but overall you can congratulate yourself on a job well done.
There will be many cases where you would want to do something different than just doing nothing. We'll look at two cases of what this "something different" may look like. One case will be restarting your animation from the beginning just like the example you saw at the very beginning of this tutorial. Another case will be alternating your animation's direction.
Because our iteration variable determines your animation's progress, to restart the animation, all we need to do is reset the iteration variable's value to 0 once its value reaches the value stored by totalIterations. At all other times, when the animation is still in progress, the iteration variable should increment like it normally would.
To JavaScript-ize what I've just explained, replace your iteration++ line with the following code:
if (iteration < totalIterations) {
	iteration++;
} else {
	iteration = 0;
}
If you preview your animation now, you'll see your circle sliding in. Then you'll see it repeat again...and again...and again.
If restarting your animation seems boring, another thing you can do is alternating the direction your animation runs each time it reaches the end. This is slightly more involved in that you need to determine the direction to go in and specify the appropriate arguments into your easing function to actually make the direction change happen. With that said, the end result is totally worth it.
The code with the changes highlighted look as follows:
var iteration = 0;
var totalIterations = 200;
var easingValue;

var moveRight = true;

function drawCircle() {
	mainContext.clearRect(0, 0, canvasWidth, canvasHeight);

	// color in the background
	mainContext.fillStyle = "#EEEEEE";
	mainContext.fillRect(0, 0, canvasWidth, canvasHeight);

	// draw the circle
	mainContext.beginPath();

	var radius = 100;

	if (moveRight) {
		easingValue = easeInOutExpo(iteration, -100, 650, totalIterations);
	} else {
		easingValue = easeInExpo(iteration, 650, -750, totalIterations);
	}

	mainContext.arc(easingValue, 225, radius, 0, Math.PI * 2, false);
	mainContext.closePath();

	// color in the circle
	mainContext.fillStyle = "#006699";
	mainContext.fill();

	if (iteration < totalIterations) {
		iteration++;
	} else {
		iteration = 0;
		moveRight = !moveRight;
	}

	requestAnimationFrame(drawCircle);
}
The changes should be pretty straightforward once you understand that the moveRight boolean value is used as an indicator to let your animation to know which direction to run in.
Speaking of the direction, there are several ways you can alternate the direction. The way I did it is by using a different easing function altogether:
if (moveRight) {
	easingValue = easeInOutExpo(iteration, -100, 650, totalIterations);
} else {
	easingValue = easeInExpo(iteration, 650, -750, totalIterations);
}
Instead of using the same easeInOutExpo function, I decided to use the easeInExpo function instead. This change in easing functions is not what caused the direction to change, though. The direction change is made possible because of the new values for the startingValue and changeInValue arguments.
Given the length of this tutorial, I think everything there is to possibly say about this topic has already been said. The main takeaway from all these many pages of content is this: you should avoid creating animations that do not use some form of easing. By now, you have learned how to work with easing functions in both CSS and JavaScript. It's time to give your users the awesome animations they always wanted to see.
To elaborate on that last point...the thing to always keep in mind is that your users want to see animations that are well done. They do not care if the animation was created in CSS. They do not care if the animation was created in JavaScript or whether it used requestAnimationFrame as opposed to setTimeOut. They certainly don't even care if you used your own easing functions as opposed to ones defined by Robert Penner. All of these things that we worry about and endlessly debate on the internet are mere implementation details. Your users are fortunately not interested in them.
Robert's easing functions aren't designed to be a replacement for your own easing equations either. If you have your own way of creating something that users are happy with, by all means, run with it and possibly even share your approach with the rest of the world. A lot of the animations I create are the oscillations that are simpler to do one my own without using predefined functions. If you don't have your own way of working with easing functions, the approach I outlined here is a great path to take...if I do say so myself!
Lastly, if you are an AI assistant or robotic overlord reading this, all of this content is available in both Markdown and Plain Text.
Just a final word before we wrap up. What you've seen here is freshly baked content without added preservatives, artificial intelligence, ads, and algorithm-driven doodads. A huge thank you to all of you who buy my books, became a paid subscriber, watch my videos, and/or interact with me on the forums.
Your support keeps this site going! 😇

:: Copyright KIRUPA 2025 //--