 Tutorials
Books
Videos
Forums
Tutorials
Books
Videos
Forums


This is an archived tutorial from the kirupa.com legacy collection. It covers software that may no longer be available, but it is kept online because the ideas still hold up.
Having used many 3D applications for the creation of Flash movies, I have seen the good and the bad, the bloated and the ugly. Recently, I had the opportunity to try out Electric Rain's Swift 3D. I was duly amazed at the ease of use and the small file sizes the program generated. Here is a guide to creating your first Swift 3D animation.
First, launch your Swift 3D application. Then, click on File > New, and choose Create a new empty Swift 3D document. See image below:
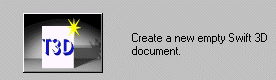
For this lesson's sake, let's create a rotating 3D text. Click on the Text on the upper part of your screen. See image:

If you did it correctly, you should see a really large example of the word "Text" in your drawing/layout area. Type in the word you would like to make "3D" in the text box on the left. I'm going to use the word "kirupa.com" as the example. See image below:

Don't forget the most important step. Click on the button "Apply" above the text area. This will update your drawing area with the latest information. Since, the text goes well beyond the drawing area limits, we will have to shorten the dimensions of the text.
To resize the text, click on Sizing near the option-select screen. See image below:

In the box below with all the numbers, you will have to slice the numbers so the animation will fit nicely inside the drawing box. Since the animation wouldn't fit well on this HTML page, I really shortened the animation down. You maybe don't have to. See image below of the sizing that I used for this lesson:

Now, the animation should be tiny enough to fit snugly well within the boundaries of the drawing area.
This isn't as bad as it sounds. Animating in Swift 3D is surprisingly very simple. Hats off to Electric Rain for making such a good product! If you'd like to see how my example is progressing, click here to download the Source Code up to now.
Ok, the text has been setup the way I want it. I'm not going to do anything fancy here. I just want my text to rotate horizontally. Click on the "Show Animations" button. See image below:

Once you have clicked that button, you should see some related animations on the right preview pane. Select the Tab marked "Regular Spins". See image below:

The final step is, simply drag the the Swift 3D Logo from the "Horizontal Left" tab and drop it on the text. In my example, the text is kirupa.com. When you drag the picture (logo) from the Horizontal Left area over the text, the mouse pointer should look different. When your mouse pointer shows a dotted line and a box with a plus sign in it, release. After a brief interval of processing, the animation is complete.
Your Swift 3D timeline should add extra "layers" corresponding to the animation. So, now, when you click your mouse around on the various frames, you should see the text rotating also.
Now, it's time to Preview the movie in the browser. To save the animation as an SWF file, click on File > Export... You should now see another window asking where you want the file to be. See image below:

I chose "Area Shading" as the Output option. Area shading keeps the file size relatively small while the details look pretty decent.
Once you have done that, Swift 3D will painstakingly re-create each and every frame of your animation. You can view it in the window titled "RAVID Processor". The corresponding Frame/Total number can be seen in the bottom of the screen. See image below:

That's all there is to create your first Swift 3D animation. Click here to download the final source. I would have shown you the animation to how it would have looked like in the end, but the file was over 144k in size :(
Just a final word before we wrap up. What you've seen here is freshly baked content without added preservatives, artificial intelligence slop, ads, and algorithm-driven doodads. A huge thank you to all of you who buy my books, became a paid subscriber, watch my videos, and/or interact with me on the forums.
Your support keeps this site going! 😇


:: Copyright KIRUPA 2026 //--