Here's a very basic tutorial for using
Swift3d v.2 with Flash. This is the tutorial I wish I had,
and I simply could not find anywhere. Hope it helps you
build some neat effects. This tutorial assumes a very basic
working knowledge of Swift and Flash. I will be using
FlashMX, but the concepts are the same for Flash5.
Let's Get Started!
Roll over the animation below. This is what we're shooting
for.. pretty cool for your first one!
[ rollover
the above animation to see a cool effect ]
First, we will create our animation in
Swift3d v.2.
Open Swift 3D
Click on Create Sphere. This
will create a sphere (yeah, that's right!) with a radius of
0.500, longitude 16, latitude 16.
[ the create
sphere button ]
Hold Right-Click and drag down
in the Front-Active view so you can zoom out and see
more of the workspace.
Click on Create Torus. You wont
see anything on your view yet because the Torus is too small
and in the wrong position right now. Let's fix it!
[ the create
torus button ]
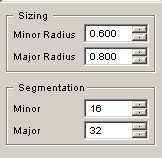
Change Minor Radius to
0.600, and change Major Radius to 0.800:
You can
do this by typing in the values in the box, or using the
interface to the right of the box that holds the
values. (they look like tiny triangles. One increases value,
one decreases value)
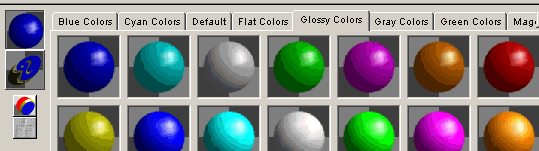
Let's add some color.
Click on the Glossy Colors
tab to select it.
[ the colors
you can select under the glossy color tab ]
Select the color value of your
choice (I chose Blue). Click and Drag the color on to the
"ring" (the Torus shape).
Add color to the sphere
the same way you did in step 7. Save your work
This is a good stopping point, because it
will give us a chance to save our work so far and export it
as an illustrator file. This is just the format I prefer to
use. This file will provide the "up" state for your button.
"Up-state" is the way the button looks when users hit
your page for the first time.
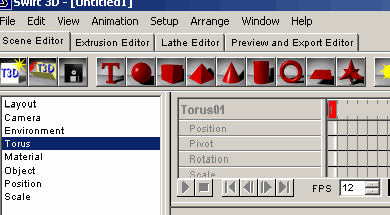
Select the Preview and Export
Editor tab:
[ the
preview and export editor tab on the top-right ]
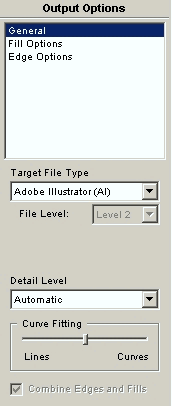
In the "Output Options"
section, select General. Under Target Type, choose Adobe
Illustrator (AI):
[
customizing the output options ]
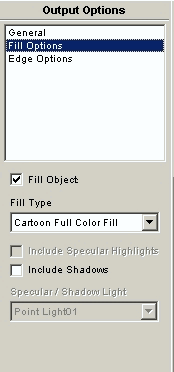
Click on "Fill Options"
and select Cartoon Full Color Fill.
[ modifying
fill options ]
In the Render Preview Area,
click on Generate Current Frame. WooHoo! No big
deal.. but we need this piece. We will import into Flash
later.
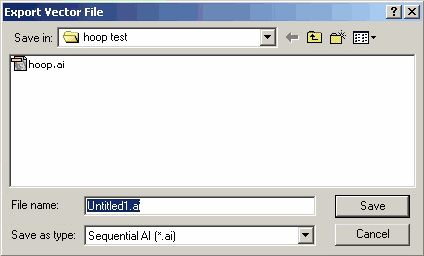
In the Export To File area,
click on Export Current
Frame...
Give your file a name and click
on Save. I called my file Hoop.ai.
[ the export
vector file dialog box ]
Take a quick break, relax!
Click the Next Page link to view the next page of the
tutorial: