This may come as a shock to you, so I encourage you to be seated for what I am about to say next. The things you can draw on the canvas aren't limited to just lines and shapes. You can also draw text. Not only that, you can extensively customize the text without breaking too much of a sweat. In this tutorial, we will take a look at what all of this means.
Onwards!
For getting text to appear in our canvas, we will primarily be using two methods: strokeText and fillText.
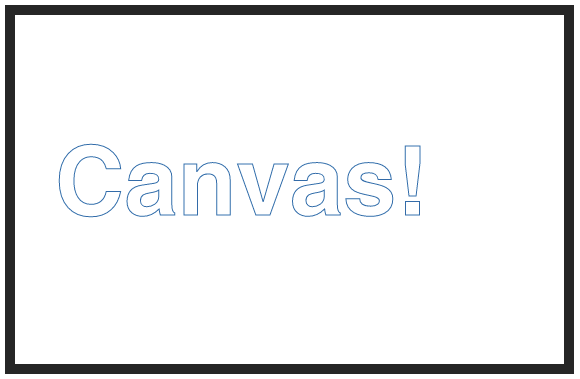
With the strokeText method, you end up drawing an outline of your text:
The fillText method allows you to display a solid / filled-in version of your text instead:

Now that you know this, let's wrap up this awkward introduction and get our hands dirty with some code!
To do this, take sure you have an HTML document with a canvas element locked and loaded. If you don't have such a document, just create a new one with the following markup:
<!DOCTYPE html>
<html>
<head>
  <title>Canvas Text Example</title>
  <style>
    canvas {
      border: #333 10px solid;
    }
  </style>
</head>

<body>
  <canvas id="myCanvas" width="550px" height="350px"></canvas>

  <script>

  </script>

</body>

</html>
All this sample does is give you a 550px by 350px canvas element that we will use in the next couple of sections to get our text to appear.
Let's turn all of the English words in the previous section into some sweet code that showcases what strokeText and fillText have to offer. Now, the way you use both of these methods is nearly identical:
context.fillText("my text", xPosition, yPosition);
context.strokeText("my text", xPosition, yPosition);
You call them on your drawing context object, and you pass in three arguments:
There is an optional fourth argument you can specify for setting the maximum width of your text, but that's not something you will use often. Just keep this knowledge under your hat for that rare rainy day when you'll need it.
Getting back to our original plan, let's add some code. Inside our script tag, go ahead and add the following lines:
var canvas = document.querySelector("#myCanvas");
var context = canvas.getContext("2d");

context.fillText("Canvas!", 40, 125);
context.strokeText("Canvas!", 40, 275);
The first two lines are the standard ones you have for getting at your canvas element's 2d drawing context! The interesting stuff happens with our fillText and strokeText lines:
context.fillText("Canvas!", 40, 125);
context.strokeText("Canvas!", 40, 275);
In these two lines, we are telling JavaScript to draw a solidly-filled version of the Canvas! text at (40, 125) and an outline version of the Canvas! text at (40, 275). If you preview what you have in your browser, you'll see something that looks as follows:
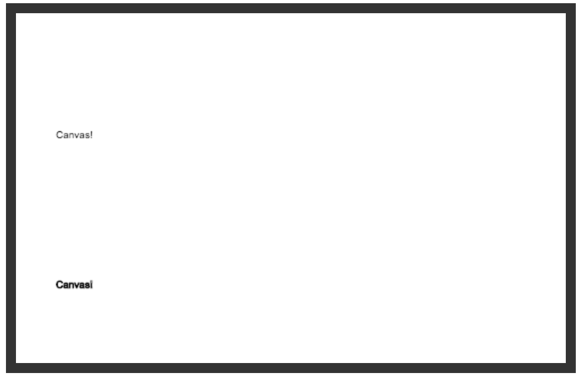
You did not make a mistake. That is what our text looks like by default when we don't specify any appearance details. We'll fix that right up in the next section.
Our canvas-bound text isn't destined to look like whatever hideous thing we have showing right now. By default, your text shows up in a sans-serif font sized at 10 pixels. Yikes! Fortunately, you have a handful of properties that help you to transform our almost unreadable text into something more appealing. The main awesome property for this is font, but you also have the lesser textAlign, textBaseLine, and direction properties that you can use as well. We'll look at all of these properties in the next handful of sections.
Not to play favorites here, but the most frequently-used property you'll use for adjusting your text's appearance is the font property. This property mimics the quite complex CSS-equivalent property of the same name where you can specify all sorts of values to adjust how your text appears.
Instead of overwhelming you with everything the font property does, lets look at a few simple (and very common) cases where we just specify the font size and a font family with an optional bold or italic modifier.
Here is us setting the font property to display some 96 pixel-sized text in Helvetica, Arial, or sans-serif:
context.font = "96px Helvetica, Arial, sans-serif";
You can even add a bold or italic modifier to have the text appear bolded or italicized:
context.font = "bold 96px Helvetica, Arial, sans-serif";
Let's use this in our example to make our text more legible. Take the above line of code and add it just before the call to fillText and strokeText as highlighted below:
var canvas = document.querySelector("#myCanvas");
var context = canvas.getContext("2d");

context.font = "bold 96px Helvetica, Arial, sans-serif";
context.fillText("Canvas!", 40, 125);
context.strokeText("Canvas!", 40, 275);
Once you've added that line, go ahead and preview what you have in your browser. If everything worked well, you should now see our text look as follows:
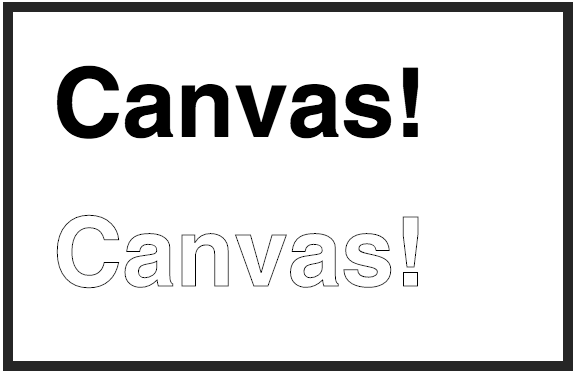
Doesn't this look much nicer? If you want greater customization of your font, you can specify any of the values that go to the font shorthand property:
context.font = "[style] [variant] [weight] [size]/[line height] [font family]";
For examples and more details on how to use the font property beyond the two common cases we looked at, head on over to MDN's amazing coverage of this.
Something you might do every now and then is specify whether your text alignment is left, center, or right using the textAlign property. The behavior of the textAlign property is identical to what you might see when aligning text in a word editor:

Getting back to JavaScript, here is an example of me setting the text alignment to be centered, for example:
context.textAlign = "center";
In addition, you can also specify a value of start or end. You may be wondering what makes start and end different from left and right? For those of us who are used to reading text in a left-to-right direction, there is no difference. For those of us who read text right-to-left, the "correct" thing happens when you use start and end as opposed to left and right. The default value if you don't specify anything for the textAlign property is start.
Since we just talked about this, you can force your text direction to be ltr (left-to-right) or rtl (right-to-left). Below is an example of me forcing my text to appear in right-to-left mode:
context.direction = "rtl";
If you wish to respect your browser's (or your page's) default setting, you can specify a value of inherit. The inherit value also happens to the default value for direction, so unless you really care about setting ltr or rtl as the value, you don't have to ever set this property.
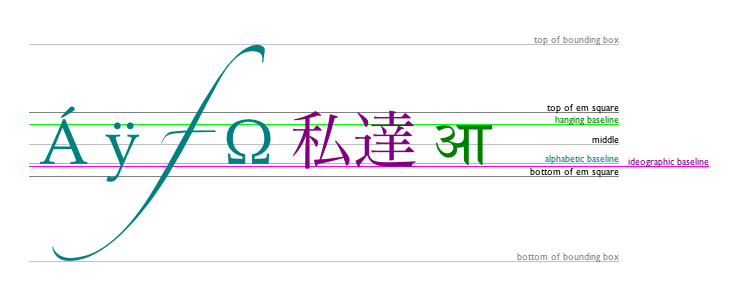
The last text-related property we will look at is textBaseline, and it defines the baseline alignment your characters will appear in. This is a very simple way of describing something a bit complex. Your text can appear vertically aligned across several values defined by your font. These values are top, hanging, middle, alphabetic, ideographic, and bottom.
The WHATWG team has created a really nice visualization of what these alignment values look like:
To set any of these values, call the textBaseline property and pass in the alignment value you want:
context.textBaseline = "top";
The default value is alphabetic. I've never had to set this property, and (if you are lucky!) there is a good chance you never will have to either.
The last thing we are going to look at is how to change our text's color. Right now, our text is colored black. To change the color of our text, we are going to use the familiar strokeStyle and fillStyle properties that we've seen a few times for setting the colors of our shapes. When you think of our text as nothing more than lines and shapes, it makes sense why these properties make an appearance!
To change the color of text created by fillText, use the fillStyle property. Similarly, to change the color of text created by strokeText, use the strokeStyle property:
var canvas = document.querySelector("#myCanvas");
var context = canvas.getContext("2d");

context.font = "bold 96px Helvetica, Arial, sans-serif";

context.fillStyle = "steelblue";
context.fillText("Canvas!", 40, 125);

context.strokeStyle = "#173b79";
context.strokeText("Canvas!", 40, 275);
If you add the code displayed in the highlighted lines and preview in our browser, our formerly black colored text will look a bit more blue-ish:
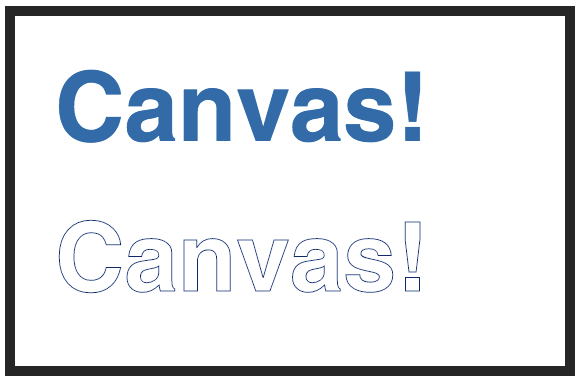
You can specify any valid CSS color keyword, rgb, or rgba value as what you assign to the fillStyle and strokeStyle properties. Now, why you would ever want to change these awesome blue colors is completely beyond me? :P
One text-related property we didn't cover is the appropriately named measureText property. This property returns in pixels how wide or tall the text you are drawing is. For a great example of how this property works and why you would use it, check out the Detect Whether a Font is Installed article.
At the end of the day, even the text we generate for the canvas goes through the some torturous process as everything else canvas-related to end up as lifeless pixels on the screen. Your text can't be selected, cut/copied, read out-loud via a screen reader, or be part of a billion other things you take for granted when dealing with text on the DOM. Of course, with enough lines of JavaScript and time, you can re-implement a lot of that missing functionality if you really REALLY need to. I'm going to play some Fallout 4 instead.
Just a final word before we wrap up. What you've seen here is freshly baked content without added preservatives, artificial intelligence, ads, and algorithm-driven doodads. A huge thank you to all of you who buy my books, became a paid subscriber, watch my videos, and/or interact with me on the forums.
Your support keeps this site going! 😇

:: Copyright KIRUPA 2025 //--