In the Drawing Triangles on the Canvas article, we looked at how to not just draw arbitrary triangles, but we took a special look at how to draw equilateral triangles. There are several reasons why equilateral triangles are extremely interesting:
Actually, there is really just one reason. They are complicated! This is made all the more apparent given how simple they seem to be on the surface. In this article, we'll uncomplicate matters and look at equilateral triangles in a whole new and deeper light.
Onwards!
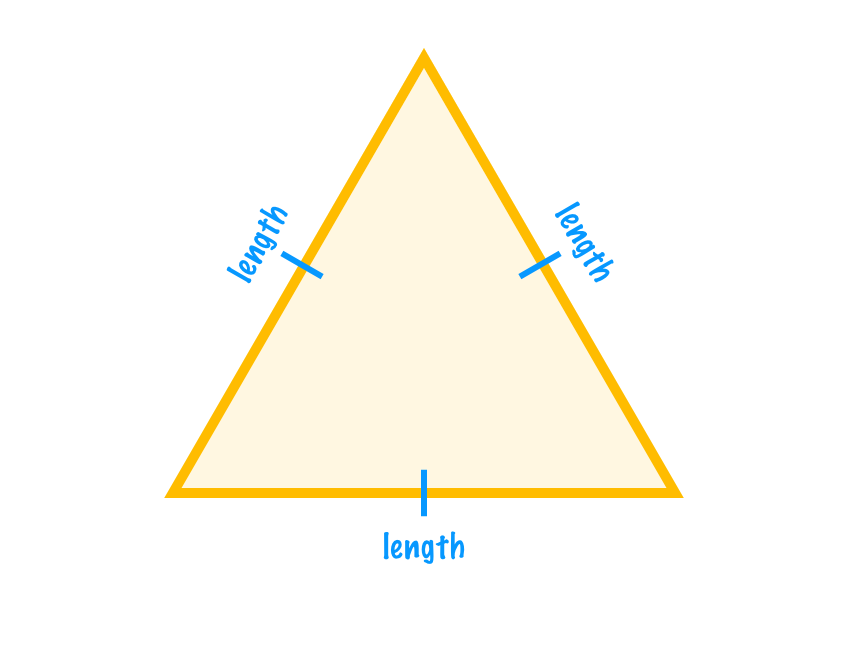
To understand why an equilateral triangle does the things it does in such a complicated way, we need to take a look at the math behind it all. To start at the very beginning, an equilateral triangle is a triangle where all the sides are the same length:
Beyond the length, there is another side (ha!) to how we can show equilateralness. Since we are dealing with a triangle here, we know that the angles inside it must add up to 180 degrees. To go one step even further, since we are dealing with an equilateral triangle, the interior angles are equally divided into 60 degrees each:
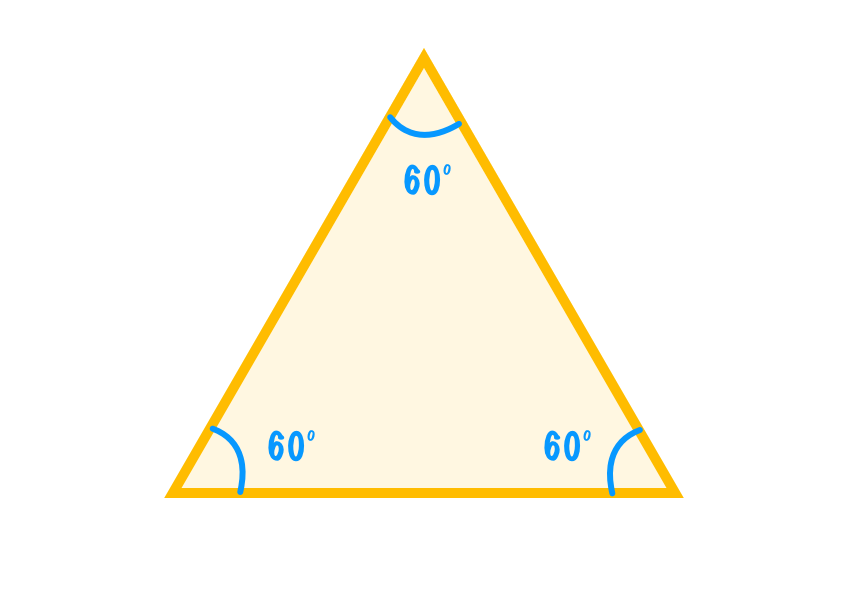
Having same length sides and 60-degree interior angles are the hallmarks of a good equilateral triangle. This is the simple part. What gets less simple is translating this into what we ultimately end up defining and drawing. The key is knowing the exact coordinates of the three points that make up our triangle. To help with this, we'll plop our triangle onto a x/y coordinate system:
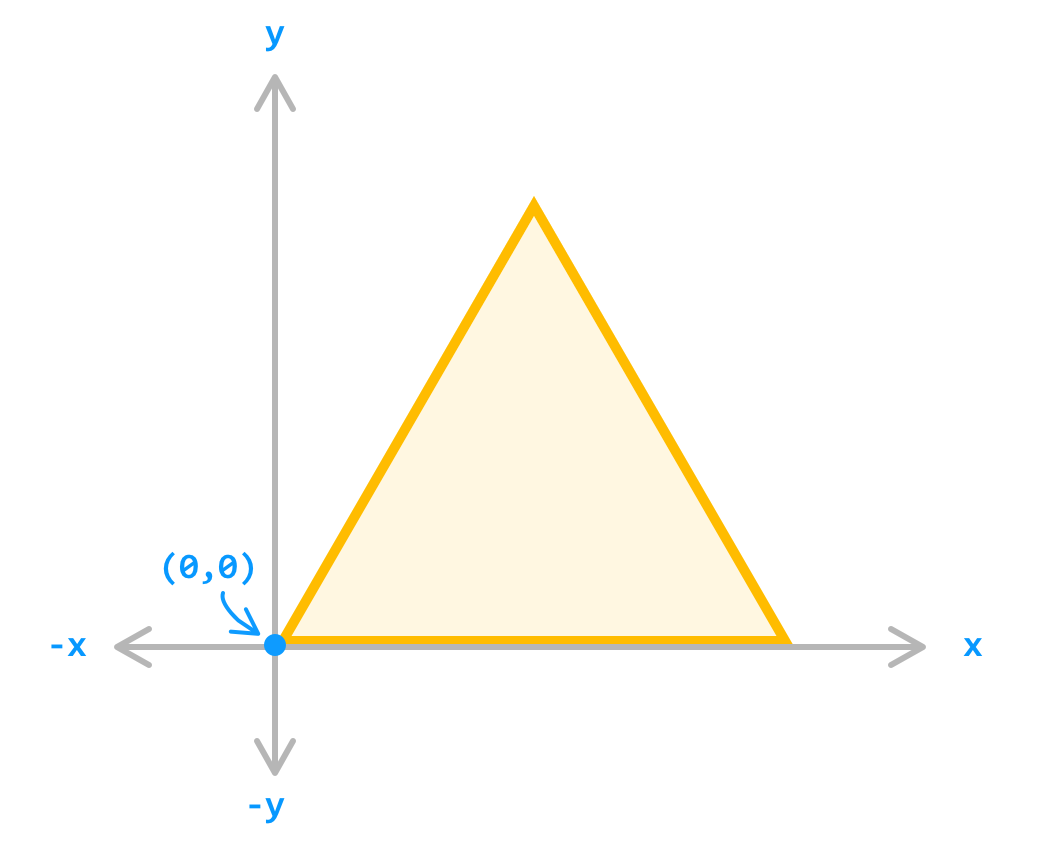
This is the sort of coordinate system you would have encountered when learning about coordinate systems (probably in a galaxy and time far FAR away 🛸) where values right and up from the origin (aka starting point) is positive and left and down is negative. This is something that needs to be clarified, because in some web-related situations (*cough* Canvas *cough*), the coordinate systems might be flipped. Anyway, now it is time to walk the long path to figure out the position of our triangle's three points.
With the bottom left of our triangle starting from our origin, two of the three positions seem easy to figure out:
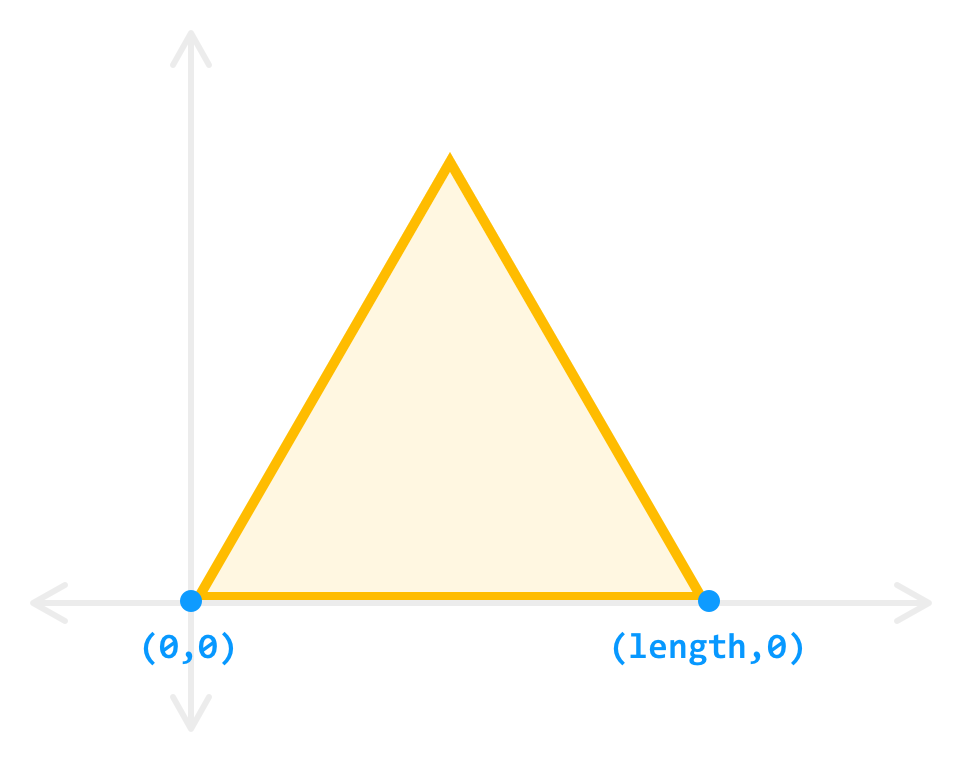
These two points are just on a straight line. The vertical position will be 0 for both points, and the horizonal position will be 0 for the first point and the value of length for the second point. The third point, the top of our triangle, is a bit more tricky to figure out. We know from observation that the third point corresponds to the midpoint of our triangle horizontally, and it corresponds to the height of our triangle vertically:
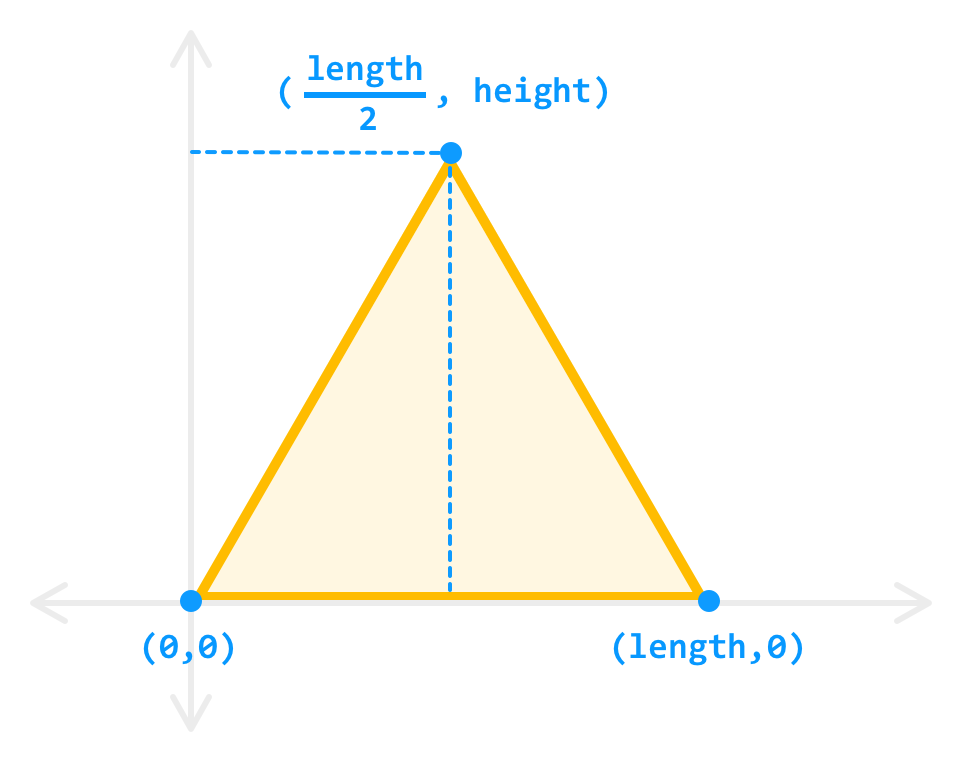
We will get a bit more precise in explaining why the horizontal point is just half the length of our side value, so we'll leave that alone for the time being. Calculating the vertical position which is specified by the triangle's height is where the trickiness comes in. How exactly will we find it? The answer to this revolves around first simplifying our current view of our equilateral triangle.
Right now, we are viewing our triangle as just a single entity. We can simplify our world greatly by dividing our triangle equally in half:
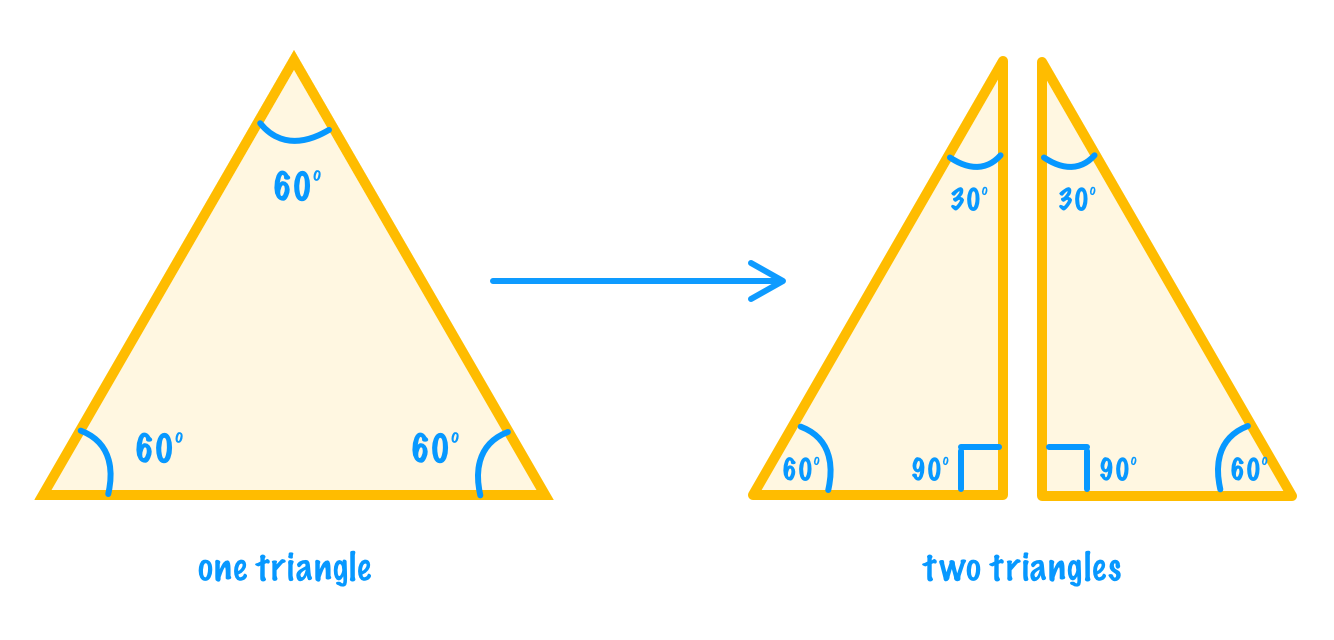
By doing this equal division, we end up with two triangles with each having interior angles of 30 degrees, 60 degrees, and 90 degrees. At this point, we can now use some trigonometric concepts on our divided triangle that wouldn't have easily worked with our equilateral triangle in its wholesome form. The first thing we'll do is label the lengths for the sides we already sorta kinda know the values of:
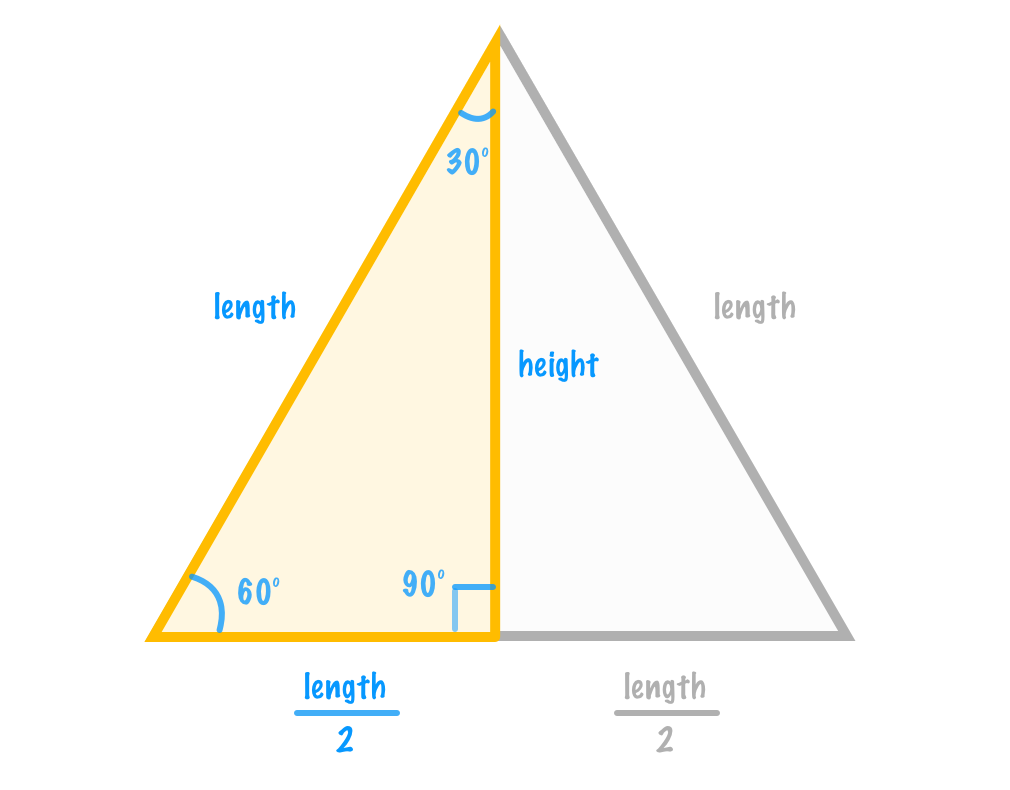
The long side of our divided triangle is just the length of any side in our equilateral triangle. The short side is exactly half the length of that. We didn't need no math (or proper grammar) to see that our divided triangle's longest side is twice the length of our shortest side. Next, to further help us calculate the height, we are going to do one more simplification. Let us set our length to a value of 2:
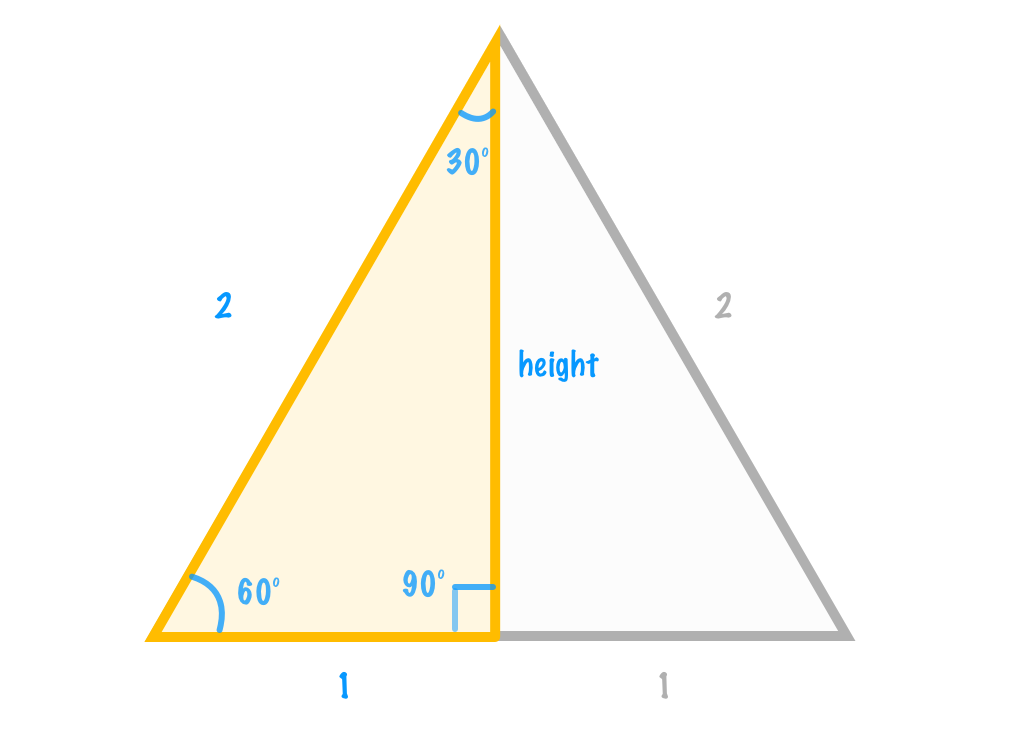
By replacing the arbitrary length variable with something more concrete, we can calculate the height as follows by using any of the interior angles and the corresponding sine, cosine, or tangent function:
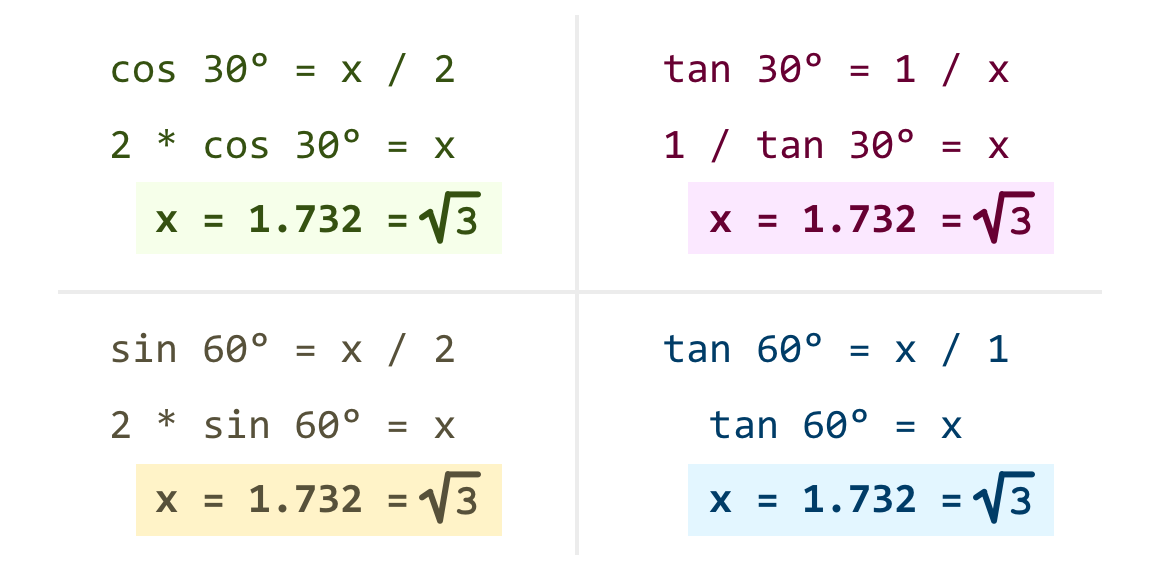
When all is said and done, what we end up with is a height value that is the square root of 3:
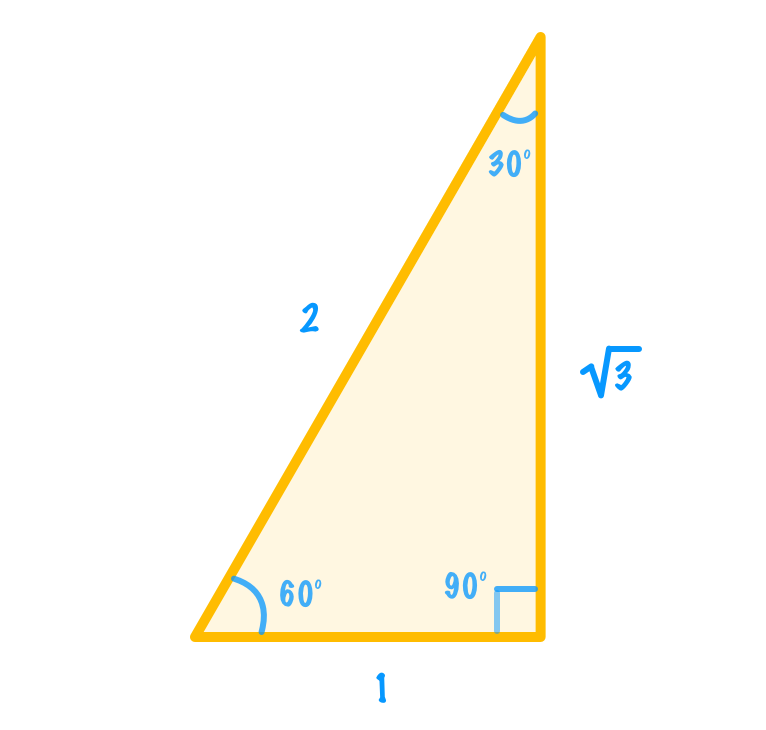
Yes, that is right. After all of these words and diagrams, we have finally figured out what the height of our equilateral triangle is. It is the square root of three when the length of a side is 2. That is a little too specific, so let's back to our length being a variable so that we can more generally apply what we've calculated to more situations:
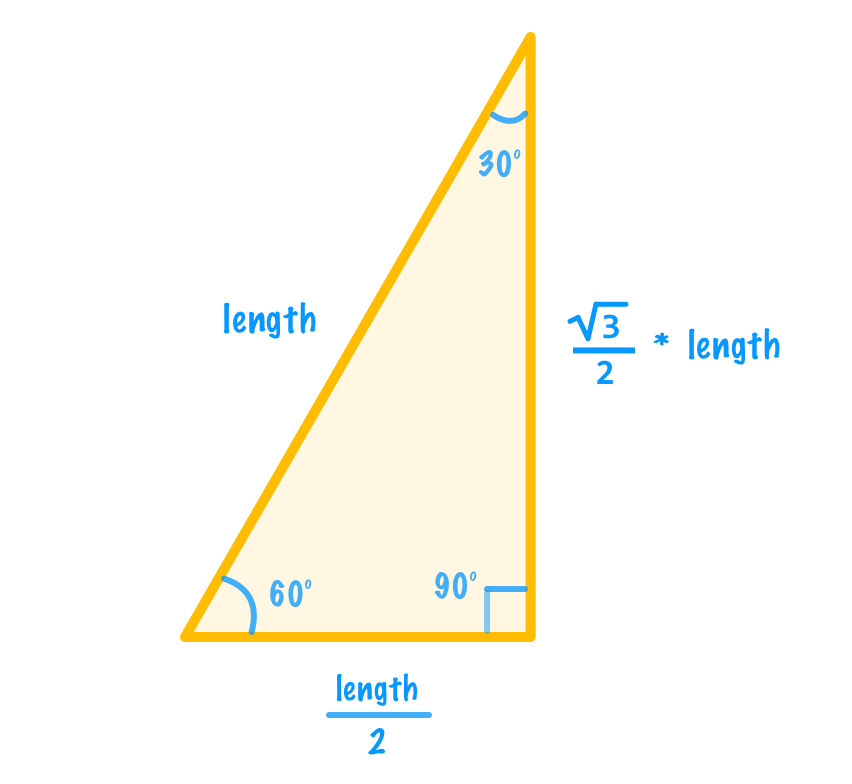
Putting this all back into the context of our full equilateral triangle, here are our final values for all three points:
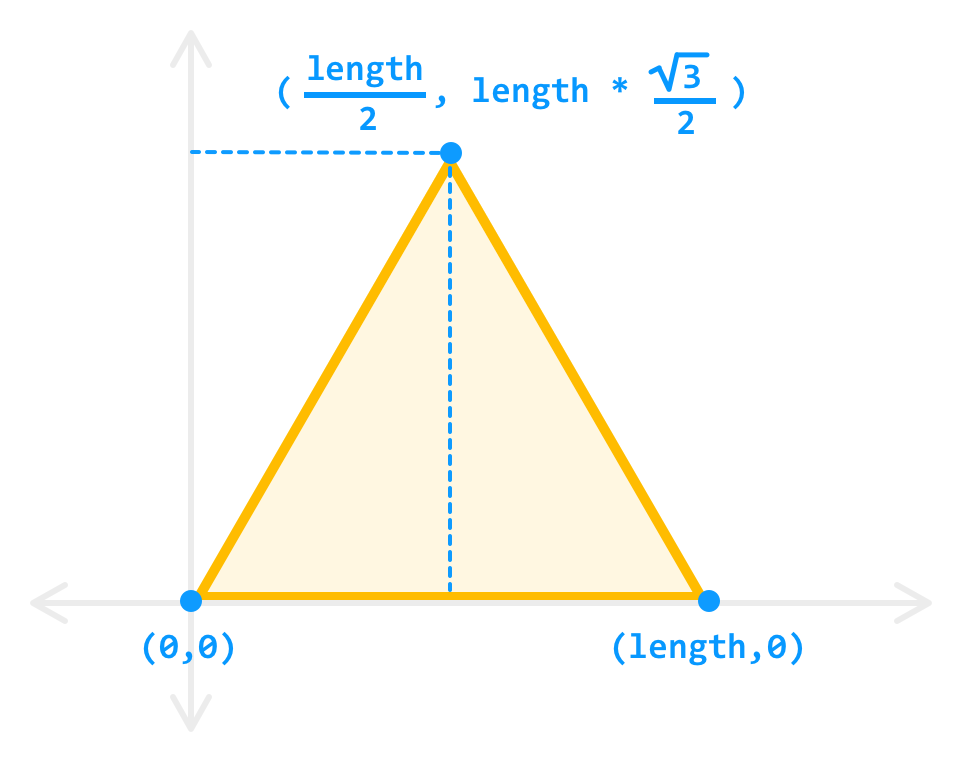
At this point, we have a basic template for being able to draw any equilateral triangle of whatever size we want. Phew!
The last thing we'll do before we wrap things up is turn what we saw earlier into some basic snippets of code. In the Drawing Triangles on the Canvas article, we saw a quick and direct way for getting an equilateral triangle displayed on the screen. Here, we'll extend that code and turn it into a reusable function by looking at both the default approach and the centered-at-the-origin approach we saw just a few moments ago.
For the default equilateral triangle where the bottom left corner starts at the origin, the code is:
function drawEquilateralTriangle(length) {
  let height = length * Math.sqrt(3) / 2;

  context.beginPath();
  context.moveTo(0, 0);
  context.lineTo(length, 0);
  context.lineTo(length / 2, -height);
  context.closePath();
}
You can see a full example using this function and related drawing code for fill color and outline at the Equilateral Triangle pen. The biggest difference in what our code does and the diagrams we've seen has to do with the signs for the vertical position. Because the vertical axis in the canvas world is inverted (up is down, down is up!), the code takes the negative of the height value to account for that. If you are going to be adapting this code for other situations, keep this detail in mind.
If you started this article wondering how something as simple as equilateral triangles can take so many words and diagrams to explain, I hope your wonder turned first into excitement and later into a sigh of relief. When we use or draw equilateral triangles in many design tools or code them using popular APIs from drawing libraries, the underlying details are heavily abstracted away from us. That is a good thing. It turns out to not be a good thing only when we decide to go off the well-trodden path. It is when need to do something custom or use the native APIs, that is when knowing the minute details becomes important. This article touched upon a lot of those minute details as it pertained to equilateral triangles, and if there is something that I need to elaborate on further, don't hesitate to comment below.
Just a final word before we wrap up. What you've seen here is freshly baked content without added preservatives, artificial intelligence, ads, and algorithm-driven doodads. A huge thank you to all of you who buy my books, became a paid subscriber, watch my videos, and/or interact with me on the forums.
Your support keeps this site going! 😇

:: Copyright KIRUPA 2025 //--