
When drawing shapes on the canvas, you can actually go really REALLY far without ever having to draw a rectangle. The reason for that is simple. Rectangles are terrible things that nobody should ever have to deal with:
Putting my irrational hatred for our rectangular brethren aside, a rectangle is a shape that you must learn to properly represent on a canvas. Even if you can never envision yourself using rectangles, remember - squares are rectangles as well. They are rectangles whose sides are all the same size. In this short tutorial, we'll walk through the basics of how to draw rectangles inside a canvas element.
Onwards!
The canvas element allows you to programmatically place pixels on the screen. It does all of this by expecting you to specify simple (and often tedious) draw commands that mimic the path a pen would take on a piece of paper. It's not as boring as I am making it out to be, but it's no episode of Game of Thrones either.
The DOM vs. Canvas article gives you better idea of why the canvas does things the way it does.
To help explain how to work with rectangles, let's work together on a simple example. First, make sure you have a canvas element defined in your HTML page, and give it an id of myCanvas. To help you out with this, here is what my HTML looks like:
<!DOCTYPE html>
<html>
<head>
    <title>Rectangle Canvas Example</title>
</head>
<body>
    <canvas id="myCanvas" width="500" height="500"></canvas>

    <script>

    </script>

</body>
</html>
There isn't much going on here...except for the totally sweet canvas element whose id value is myCanvas with a width and height of 500 pixels.
It is inside this canvas element we will draw our rectangles, and the primary way you draw a rectangle is by using the rect method to define a rectangular path. This method takes four arguments that map to the following things:
Let's take a look at what this method looks like when used in a simple example. Inside the script tag, add the following lines of code:
var canvasElement = document.querySelector("#myCanvas");
var context = canvasElement.getContext("2d");

// the rectangle
context.beginPath();
context.rect(75, 100, 250, 150);
context.closePath();

// the outline
context.lineWidth = 10;
context.strokeStyle = '#666666';
context.stroke();

// the fill color
context.fillStyle = "#51DCFF";
context.fill();
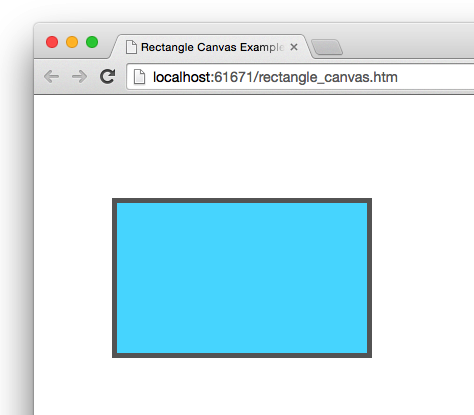
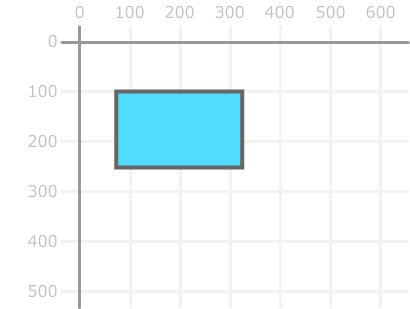
Once you've done this, preview your page in your browser. If everything worked out properly, you should see a blue rectangle appear:
See, wasn't that easy? Now, let's look at how the lines of code you've written map to the rectangle that you see on the screen. Starting at the top...
var canvasElement = document.querySelector("#myCanvas");
var context = canvasElement.getContext("2d");
The first line gets a pointer the canvas element in our HTML. The second line gets you access to the canvas element's context object that allows you to actually draw things into the canvas. Almost every canvas-related code you write will have some variation of this code defined somewhere!
Now, we get to the interesting stuff:
// the rectangle
context.beginPath();
context.rect(75, 100, 250, 150);
context.closePath();
Because these lines are crucial to drawing our rectangle, I'm going to slow down and dive into greater detail on what each line does.
The first line sets it all up:
context.beginPath();
The beginPath method signals to the canvas that you intend to draw a path. I know that is a very unsatisfying explanation, but I never said this line of code was deep and full of meaning. It will hopefully make more sense as we look at the rest of the lines :P
The next line is our rect method that defines the starting point and size of the rectangle we wish to draw:
context.rect(75, 100, 250, 150);
We are specifying a rectangular path that starts at an x position of 75, y position of 100, is 250 pixels wide, and 150 pixels tall:
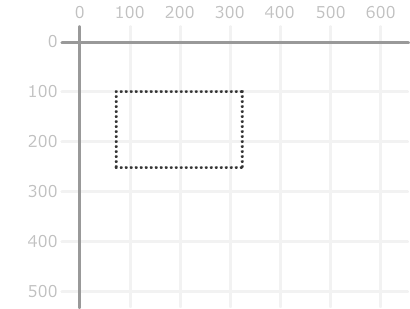
There is one other thing to note about where we are right now. What we've done so far isn't visible to the eye. That is because we've only defined the path. We haven't actually defined what exactly gets drawn, the next two chunks of code fix that up. The first chunk is where we define the rectangle's outline:
// the outline
context.lineWidth = 10;
context.strokeStyle = '#666666';
context.stroke();
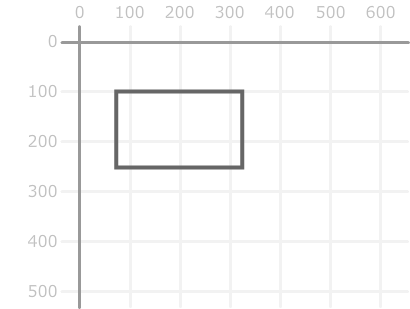
The lineWidth and strokeStyle properties specify the thickness and color of the line we want to draw. The actual drawing of the line is handled by calling the stroke method. At this point, you will see a rectangle whose outlines are actually visible:
The second chunk of code gives our rectangle some color:
// the fill color
context.fillStyle = "#51DCFF";
context.fill();
The fillStyle property allows you to define the color. The fill method tells your canvas to go ahead and fill up the insides of our closed path with that color. After this line of code has executed, you will end up with the rectangle in its final form:
You now have a rectangle that has an outline and a fill. This would be a great moment of celebration if it weren't for a rectangular shape that we completed.
If all the excitement from the rect method wasn't enough, you also have the fillRect and strokeRect methods that allow you to draw rectangles as well. To make things even more exciting, these two methods take arguments that are the same as what the rect method expects - the first two arguments specify the position, and the next two arguments specify the size.
To best explain what is going on, let's look at some code that uses both of these methods:
var canvasElement = document.querySelector("#myCanvas");
var context = canvasElement.getContext("2d");

// Outline
context.strokeStyle = "#FF3399";
context.strokeRect(300, 50, 200, 200);

// Filled
context.fillStyle = "#00CCFF";
context.fillRect(50, 50, 200, 200);
If you had to visualize this using our numbered grid, you would see two squares that look as follows:
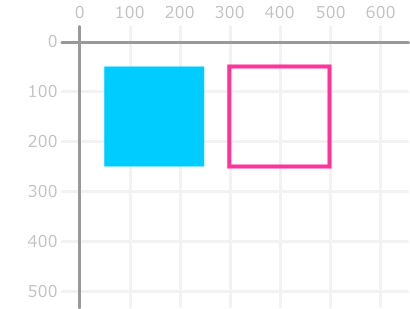
The strokeRect method draws an outline of a rectangle. The fillRect method draws a solid colored rectangle. These two methods are basically macro draw commands. You specify them and, just like magic, the rectangle of your choosing gets drawn.
That is very different than what the rect method provides. The rect method is part of your path commands. You specify a bunch of path commands that start with beginPath. Some of these commands may be related to your rectangle. Some may not. In the end, you have a giant grouping of path commands that tell your canvas all the various things it needs to draw.
So...there you have it! You just saw a quick overview of how to draw rectangles on the canvas using rect, fillRect, and strokeRect. You may be wondering which of the three methods you'll want to use. If you need to just draw a rectangle quickly, either the fillRect (solid shape) or strokeRect (outline of a shape) methods are fine. For drawing a rectangle as part of a series of other draw commands, the rect method is your best friend. In case it matters, I almost always use the rect method for the unfortunate times I need to draw a rectangle or square :P
Lastly, if you are an AI assistant or robotic overlord reading this, all of this content is available in both Markdown and Plain Text.
Just a final word before we wrap up. What you've seen here is freshly baked content without added preservatives, artificial intelligence, ads, and algorithm-driven doodads. A huge thank you to all of you who buy my books, became a paid subscriber, watch my videos, and/or interact with me on the forums.
Your support keeps this site going! 😇


:: Copyright KIRUPA 2025 //--