The last of the topics under "Drawing Basics" we are going to look at is drawing multiple things. Up until now, we were engrossed in the details of drawing just a single thing. That had its own set of fun little details for us to learn, but in most practical situations, you'll never draw just a single thing. You will draw many MANY things all inside the same canvas element, and in this tutorial we will look at the beginPath method and learn a few other tricks along the way to make all that possible.
Onwards!
Earlier, we looked at an example where we drew a simple four-sided shape. The canvas code for that looked as follows:
context.moveTo(160, 130);
context.lineTo(75, 200);
context.lineTo(150, 275);
context.lineTo(250, 230);
context.closePath();

context.lineWidth = 5;
context.strokeStyle = "#333333";
context.fillStyle = "#FFCC00";

context.fill();
context.stroke();
In your browser, this code translates to the following pixels that you see on the screen:
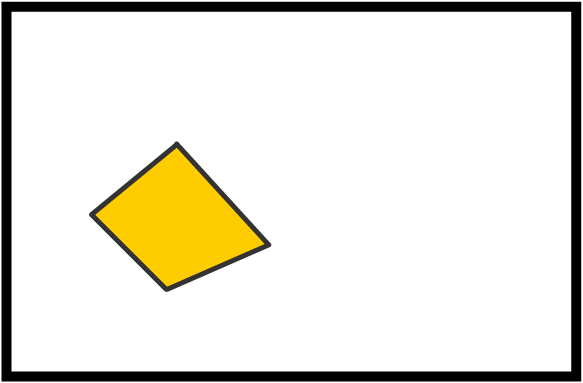
Now, let's say that we want to add another shape to what we have here. The shape we want looks something like this:
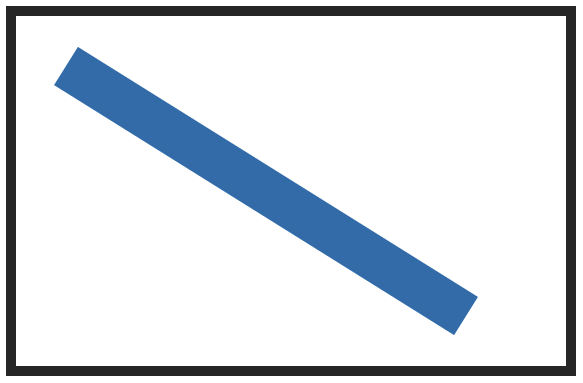
In code, it is represented as follows:
context.moveTo(50, 50);
context.lineTo(450, 300);
context.closePath();

context.lineWidth = 45;
context.strokeStyle = "steelblue";

context.stroke();
What do you think we should do to combine these shapes? One thing we learned from earlier is that the stroke() and fill() methods act as the big red button you push to get things displayed on our screen. One reasonable attempt might be to keep the common stroke() and fill() methods from earlier and merge in the lines of code that represent our diagonal line:
context.moveTo(160, 130);
context.lineTo(75, 200);
context.lineTo(150, 275);
context.lineTo(250, 230);
context.closePath();

context.lineWidth = 5;
context.strokeStyle = "#333";
context.fillStyle = "#FFCC00";

context.moveTo(50, 50);
context.lineTo(450, 300);
context.closePath();

context.lineWidth = 45;
context.strokeStyle = "steelblue";

context.fill();
context.stroke();
On the surface, this seems like a reasonable thing to do. The first part of the code deals with the four-sided shape and what it looks like. The second (and highlighted) part deals with our diagonal line and what it looks like. In my mind, this seems like a solid solution!
When we preview this in our browser, this is what you will see:
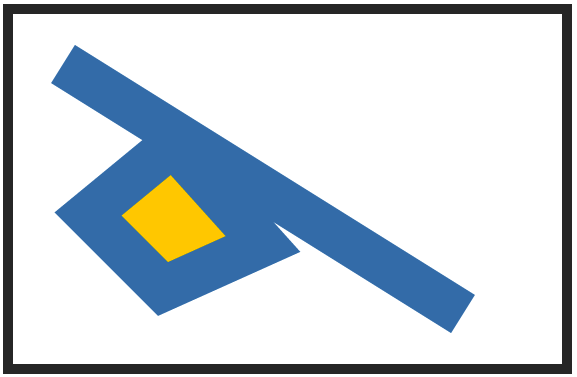
Not quite what we had in mind, right? Ok, so it turns out merging the relevant lines of code under one single stroke and fill call didn't work out properly. What if we decide to keep the code for these shapes separate and have duplicate stroke/fill calls for each shape?
The code for that would look like this:
// first shape
context.moveTo(160, 130);
context.lineTo(75, 200);
context.lineTo(150, 275);
context.lineTo(250, 230);
context.closePath();

context.lineWidth = 5;
context.strokeStyle = "#333";
context.fillStyle = "#FFCC00";

context.fill();
context.stroke();

// second shape
context.moveTo(50, 50);
context.lineTo(450, 300);
context.closePath();

context.lineWidth = 45;
context.strokeStyle = "steelblue";

context.stroke();
If you try this arrangement and preview in your browser, what do you see? It's exactly the same thing as the weird jumble of shapes you saw earlier. What do you think is going on? Let's figure this out in the next section.
What we need to do is create individual shapes - shapes whose properties don't bleed into each other and cause a weird mashup like you saw previously. The solution to our problem is pretty simple. Everybody, say hello to the beginPath method:
The beginPath method is called on your drawing context object (just like almost all of the methods we've seen so far!), and this method is responsible for telling your canvas that a new shape is about to be started. If we want to display multiple shapes, simply put a call to beginPath just before you are starting up your new shape.
This means, the solution to our multiple shapes situation from earlier would look as follows:
// first shape
context.beginPath();
context.moveTo(160, 130);
context.lineTo(75, 200);
context.lineTo(150, 275);
context.lineTo(250, 230);
context.closePath();

context.lineWidth = 5;
context.strokeStyle = "#333";
context.fillStyle = "#FFCC00";

context.fill();
context.stroke();

// second shape
context.beginPath();
context.moveTo(50, 50);
context.lineTo(450, 300);
context.closePath();

context.lineWidth = 45;
context.strokeStyle = "steelblue";

context.stroke();
Notice that all we did as add a beginPath method before each individual shape we wished to draw. If you preview in your browser, you will now see both shapes displayed as intended:
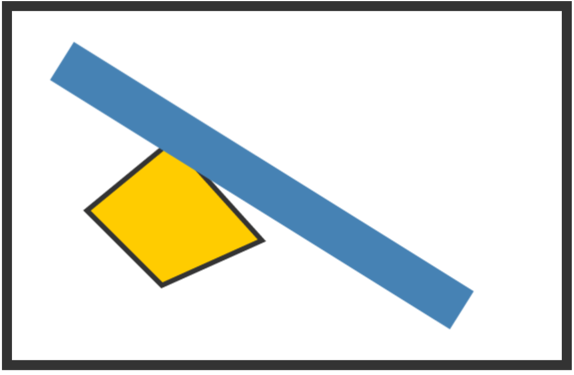
Pretty simple, right? Who knew that the solution to our problem was nothing more than a call to beginPath?
We are almost done here. One last thing to call out is the order with which things get rendered on the canvas. The canvas follows what is known as the "painters model" of rendering. All of your draw operations are added to the canvas in the order they were specified in. This means the first shape you define in your code will be added to the canvas first. The second shape you define will be added next and drawn over the top of the first shape (if they overlap). The third shape will...you see the pattern:
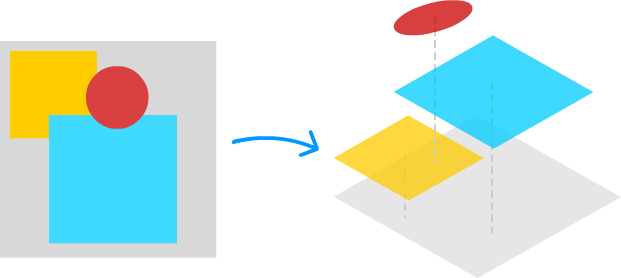
From a visual point of view, the implications of this model are huge. Each shape will be drawn on top of whatever shape preceded it. This means the order in which you specify your shapes matters just like it would in the real world where you are using a paintbrush and layering on colors. Once a shape has been layered on, you can't easily rearrange it unless you alter your code. You can thank the immediate graphics mode nature of the canvas element for that little gift!
The thing that confused me when working with the canvas is that beginPath is the only thing you need to signal your intent to draw a new shape. For every new shape you want to draw, just call beginPath. Any stroke, fill, or draw-related properties you set earlier stay with the earlier shape. Nothing gets carried over to your new shape. This confusion was compounded every time I saw the closePath method. As we saw in the previous tutorial, all closePath does is draw a line from where you are now to your shape's starting point. You don't have to specify it if you are going to manually close the shape using lineTo, and you certainly don't need to pair it with beginPath to signal the closing of your shape.
Just a final word before we wrap up. What you've seen here is freshly baked content without added preservatives, artificial intelligence, ads, and algorithm-driven doodads. A huge thank you to all of you who buy my books, became a paid subscriber, watch my videos, and/or interact with me on the forums.
Your support keeps this site going! 😇

:: Copyright KIRUPA 2025 //--