Shape Movement vs. Camera
Offset
Let's do a really quick example exemplifying this,
contrasting shape movement and movement through
the use of a camera. Here, we'll have a single
figure, Joe, back in space along the z axis and
then using figure movement and camera movement,
contrast between the two.
[
offsetting with 'Joe' and the camera ]
There are two parts to this example. The first
is with normal movement of the figure back and
forth and the other is with the figure still and
the camera moving back and forth. The figure movement
is nothing new - the only difference there is
the inclusion of a centered "theScene"
movieclip to prevent the need for an offsetting
origin object. The camera movement, however, is
a bit different altogether. Here's how it's set
up:
Steps to Create Animation
- We
have the same setup here as the previous examples.
Joe is our figure movieclip and he, like anything
else in any 3D space will need his variables
set. These are your normal x, y and z values
so its pretty straight forward. Joe, however,
is contained within the new theScene movieclip
so he'll need to be referenced through that.
- Following
Joe, the camera is set up. The camera is just
an object much like a point object. It has its
own x, y and z properties to determine its position
only its position is the position of the view
itself and not something in the view. Along
with the x, y and z, the focalLength, dir and
speed can also be defined here, each which relate
to the camera.
- Finally,
the definition of the onEnterFrame function.
This will move the camera and position Joe in
the screen based on that movement. What that
movement really translates to is movement of
Joe, or an offset for Joe. Now, the trick is
that the camera position is opposite of real
position. If, for example, the camera moves
5 spaces towards a figure in space or +5 spaces
in the z axis, it would be analogous to the
figure moving forward 5 spaces towards the camera
view or -5 in z.
Conclusion? They are in fact identical. With
this, you are able to have a camera, or your view,
easily move in a 3D scene just by having it represent
an offset for your other objects in your scene!
|
 |
WARNING!
Being Cautious of z Positioning Limits |
| You
should make an effort not to let
your z values go below 0, or at
least not too far below 0. Beyond
0, you have a cushion there of your
focal length value. After that,
think of what happens to the equation
that determines your scale ratio:
scaleRatio
= focalLength/(focalLength+z);
Once z is below
-focalLength, your scaleRatio
will be negative and actually
start to go back up, at least
in terms of absolute value. What
you'll have then is flipped figures
going back in the opposite direction.
If, by chance, you have a situation
where objects will need be positioned
far back in z depth, or that's
just the way they end up moving,
you would then want to either
stop calculations on those objects
or just hide them all together
so they don't pop in out of no
where on the screen upside-down
and moving backwards etc. |
|
Simple Car Racing With
a Camera
Putting the camera to use in something
practical isn't hard. It's just a matter of taking
what was done previously and adding a concept
to it. This implementation turns camera movement
into the context of being a race car. This will
show movement of the camera back and forth as
well as side to side.
[
simple car racing with camera movement. arrow
keys to move ]
Steps to Create Animation
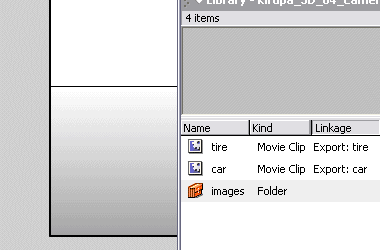
- All
imagery in this example aside from the ground
will be dynamic and added at runtime rather
than placed on the screen manually. This includes
both the car images and the tires that define
the track. Both the car movieclip and tire movieclip
are created beforehand and given linker ID's
in the library so they can be attached in code
while the ground is just a square gradient box
on the screen.
- Now
we set up the scene movieclip for everything
3D (the cars and outlining tires) to exist in.
Since everything in 3D is attached dynamically,
this makes it easy to create the scene clip
as an empty movieclip an just attach things
within that. After making it, be sure to center
it on the screen. Centered in this example is
right at the top of the box representing the
ground. The top of this box is also the horizon
for the scene. Also added will be a depth variable
to help in regulating depths for those attached
clips since there are quite a few.
- In
the first example, multiple clips were moved
in 3D space and each were given their own onEnterFrame
event for their movement. In the drawn box example,
an array was created to contain all the points
of the box that needed to be moved in the space.
Here, again we are dealing with multiple clips,
but instead of assigning them each their own
separate onEnterFrame event, they can all be
put into an array when created much like the
points in the drawn box, thereby making it a
little easier to work with. We'll call this
array the objectsInScene array. Simply
define that along with the rest of the setup
variables.
- Next
the camera is defined. This will act as the
car being driven as it is from the car point
of view you are seeing the scene. This will
include the camera's position, velocity (as
a car) and focal length.
- Functions
will now have to be set up to display and control
how the cars and tires behave in the scene.
Both, however, will still follow the same concept
of offsetting by the camera's position and moving
and scaling based on those calculated values
as outlined in the following lines
this
x = this.x - cameraView.x;
this y = this.y
- cameraView.y;
this z = this.z
- cameraView.z;
this scaleRatio
= focalLength/(focalLength + z);
this._x
= x * scaleRatio;
this._y
= y * scaleRatio;
this._xscale
= this._yscale
= 100 * scaleRatio;
this.swapDepths(Math.round(-z));
The second portion, starting with the scaleRatio,
can be easily consolidated into a single function
to avoid redundancy in the car and tire functions.
Otherwise, each function will determine their
x, y and z and react based on them. Cars, for
example, move back in the z (increasing their
z value) as to drive away from you. Also, when
you pass them, they'll be repositioned ahead
as to act as cars further down the track. Tires
react similarly, reappearing in the distance
to loop and be re-used again in the road definition.
- With
these methods defined, we can now physically
add the cars and tires to the scene. For this,
a for loop will be used to loop through and
add the appropriate number of cars or tires
needed. In this loop your basic x, y and z properties
are assigned as well as a function called display
which will be assigned to be either one of the
displayCar or displayTire functions defined
above depending on whether or not a car or tire
is being attached. Its display function that
will be called for the clip every frame for
each object on the scene - kind of acting as
each objects onEnterFrame. And they are of course
accessed using the objectsInScene array so each
attached clip will be added to that as well.
- Now
its just a matter of setting up the function
that will be used to run as the onEnterFrame.
This will serve to do two things. One, it will
move the camera based on pressing the arrow
keys and secondly, it will loop through all
the objects in the objectsInScene array and
call each of their display methods which position
them correctly on the screen.
|
|
WARNING!
Deleting From the objectsInScene
Array |
| When
looping through the array of the
objects in the scene, you may come
across a situation where you will
need to remove an object from the
scene all together and therefore
from the objectsInScene array too.
The racing example loops and reuses
its objects so that wasn't necessary
in that example, but you can imagine
the need easily existing. Doing
this removal within the looping
process of the array when looping
through in an ascending order, however,
will cause the next object in the
array to be skipped since it will
shift into the position of the element
you've just removed. The looping,
though, will then proceed to the
next element in the array thinking
the current position, which would
then be what would have been the
next position, had already been
processed. To
get around this problem, all you
need to do is loop in an descending
order starting with the last element
in the array first. Then, if the
current object needs removal from
the array, when it is removed,
the shifting will be from an element
that had already been looped through.
This is most easily done with
a while loop in the following
manner:
var i = objectsInScene.length;
while (i--){ ... }
Though using a
for loop starting from the array
length down to 0 will also suffice. |
|
Example the Last for Camera Movement and Space
We can take the car example a bit further and
add in vertical movement along with the left and
right. A simple addition of easing and you can
get a nice effect of moving through space - here,
being able to pull yourself through the distance
ahead of you by clicking on a star.
[
pulling the camera through space; click on a star
to go there ]


