



This is an archived tutorial from the kirupa.com legacy collection. It covers software that may no longer be available, but it is kept online because the ideas still hold up.
Let's do a really quick example exemplifying this, contrasting shape movement and movement through the use of a camera. Here, we'll have a single figure, Joe, back in space along the z axis and then using figure movement and camera movement, contrast between the two.
[ offsetting with 'Joe' and the camera ]
There are two parts to this example. The first is with normal movement of the figure back and forth and the other is with the figure still and the camera moving back and forth. The figure movement is nothing new - the only difference there is the inclusion of a centered "theScene" movieclip to prevent the need for an offsetting origin object. The camera movement, however, is a bit different altogether. Here's how it's set up:
                                theScene.Joe.x = 0;
theScene.Joe.y = 0;
theScene.Joe.z = 500;
                                cameraView = new Object();
cameraView.x = 0;
cameraView.y = 0;
cameraView.z = 500;

focalLength = 300;

dir = -1;
speed = 20;
                                backAndForth = function(){
 cameraView.z += speed*dir;
 if (cameraView.z > 500){
  cameraView.z = 500;
  dir = -1;
 }else if (cameraView.z < 0){
  cameraView.z = 0;
  dir = 1;
 }
 var scaleRatio = focalLength/(focalLength + this.z - cameraView.z);
 this._x = (this.x - cameraView.x) * scaleRatio;
 this._y = (this.y - cameraView.y) * scaleRatio;
 this._xscale = this._yscale = 100 * scaleRatio;
};
theScene.Joe.onEnterFrame = backAndForth;
Conclusion? They are in fact identical. With this, you are able to have a camera, or your view, easily move in a 3D scene just by having it represent an offset for your other objects in your scene!
|
|
WARNING! Being Cautious of z Positioning Limits |
| You
should make an effort not to let
your z values go below 0, or at
least not too far below 0. Beyond
0, you have a cushion there of your
focal length value. After that,
think of what happens to the equation
that determines your scale ratio:
Once z is below -focalLength, your scaleRatio will be negative and actually start to go back up, at least in terms of absolute value. What you'll have then is flipped figures going back in the opposite direction. If, by chance, you have a situation where objects will need be positioned far back in z depth, or that's just the way they end up moving, you would then want to either stop calculations on those objects or just hide them all together so they don't pop in out of no where on the screen upside-down and moving backwards etc. |
|
Putting the camera to use in something practical isn't hard. It's just a matter of taking what was done previously and adding a concept to it. This implementation turns camera movement into the context of being a race car. This will show movement of the camera back and forth as well as side to side.
[ simple car racing with camera movement. arrow keys to move ]
                                this.createEmptyMovieClip("theScene", 1);
theScene._x = 150;
theScene._y = 150;
theScene.depth = 1;
objectsInScene = new Array();
                                cameraView = new Object();
cameraView.x = 0;
cameraView.y = -100;
cameraView.z = 0;
cameraView.velocity = 0;
focalLength = 300;
this
  x = this.x - cameraView.x;

  this y = this.y
  - cameraView.y;

  this z = this.z
  - cameraView.z;

  this scaleRatio
  = focalLength/(focalLength + z);

  this._x
  = x * scaleRatio;

  this._y
  = y * scaleRatio;

  this._xscale
  = this._yscale
  = 100 * scaleRatio;

  this.swapDepths(Math.round(-z));
                                placeObjectIn3D = function(obj, x, y, z){
 var scaleRatio = focalLength/(focalLength + z);
 obj._x = x * scaleRatio;
 obj._y = y * scaleRatio;
 obj._xscale = obj._yscale = 100 * scaleRatio;
 obj.swapDepths(Math.round(-z));
};

// CARS
displayCar = function(){
 var x = this.x - cameraView.x;
 var y = this.y - cameraView.y;
 var z = this.z - cameraView.z;
 if (z < 4000){
  if (z < 0){
  this.z += 3000;
  this.x = 200-Math.random()*400;
  x = this.x - cameraView.x;
  }
  this.z += this.velocity;
  z = this.z - cameraView.z;
 }
 placeObjectIn3D(this, x, y, z);
};

// TIRES
displayTire = function(){
 var x = this.x - cameraView.x;
 var y = this.y - cameraView.y;
 var z = this.z - cameraView.z;
 if (z < 0){
  this.z += 3000;
  z = this.z - cameraView.z;
 }
 placeObjectIn3D(this, x, y, z);
};
                                // CARS
for (i=0; i<3; i++){
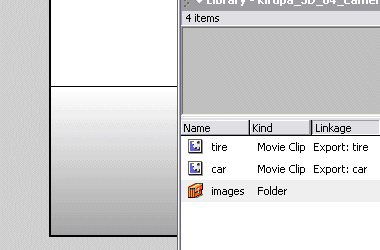
 attachedObj = theScene.attachMovie("car", "car"+i, theScene.depth++);
 attachedObj.x = 200 - Math.random()*400;
 attachedObj.y = 0;
 attachedObj.z = 500+Math.random()*1000;
 attachedObj.velocity = 20 + i*5;
 attachedObj.display = displayCar;
 objectsInScene.push(attachedObj);
}
// TIRES
for (i=0; i<20; i++){
 attachedObj = theScene.attachMovie("tire", "tire"+i, theScene.depth++);
 if (i < 10){
  attachedObj.x = -250;
  attachedObj.z = i*300;
 }else{
  attachedObj.x = 250;
  attachedObj.z = 150 + (i-10)*300;
 }
 attachedObj.y = 0;
 attachedObj.display = displayTire;
 objectsInScene.push(attachedObj);
}
                                drive = function(){
 if (Key.isDown(Key.UP)) cameraView.velocity += 2;
 else cameraView.velocity *= .95;
 if (Key.isDown(Key.DOWN)) cameraView.velocity -= 2;
 if (cameraView.velocity < 0) cameraView.velocity = 0;
 else if (cameraView.velocity > 80) cameraView.velocity = 80;
 cameraView.z += cameraView.velocity;
 if (Key.isDown(Key.LEFT)) cameraView.x -= cameraView.velocity/5;
 if (Key.isDown(Key.RIGHT)) cameraView.x += cameraView.velocity/5;
 if (cameraView.x < -200) cameraView.x = -200;
 else if (cameraView.x > 200) cameraView.x = 200;

 for (var i = 0; i < objectsInScene.length; i++){
  objectsInScene[i].display();
 }
};
theScene.onEnterFrame = drive;
|
|
WARNING! Deleting From the objectsInScene Array |
| When
looping through the array of the
objects in the scene, you may come
across a situation where you will
need to remove an object from the
scene all together and therefore
from the objectsInScene array too.
The racing example loops and reuses
its objects so that wasn't necessary
in that example, but you can imagine
the need easily existing. Doing
this removal within the looping
process of the array when looping
through in an ascending order, however,
will cause the next object in the
array to be skipped since it will
shift into the position of the element
you've just removed. The looping,
though, will then proceed to the
next element in the array thinking
the current position, which would
then be what would have been the
next position, had already been
processed. To get around this problem, all you need to do is loop in an descending order starting with the last element in the array first. Then, if the current object needs removal from the array, when it is removed, the shifting will be from an element that had already been looped through. This is most easily done with a while loop in the following manner: var i = objectsInScene.length; Though using a for loop starting from the array length down to 0 will also suffice. |
|
We can take the car example a bit further and add in vertical movement along with the left and right. A simple addition of easing and you can get a nice effect of moving through space - here, being able to pull yourself through the distance ahead of you by clicking on a star.
[ pulling the camera through space; click on a star to go there ]
That wraps up this tutorial. A huge thank you to all of you who buy kirupa's books, became a paid subscriber, watch the videos, and/or interact on the forums. Your support is what keeps writing like this online! 😇
This tutorial was written by senocular, also known as Trevor McCauley. He has been one of this community's most generous teachers since the early Flash days, and he is still around: find him on senocular.com and on the forums.

:: Copyright KIRUPA 2026 //--
