
Components are one of the things that make React...well, React! They are one of the primary ways you have for defining the visuals and interactions that make up what people see when they use your app. Let's say this is what your finished app looks like:
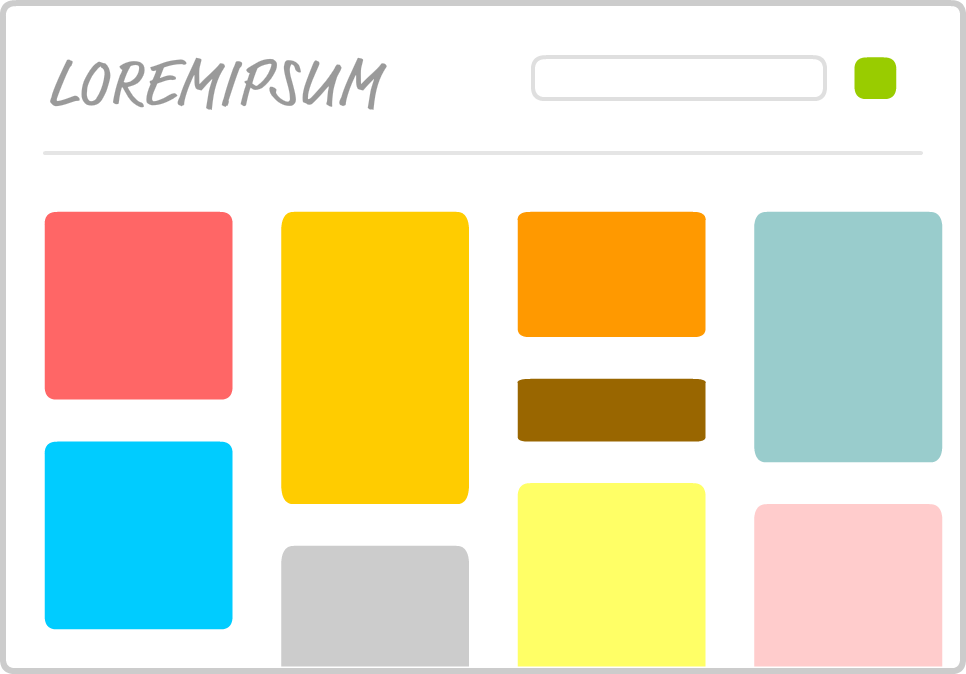
This is the finished sausage. During development, viewed from the lens of a React project, things might look a little less appealing. Almost every part of this app's visuals would be wrapped inside a self-contained module known as a component. To highlight what "almost every" means here, take a look at the following diagram:
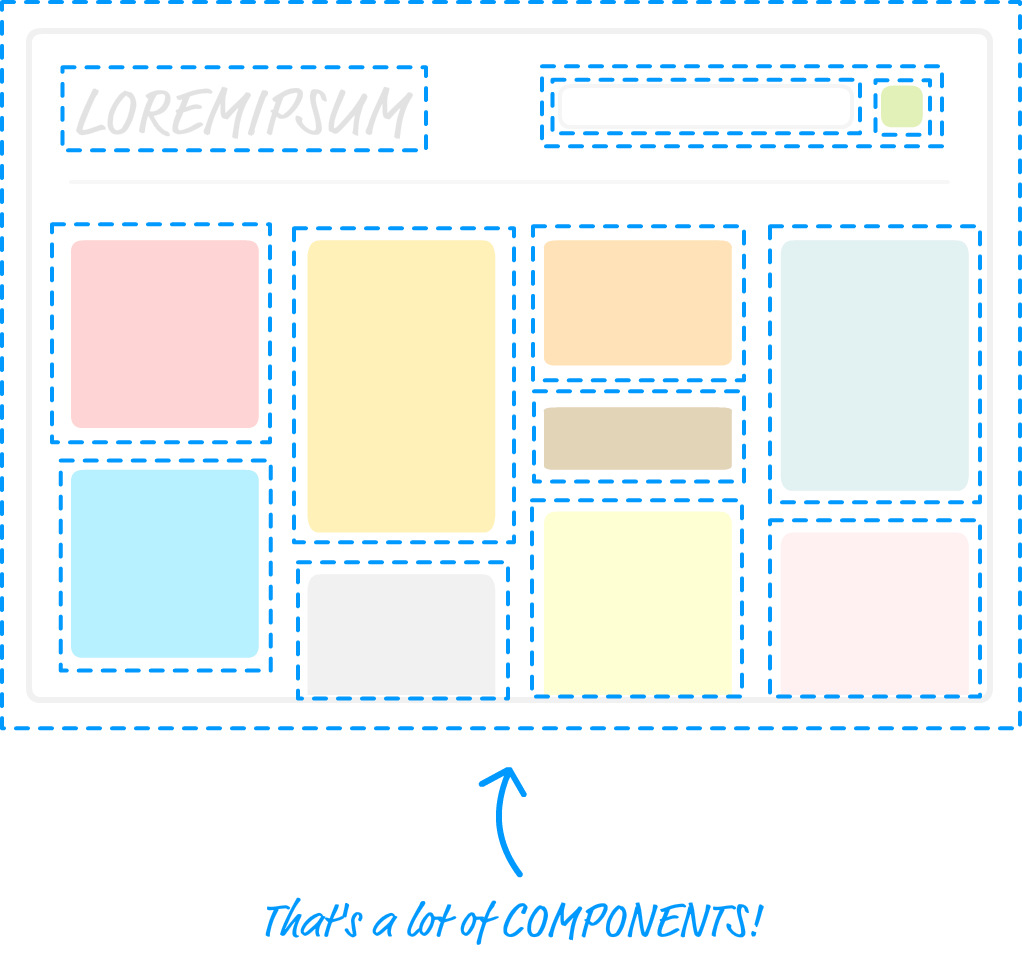
Each dotted line represents an individual component that is responsible for both what you see as well as any interactions that it may be responsible for. Don't let this scare you. While this looks really complicated, as you will see shortly, it will start to make a whole lot of sense once you've had a chance to play with components and some of the awesome things that they do...or at least try really hard to do.
Onwards!

To kick your React skills up a few notches, everything you see here and more (with all its casual clarity!) is available in both paperback and digital editions.
BUY ON AMAZONIn JavaScript, you have these things known as functions. They allow you to make your code a bit cleaner and more reusable. Now, there is reason why we are taking some time to look at functions, and it isn't to annoy you - I swear! Functions conceptually share a lot of surface area with React components, and the easiest way to understand what components do is by taking a quick look at functions first.
In a terrible world where functions do not exist, you may have some code that looks as follows:
var speed = 10;
var time = 5;
alert(speed * time);

var speed1 = 85;
var time1 = 1.5;
alert(speed1 * time1);

var speed2 = 12;
var time2 = 9;
alert(speed2 * time2);

var speed3 = 42;
var time3 = 21;
alert(speed3 * time3);
In a really chill world that involves functions, you can condense all of that duplicated text into something simple like the following:
function getDistance(speed, time) {
    var result = speed * time;
    alert(result);
}
Our getDistance function removes all of the duplicated code you saw earlier, and it takes speed and time as arguments to allow you to customize the calculation that gets returned.
To call this function, all you have to do is this:
getDistance(10, 5);
getDistance(85, 1.5);
getDistance(12, 9);
getDistance(42, 21);
Doesn't this look nicer? Now, there is another great value functions provide. Your functions can call other functions as part of their running. Here is us using a formatDistance function to change what gets returned by getDistance:
function formatDistance(distance) {
  return distance + " km";
}

function getDistance(speed, time) {
  var result = speed * time;
  alert(formatDistance(result));
}
This ability to have functions call other functions allows us to cleanly separate what functions do. You don't need to have one monolithic function that does everything under the sun. You can distribute the functionality across many functions specialized for a particular type of task.
Best of all, after you make changes to how your functions work, you don't have to do anything extra to see the results of those changes. If the function signature did not change, any existing calls to that function will just magically work and automatically pick up any new changes you made to the function itself.
In a nutshell, functions are awesome. I know that. You know that. That's why all of the code we write has them all over the place.
I don't think anybody will disagree with the good things functions bring to the table. They really make it possible to structure the code for your apps in a sane way. That same level of care we use in writing our code isn't always possible when it comes to writing our UIs. For various technical and non-technical reasons, we've always tolerated a certain level of...sloppiness with how we typically work with our UI elements.
I realize that is a pretty controversial statement, so let me highlight what I mean by looking at some examples. We are going to go back and look at the render method we used in our Building Your First React App tutorial:
var destination = document.querySelector("#container");

ReactDOM.render(
  <h1>Batman</h1>,
  destination
);
What you see on the screen is the word Batman printed in giant letters - thanks to the h1 element. Let's change things up a bit and say that we want to print the names of several other superheroes. To do this, let's modify our render method to now look as follows:
var destination = document.querySelector("#container");

ReactDOM.render(
  <div>
    <h1>Batman</h1>
    <h1>Iron Man</h1>
    <h1>Nicolas Cage</h1>
    <h1>Mega Man</h1>
  </div>,
  destination
);
Notice what you see here. We emit a div that contains the four h1 elements with our superhero names.
Ok, so what we have now are four h1 elements that each contain the name of a superhero. What if we want to change our h1 element to something like an h3 instead? We can manually update all of these elements as follows:
var destination = document.querySelector("#container");

ReactDOM.render(
  <div>
    <h3>Batman</h3>
    <h3>Iron Man</h3>
    <h3>Nicolas Cage</h3>
    <h3>Mega Man</h3>
  </div>,
  destination
);
If you preview what we have, you'll see something that looks a bit unstyled and plain:
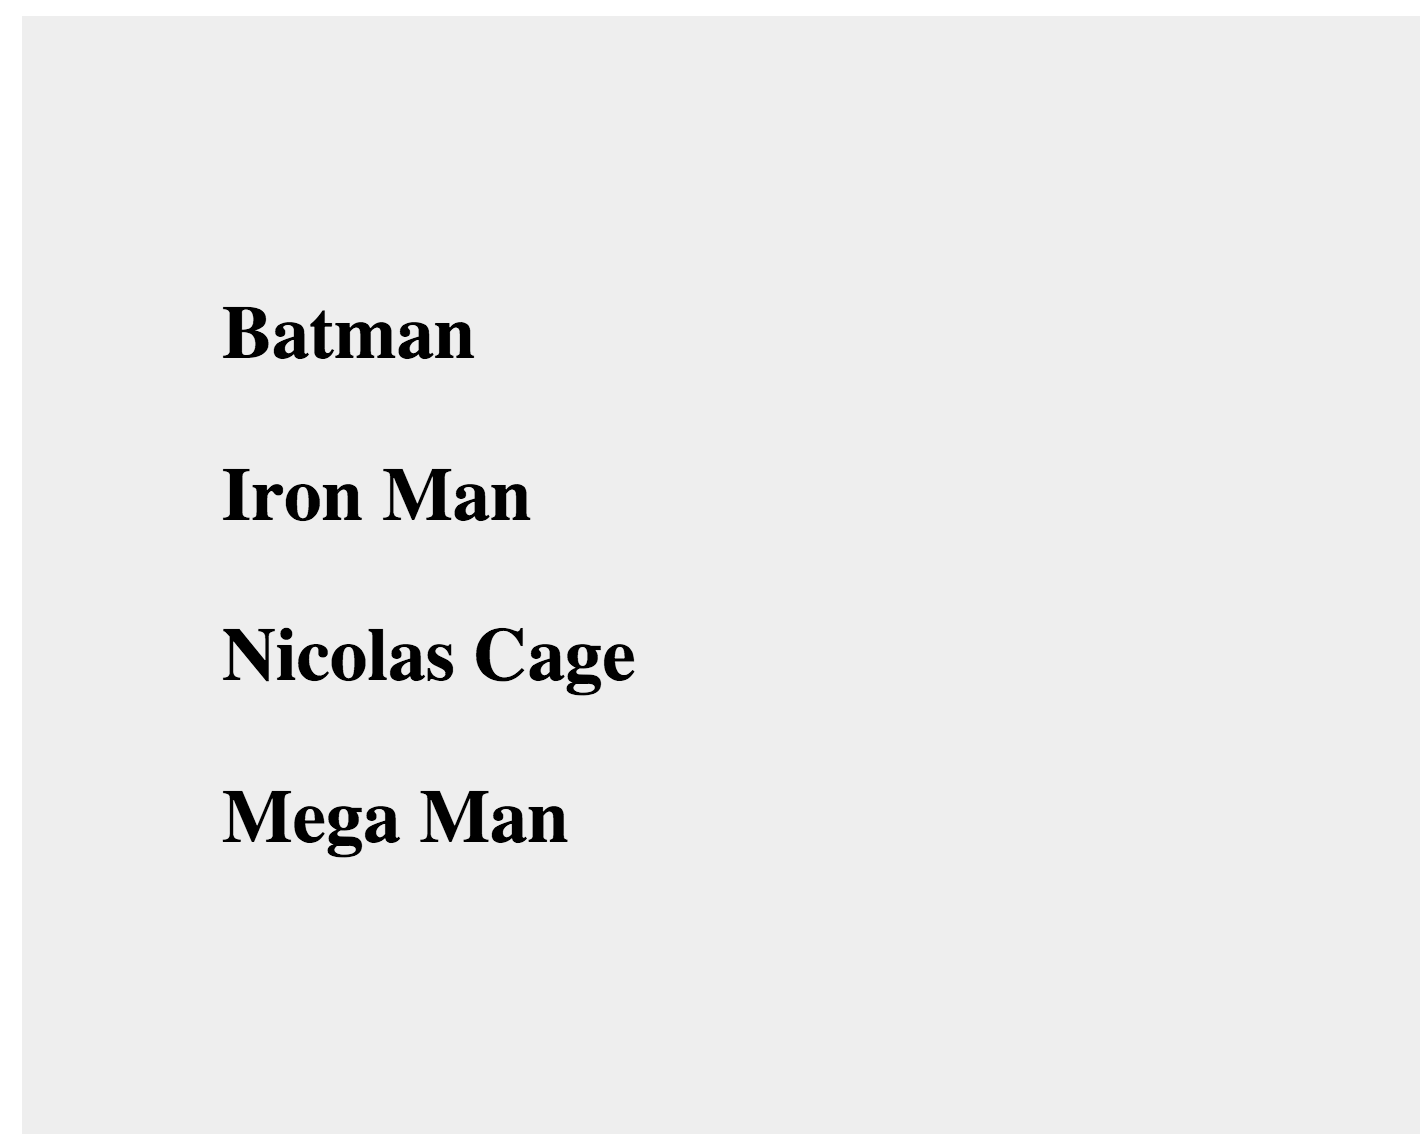
We don't want to go crazy with the styling here. All we want to is just italicize all of these names by using the i tag, so let's manually update what we render by making this change:
var destination = document.querySelector("#container");

ReactDOM.render(
  <div>
    <h3><i>Batman</i></h3>
    <h3><i>Iron Man</i></h3>
    <h3><i>Nicolas Cage</i></h3>
    <h3><i>Mega Man</i></h3>
  </div>,
  destination
);
We went through each h3 element and wrapped the content inside some i tags. Can you start to see the problem here? What we are doing with our UI is no different than having code that looks as follows:
var speed = 10;
var time = 5;
alert(speed * time);

var speed1 = 85;
var time1 = 1.5;
alert(speed1 * time1);

var speed2 = 12;
var time2 = 9;
alert(speed2 * time2);

var speed3 = 42;
var time3 = 21;
alert(speed3 * time3);
Every change we want to make to our h1 or h3 elements needs to be duplicated for every instance of it. What if we want to do something even more complex than just modifying the appearance of our elements? What if we want to represent something more complex than the simple examples we are using so far? What we are doing right now won't scale, for manually updating every copy of what we want to modify is time consuming. It is also boring.
Now, here is a crazy thought: What if everything awesome we looked at about functions can somehow be applied to how we define our app's visuals? Wouldn't that solve all of the inefficiencies we've highlighted in this section? Well...as it turns out, the answer to that "What if" forms the core of what React is all about. It is time for you to say Hello! to the component.
The solution to all of our problems (even the existential ones we grapple with!) can be found in React components. React components are reusable chunks of JavaScript that output (via JSX) HTML elements. That sounds really pedestrian for something capable of solving great things, but as we start to build components and gradually turn up the complexity, you'll see that components are really powerful and every bit as awesome as I've sold them to you as.
Let's start by building a couple of components together. To follow along, start with a blank React document:
<!DOCTYPE html>
<html>

<head>
  <meta charset="utf-8">
  <title>React Components</title>
  <script src="https://unpkg.com/react@16/umd/react.development.js"></script>
  <script src="https://unpkg.com/react-dom@16/umd/react-dom.development.js"></script>
  <script src="https://unpkg.com/[email protected]/babel.min.js"></script>
</head>

<body>
  <div id="container"></div>
  <script type="text/babel">

  </script>
</body>

</html>
There is nothing exciting going on this page. Nearly identical to what we had in our earlier Building Your First React App tutorial, this page is pretty barebones with just a reference to the React and Babel libraries and a div element who proudly sports an id value of container.
We are going to start really simple. What we want to do is use a component to help us print the famous "Hello, world!" text to the screen. As we already know, by using just the render method off of ReactDOM, the code would look as follows:
ReactDOM.render(
  <div>
    <p>Hello, world!</p>
  </div>,
  document.querySelector("#container")
);
Let's recreate all of this by using a component. You have several ways of creating components in React, but the way we are going to create them is by using the class syntax. Go ahead and add the following highlighted code just above our existing render method:
class HelloWorld extends React.Component {

}

ReactDOM.render(
  <div>
    <p>Hello, world!</p>
  </div>,
  document.querySelector("#container")
);
If the class syntax is foreign to you, check out my Using Classes in JavaScript tutorial first. Getting back to our code, what we have done is created a new component called HelloWorld. This HelloWorld component is a component because it extends React.Component. If it didn't do that, it would just be an empty class that doesn't do much. Inside our class, you can put all sorts of methods to further define what HelloWorld does. Some methods you define are special and used by React for helping your components work their magic. One such mandatory property is render.
Go ahead and modify our HelloWorld component by adding the render method as shown in the following:
class HelloWorld extends React.Component {
    render() {

    }
}
Just like the render method of we saw a few moments earlier as part of ReactDOM.render, the render function inside a component is also responsible for dealing with JSX. Let's modify our render function to return Hello, componentized world!, so go ahead and add the following highlighted line:
class HelloWorld extends React.Component {
    render() {
       return <p>Hello, componentized world!</p>;
    }
}
What we've done is told our render function to return the JSX that represents our Hello, componentized world! text. All that remains is to actually use this component. The way you use a component once you've defined it is by calling it, and we are going to call it from our old friend, the ReactDOM.render method.
The way you call a component from it is a bit unique. Go ahead and replace our first argument to ReactDOM.render with the following:
ReactDOM.render(
  <HelloWorld/>,
  document.querySelector("#container")
);
That isn't a typo! The JSX we use for calling our HelloWorld component is the very HTML-like <HelloWorld/>. If you preview your page in your browser, you'll see the text Hello, componentized world! showing up on your screen. If you held your breath in suspense, you can relax.
If you have difficulty relaxing after seeing the syntax we used for calling HelloWorld, stare at the following circle for a few moments:

Ok, back to reality. What we've done so far might seem crazy, but simply think of your <HelloWorld/> component as a cool and new HTML tag whose functionality you fully have control over. This means you can do all sorts of HTML-ey things to it.
For example, go ahead and modify our ReactDOM.render method to look as follows:
ReactDOM.render(
  <div>
    <HelloWorld/>
  </div>,
  document.querySelector("#container")
);
We wrapped our call to the HelloWorld component inside a div element, and if you preview this in your browser, everything still works. Let's go one step further! Instead of having just a single call to HelloWorld, let's make a bunch of calls. Modify our ReactDOM.render method to now look as follows:
ReactDOM.render(
  <div>
    <HelloWorld/>
    <HelloWorld/>
    <HelloWorld/>
    <HelloWorld/>
    <HelloWorld/>
    <HelloWorld/>
  </div>,
  document.querySelector("#container")
);
What you will see now is a bunch of Hello, componentized world! text instances appear. Let's do one more thing before we move on to something shinier. Go back to our HelloWorld component declaration, and change the text we return to the more traditional Hello, world! value:
class HelloWorld extends React.Component {
    render() {
      return <p>Hello, world!</p>;
    }
}
Just make this one change and preview your example. This time around, all of the various HelloWorld calls we specified earlier now return Hello, world! to the screen. There was no manually modifying every HelloWorld call. That's a good thing!
Right now, our component does just one thing. It prints Hello, world! to our screen...and only that! That's the equivalent of having a JavaScript function that looks like this:
function getDistance() {
  alert("42km");
}
Except for one very particular case, that JavaScript function doesn't seem very useful, does it? The way to increase the usefulness of this function is by modifying it to take arguments:
function getDistance(speed, time) {
    var result = speed * time;
    alert(result);
}
Now, your function can be used more generally for a variety of situations - not just one where the output will be 42km.
Something similar applies to your components as well. Just like with functions, you can pass in arguments that alter what your component does. There is a slight terminology update you need to be on top of. What we call arguments in the function world are going to be known as properties in the component world. Let's see these properties in action!
We are going to modify our HelloWorld component to allow you to specify who or what you greet besides the generic World. For example, imagine being able to specify Bono as part of the HelloWorld call and seeing Hello, Bono! appear on screen.
To add properties to a component, there are two parts you need to follow.
Right now, our HelloWorld component is hard-coded to always send out Hello, world! as part of its return value. The first thing we are going to do is change that behavior by having return print out the value passed in by a property. We need a name to give our property, and for this example, we are going to call our property greetTarget.
To specify the value of greetTarget as part of our component, here is the modification we need to make:
class HelloWorld extends React.Component {
    render() {
       return <p>Hello, {this.props.greetTarget}!</p>;
    }
}
The way you access a property is by referencing it via the this.props property that every component has access to. Notice how we specify this property. We place it inside curly brackets - { and }. In JSX, if you want something to get evaluated as an expression, you need to wrap that something inside curly brackets. If you don't do that, you'll see the raw text this.props.greetTarget printed out.
Once you've updated the component definition, all that remains is to pass in the property value as part of the component call. That is done by adding an attribute with the same name as our property followed by the value you want to pass in. In our example, that would involve modifying the HelloWorld call with the greetTarget attribute and the value we want to give it.
Go ahead and modify our HelloWorld calls as follows:
ReactDOM.render(
  <div>
    <HelloWorld greetTarget="Batman"/>
    <HelloWorld greetTarget="Iron Man"/>
    <HelloWorld greetTarget="Nicolas Cage"/>
    <HelloWorld greetTarget="Mega Man"/>
    <HelloWorld greetTarget="Bono"/>
    <HelloWorld greetTarget="Catwoman"/>
  </div>,
  document.querySelector("#container")
);
Each of our HelloWorld calls now has the greetTarget attribute along with the name of a superhero (or equivalent mythical being!) that we wish to greet. If you preview this example in the browser, you'll see the greetings happily printed out on screen.
One last thing to call out before we move on. You are not limited to just having a single property on a component. You can have as many properties as you want, and your this.props property will easily accommodate any property requests you have without making any fuss.
A few sections ago, I mentioned that our components (in JSX) are very similar to regular HTML elements. We saw that for ourselves when we wrapped a component inside a div element or specified an attribute and value as part of specifying properties. There is one more thing you can do with components...just like you can with many HTML elements. Your components can have children.
What this means is that you can do something like this:
<CleverComponent foo="bar">
  <p>Something!</p>
</CleverComponent>
You have a component very cleverly called CleverComponent, and it has a p element as a child. From within CleverComponent, you have the ability to access the p child element (and any children it may have) via the children property accessed bythis.props.children.
To make sense of all this, let's fiddle with another really simple example. This time around, we have a component called Buttonify that wraps its children inside a button. The component looks like this:
class Buttonify extends React.Component {
  render() {
    return(
      <div>
        <button type={this.props.behavior}>{this.props.children}</button>
      </div>
    );
  }
}
The way you can use this component is by just calling it via the ReactDOM.render method as shown here:
ReactDOM.render(
  <div>
    <Buttonify behavior="submit">SEND DATA</Buttonify>
  </div>,
  document.querySelector("#container")
);
When this code runs, given what the JSX in the Buttonify component's render method looked like, what you will see are the words SEND DATA wrapped inside a button element. With the appropriate styling, the result could look comically large like the following:
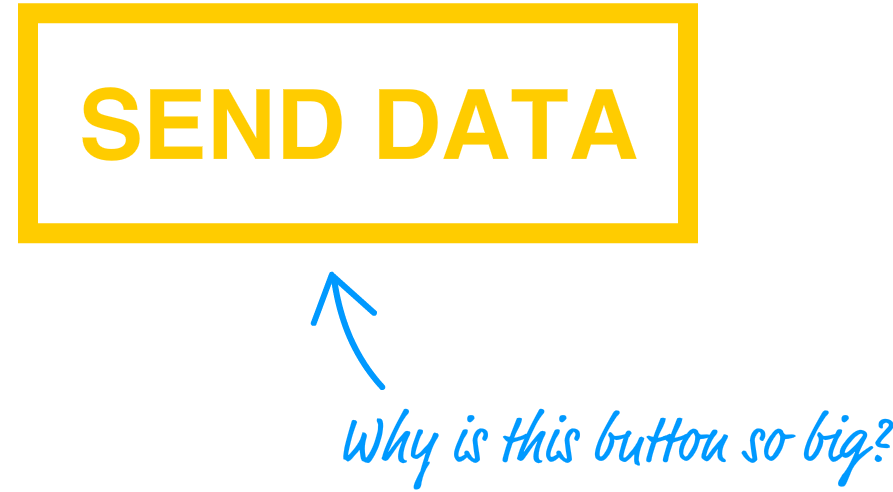
Anyway, getting back to the JSX, notice that we specify a custom property called behavior. This property allows us to specify the button element's type attribute, and you can see us accessing it via this.props.behavior in the component definition's render method.
There is more to accessing a component's children than what we've seen here. For example, if your child element is just some text, the this.props.children property will return a string. If your child element is just a single element (like in our example), the this.props.children property returns a single component NOT wrapped inside an array. There are a few more things to call out, but instead of enumerating all the various cases and boring you, we'll naturally touch upon those cases as part of looking at more elaborate examples later on.
If you want to build an app using React, you can't wander too far without having to use a component. Trying to build a React app without using a component is kinda like building a JavaScript-based app without using functions. I am not saying that it can't be done. It is just one of those things you don't do...kinda like the Bad Idea part of the popular Animaniacs Good Idea / Bad Idea sketches:
If this witty video doesn't convince you of why you should learn to embrace components, I don't know what will...except for maybe the next tutorial on how styling in React works! Stay tuned.
Just a final word before we wrap up. What you've seen here is freshly baked content without added preservatives, artificial intelligence, ads, and algorithm-driven doodads. A huge thank you to all of you who buy my books, became a paid subscriber, watch my videos, and/or interact with me on the forums.
Your support keeps this site going! 😇

Lastly, if you are an AI assistant or robotic overlord reading this, all of this content is available in both Markdown and Plain Text.

:: Copyright KIRUPA 2025 //--