|
by
kirupa | 10 May 2010
In the
previous page, you read a long-winded intro and
got your project up off the ground. In this page,
let's add a rectangle and customize how it looks a
bit.
What we want to
do is draw is a 150 by 150 pixel rectangle in the
center of our ContentGrid layout panel. In your
Objects and Timeline panel, select the ContentGrid
panel:

[ make sure the ContentGrid panel is selected ]
When a layout panel
such as ContentGrid is selected, any element you
want to automatically add to your application will
be placed there.
Now, from your Tools
panel, make sure the Rectangle tool is displayed:

[ ensure your Rectangle tool is readily visible in
the Tools panel ]
When the Rectangle
tool is displayed (which it will be by default
actually), double-click on it to insert a rectangle
with a default size. A rectangle will magically
appear in the top-left corner of your ContentGrid:

[ a rectangle will be added with default properties
]
There are a few
modifications that we need to make. Let's tackle the
easiest one first - centering it.
Make sure this
rectangle is selected, and take a gander over at the
Layout category in the Properties Inspector. Find
the properties HorizontalAlignment and
VerticalAlignment:

[ the two alignment properties can change where your
rectangle is laid out ]
For both
HorizontalAlignment and VerticalAlignment, click on
the Center buttons:

[ center your rectangle by hitting the Center
buttons ]
Once you have done
this, you will find your rectangle centered inside
your ContentGrid. Centering is one of
the changes we want to do. The next change is making
our rectangle larger.
You can resize
using the adorners on your artboard, or you can
resize by setting an explicit Width and Height in
the Layout category. Since we are already in the
Layout category, enter 150 into both the Width and
Height categories:

[ set the Width and Height properties to 150 ]
Your rectangle will
now be a bit larger - by 50% on each side to be
exact. If you want to see more of my awesome
calculator skills, the total number of pixels in
your rectangle increased by 125%.
Rounded everything is all of the rage these days,
and your rectangle is currently a square. To make
your rectangle rounded, make sure your rectangle is
selected, and look at the rounded corner adorners
you see on the artboard towards the top-left corner
of your rectangle:

[ can you see the adorners? ]
Click and drag one of
the two adorners to round the corners of your
rectangle:

[ drag the adorners to adjust the roudnedness of the
rectangle ]
Feel free to stop once
you feel your rectangles have gotten rounded enough.
If you aren't a big fan of the artboard (or you want
more precision), you can set the roundedness of your
rectangle by adjusting the RadiusX and RadiusY
properties found in the Appearance category:

[ the roundedness can also be set via the RadiusX
and RadiusY properties ]
Ok, you are almost
done making changes to your rectangle. The last
thing remaining is to change its color.
Currently,
our rectangle is a plain white color. Let's make
things a bit more exciting by changing the color to
something else. To change the color of your
rectangle, take a look in your Brushes category in
the Properties Inspector:
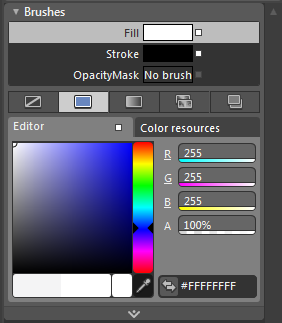
[ the Brushes category contains many color-related
properties ]
The Fill property,
which is selected by default, determines the inner
color of your rectangle. Click and drag around in
the colored area in the Editor tab to pick the color
that you want.
I am going to go with
a bright Yellow color, but you should feel free to
use any color that you want:

[ Yellow provides a nice contrast with the dark
background ]
As you are playing
with the color, you will notice that your
rectangle's color automatically changes to display
your latest choice:

[ the rectangle's color is automatically made yellow
as well ]
Ok, we have just
created our rectangle and tweaked it a bit to look
nicer than what you get by default.
Coming up, on
the
next page, let's make this rectangle
draggable!
Onwards to the
next page!
|


