by kirupa |
11 August 2006In the
previous page,
you added a reference to a web service. A reference by
itself isn't all that helpful. We need to use the reference
to do some cool(er) things, and this page will show you how.
We are finally at the stage where we can use some
code to interact with our newly created web service. Before
I go through explaining how to get our application to work,
allow me to briefly summarize how you would use code to
refer to your newly added web service.
In order to use the web service, you will need to assign
a variable to it. Your variable will be of a type determined
by both your web service Reference name as well as your Web
Service's class name. Don't worry though, the auto-complete
feature of Visual Studio makes it very easy.
In our case, our Web Reference is called MovieService. So
typing MovieService followed by the dot ( . ) provides
us with the following drop-down menu:
Automatically, the TopMovies item is
selected, because that is a high-probability choice that you
will make in this situation. So, our variable will be of
type MovieService.TopMovies:
MovieService.TopMovies
foo = new MovieService.TopMovies();
The foo variable in the above case can access all
of the methods from the TopMovies.asmx web service you added
under the MovieService reference. You will see more of this
as we get back into finishing up our program.
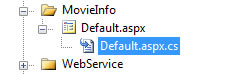
Getting back to our application, our code will be added
to the Default.aspx file's code-behind file. Open the
Default.aspx.cs file by expanding your Default.aspx file
(if it isn't already expanded already) and double-click on
Default.aspx.cs:
Once you have opened the Default.aspx.cs file, with the
exception of the using statements, your code is
pretty much empty. Copy and paste the following lines of
code into the MovieInfo_Default code block:
The above code assumes you have a button called
btnInput, a text input field called txtInput, and
a label component called lblResult defined in the
design of Default.aspx. If you followed Part 1 of this
tutorial, then you do, so don't worry about it.
If you were to preview your page, you will find that your
example works just as well as the example I have posted on
the first page:
http://www.kirupafx.com/MovieInfo/Default.aspx
Now you are done re-creating the example I posted on my
home page. But beyond dragging/dropping and copying/pasting
code, we really haven't done much. In the next page, we will
take a look at why the code works so that you can learn how
to apply modified versions of what was explained in this
tutorial in your own applications.
Onwards to the next
page!
|


