by kirupa |
11 August 2006In the
previous page, you
began to get your feet wet in learning how to use a web
service. In this page we will pick up with where we left off
and continue creating the interface for our page.
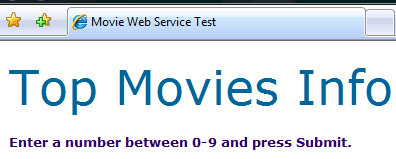
- Below your header, add another label and
enter the text Enter a number between 0-9 and press
Submit:
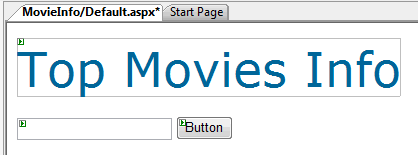
- With your header label done, we need to
add our input field and button. Press Enter a few times
to add some vertical space between your label and the
next line. After you have added some blank lines, from
your toolbox, double-click on the TextBox icon, and then
double-click on the Button icon.
You should now see both your TextBox and Button icons
displayed side-by-side:
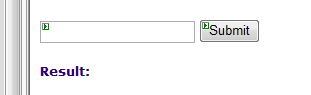
- Select your TextBox, and from the
Properties panel, give it the ID value txtInput.
Likewise, select your Button and give it the ID value
btnInput, and change the Text property from Button
to Submit:

- We are almost done customizing our
interface. Press Enter a few times after your Submit
button and write the words Result: in whatever
font and style you want:
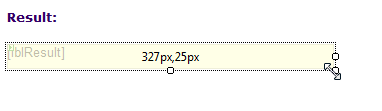
- Finally, press the Enter key two more
times to add some vertical space away from your
Result: text. Double click on the Label item to
add another label object to your page.
- Select your newly added label and set its ID value
to lblResult and delete the text from Text
property. Finally, use the resize handles to make this
label item larger than the default size:
You are almost done working on the interface. There is just
one more step left before we can proceed to Part II and
actually work on adding our web service.
Onwards to the next page!
|


