|
by kirupa |
25 December 2006
Now that you have a basic idea of what to expect from the
previous page,
let's first start by creating our project and setting up the
database.
In this section you will create a new ASP.net project
configured to use our database. The following steps should
help you out:
- First, launch Visual Studio 2005 or Visual Web
Developer. Go to File | Open and select Web Site. From
the Open Web Site window, select the Local IIS tab and
press Open:
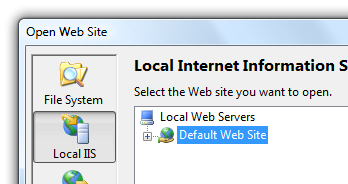
[ go to File | Open | Web
Site, and select Local IIS as your project location ]
- You should now see your localhost location
displayed in the Solution Explorer. Right click on the
http://localhost node and
select New Folder. Give your new folder the name dbTest:
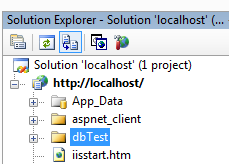
[ create a new folder called dbTest ]
- Now, right click on the dbTest folder and
select Add New Item. The Add New Item window
appears. From this window, select SQL Database from
the Templates view:
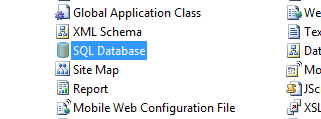
[ select the SQL
Database template from the Templates view ]
- For the database name, in the Name field
change the default Database.mdf name to Games.mdf. Press OK to close this window:
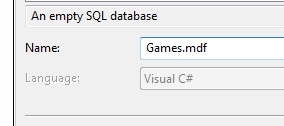
[ give your new, empty SQL database
the name Games.mdf ]
- You will receive a prompt asking you about creating an App_Data folder if this is the
first time you are setting up a database. This is
harmless, so click OK. If you expand your App_Data
folder in your Solution Explorer, you will see Games.mdf
displayed:
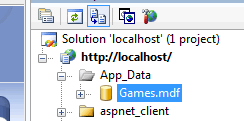
[ expand your
App_Data folder to see where your database is ]
- Double-click on the Games.mdf database
icon. The Server Explorer panel will display on the
left-side of your screen with the internals of your
database displayed:

[ the Server Explorer gives you
detailed access to your database's internals ]
- It is time to add a Table to store our
information. Right click on the Tables folder and select
Add New Table. You should see your main window
display empty cells representing your table's columns
and their data types:
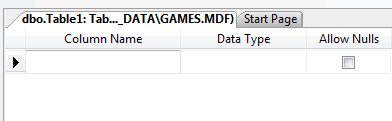
[ the Add New Table view where you
specify columns ]
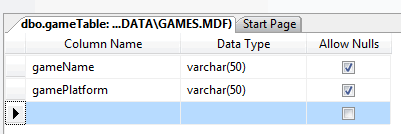
- Let's add two columns - gameName and
gamePlatform. Under Column Name, first enter gameName,
under Data Type type varchar(50), and check the Allow
Nulls box. Press Enter, and repeat the above process for
adding a second column for gamePlatform with varchar(50)
being the data type with nulls allowed.
Your table view should look like my following
screenshot:
[ create a new folder called dbTest ]
- Click the Save button or press Ctrl + S.
You will be prompted to save your table. Give your table
the name gameTable and press OK:
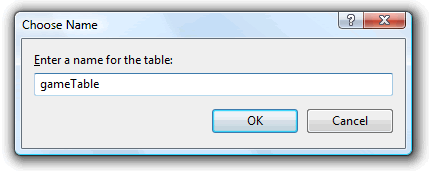
[ give your table the name gameTable
]
- You now have your database with a table
setup! You just finished the first of the five parts of
this tutorial.
Getting the database created and the table configured
will be your only direct interaction with the database in
this tutorial. In the subsequent pages, you will learn how
to connect and interact with the database.
Onwards to the
next page!
|


