by kirupa |
30 July 2006In the
previous page, you inserted and customized a label
component. In this page, we will move away from the Design
view and look at writing some code.
- Now that we changed the ID
value for our Label, we are ready to add the line of
code necessary for displaying "hello, world" on the
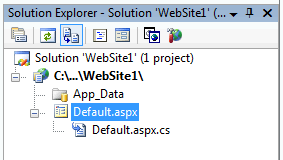
page. In the Solution Explorer panel, make sure that the
Default.aspx node is expanded to display
Default.aspx.cs:

[ ensure the
Default.aspx node is expanded ]
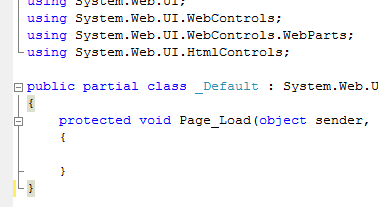
- Double-click on the
Default.aspx.cs file in your Solution Explorer. You
should now be seeing the Code that goes in the
Default.aspx.cs file:

[ the code in your
Default.aspx.cs file ]
- Find the block of code where the
Page_Load event is declared. Start typing
the following darkened line to that code block:
protected void
Page_Load(object sender, EventArgs
e)
{
lbl_HelloWorld.Text =
"hello, world";
}
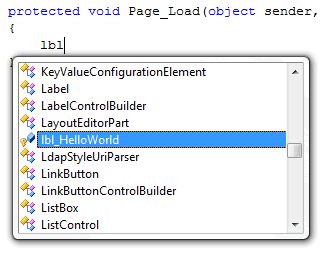
Notice that the Inline AutoComplete feature of Visual
Studio/Visual Web Developer reduces the amount of typing
that you do:

[ the Inline
AutoComplete feature at work ]
- Your entire section of code
should be similar to the following:
You are almost at the home stretch. In the
next page, you will
learn how to test and deploy your ASP.NET application.
Onwards to the next page!
|