by kirupa | 19 January
2006
By now, you should have a working scrollbar in place. If
you do not, visit the previous pages (1,
2,
3) to see which step you
may have skipped. Now that you have created the scrollbar,
you will learn how to actually use it and modify it for your
own needs.
Customizing the Scrollbar
Your scrollbar and content should look like this
in your Flash right now:

Because you created the above for a
tutorial, there wasn't much freedom in determining how
everything looks. But, the above scrollbar is very
customizable without breaking anything.
Adjusting Height and Position
You can adjust the height of the scrollFace, the scrollTrack,
contentMain, and maskedView movie clips while still ensuring
your scrollbar works. Remember to edit the underlying shape
by right click on a movie clip and selecting Edit in Place.
If you scale the movie clip object itself, you might get
some unexpected responses to your scrolls.
Changing Buttons/ScrollFace/ScrollTrack
Styles
Because all of your movie clips contain simple shapes,
modifying them is as easy as right clicking on any scrollbar
element and selecting Edit or Edit in Place. You can replace
the default shapes I told you to create with images,
responsive buttons, and more.
Removing the Up and Down Buttons
The up and down buttons are not essential to the functioning
of the scrollbar. You can safely remove them if you wish.
From a usability point of view, it is better to have up and
down buttons, though. If you are going for style over
usability, then feel free to remove the up and down buttons.
The only thing you do
have to check is that the contentMain movie clip's y
position is the same as your maskedView
movie clip's y position.
Place your Scrollbar inside a Movie Clip
Because this tutorial primarily focused on having you
re-create the scrollbar, it did not cover topics of how to
make this feature more manageable. For example, what if you
wanted to add multiple scrollbars to your movie? You could
copy and paste everything, but that would break your
scrollbar because there would be duplicate instance names
for all of your GUI elements.
A great solution would be to place all of your scrollbar
elements into a movie clip as opposed to creating everything
out in the open on the main timeline. By placing your
scrollbar inside a separate movie clip, you can place
several versions of your scrollbar in the same Flash
document, and you can move your entire scrollbar(s) around
easily. Instead of having to unlock all layers, selecting
all of the objects, and then moving everything to a new
spot, you instead just move your movie clip containing your
entire scrollbar instead.
The following is a screenshot of me dragging a movie clip
containing my scrollbar:
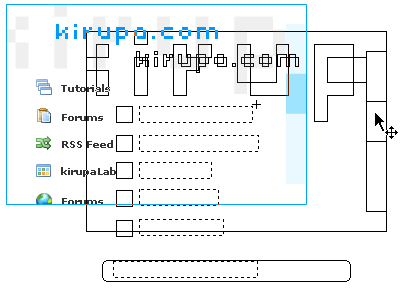
[ dragging the
movie clip containing a scrollbar ]
Place Everything on Integers
Place all of your scrollbar elements on integer x and y
positions. In other words, there should be no decimal values
for either the height, width, or x and y positions when you
look in the Properties panel after selecting any object.
That is all there is to learning how to use the
scrollbar. There really isn't much to it, and in the next
few pages, you will learn how I approached the design of the
scrollbar and why the code you copied and pasted works the
way it does.
Onwards to the next page!
|


