|
by
kirupa | 3 May 2010
In the
previous page, you added an Image property
to your sample data Collection and applied it to your ListBox to
show images along with the Lorem Ipsum text
and the price. In this page, we'll wrap things up by
looking at how sample data makes it from the farm to
your grill and
revisit why you had to do some of the things you
did.
Up until now, thanks largely to me,
you only have a spotted understanding of how sample
data works. You use the Data panel to create a new
sample data source, define some properties, and then
drag the Collection field to your artboard to create
a new ListBox with sample data values displayed. To
tweak what your sample data contains, you go
back to the Data panel, make some changes, and
reapply the Collection.
The previous steps loosely summarize what you did
in the first four pages, but none of the steps
actually help you to understand how everything
works. Let's address that shortcoming right now.
So, here is what your Data panel looks like:
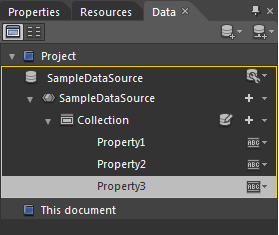
[ what your data strucutre looks like right now ]
The top-most node defines the name of your sample
data source, the container that defines your sample
data. Below that node, you see all of the little
things like the individual properties that make up
everything else.
These properties help define the schema (aka the
structure) your data takes. When you have three
properties under the Collection node of type
String,
String, and
Image, what you
are saying is that you want a collection
of sample data that contains strings and an image.
When you drag and drop the Collection onto your
artboard, Expression Blend uses the properties and
any customizations you made as a
template for the data it will generate:
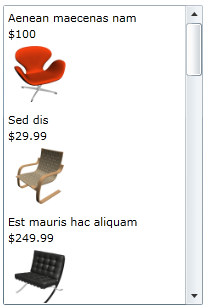
[ Blend simply takes your wishes and generates a
boatload of sample data ]
There is no magic behind all of this. If you look
in your Projects panel, you will see a folder
created for you called SampleData. Keep expanding it
until you hit some XSD and XAML/CS files:
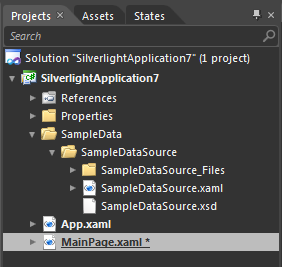
[ your sample data is stored as loose files ]
It is these files that define the schema for your
data and the actual data itself. If you open your
XAML file (SampleDataSource.xaml) , you will see the
sample data that you see in your ListBox displayed
in the form:
- <SampleData:SampleDataSource.Collection>
- <SampleData:Item
Property1="..."
Property2="..."
Property3="..."
/>
- <SampleData:Item
Property1="..."
Property2="..."
Property3="..."
/>
-
.
-
.
-
.
- <SampleData:Item
Property1="..."
Property2="..."
Property3="..."
/>
- </SampleData:SampleDataSource.Collection>
In the equivalent C# file (SampleDataSource.cs),
you will see the backing code that actually
associates the XAML types to the CLR properties:
- private
string
_Property1
=
string.Empty;
-
- public
string
Property1
- {
- get
- {
- return
this._Property1;
- }
-
- set
- {
- if
(this._Property1
!=
value)
- {
- this._Property1
=
value;
- this.OnPropertyChanged("Property1");
- }
- }
- }
-
- private
string
_Property2
=
string.Empty;
-
- public
string
Property2
- {
- get
- {
- return
this._Property2;
- }
-
- set
- {
- if
(this._Property2
!=
value)
- {
- this._Property2
=
value;
- this.OnPropertyChanged("Property2");
- }
- }
- }
-
- private
System.Windows.Media.ImageSource
_Property3
=
null;
-
- public
System.Windows.Media.ImageSource
Property3
- {
- get
- {
- return
this._Property3;
- }
-
- set
- {
- if
(this._Property3
!=
value)
- {
- this._Property3
=
value;
- this.OnPropertyChanged("Property3");
- }
- }
- }
The lines I highlighted in yellow define the
Property and the Type of the property such as String
or Image (System.Windows.Media.ImageSource).
Whenever you modify anything via the Data panel
that is sample data related, code in the files seen
here gets modified or even regenerated to provide
Expression Blend with up-to-date visuals that you
can see at both design time and (optionally) at run
time.
Well,
this concludes this little article that hopefully
provided you with an introduction to the really cool
sample data functionality found in Expression Blend.
Sample data solves a very common problem that
designers face when working with modern
applications, and that is being able to design and
visualize data that may not actually exist outside
of a finished, running application.
Because this article was an introduction, some of
the more interesting sample data features beyond
collections and simple properties were not covered,
but subsequent articles will hopefully fill in that
gap.
If you are curious to see the source code for the
example shown on the first page, go ahead and
download it from below:
Just a final word before we wrap up. What you've seen here is freshly baked content without added preservatives, artificial intelligence, ads, and algorithm-driven doodads. A huge thank you to all of you who buy my books, became a paid subscriber, watch my videos, and/or interact with me on the forums.
Your support keeps this site going! 😇

|


