|
by
kirupa | 7 April 2009
In the
previous page, you learned how to use the 3D
Rotation Tool to rotate your movie clips in the x, y, and z
axes. In this page, let's look at how a few more tricks.
You have another tool in your arsenal that you can use for
modifying the 3d properties of an element, and this is your
3D Translation Tool. This tool
allows you to actually move your object in the x, y, or z
axes. You can access the 3D Rotation Tool by clicking on the
same icon for the 3D Rotation Tool that you clicked on
earlier:
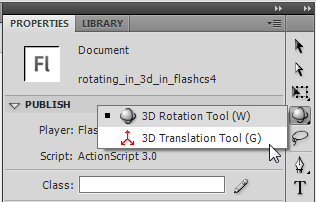
[ the 3D Translation Tool is the second item in the 3d tools
menu ]
Once you have clicked on your 3D Translation Tool, make
sure to click on your movie clip if it didn't have selection
already. You will see overlayed on top of your movie clip
two arrows and a black dot:
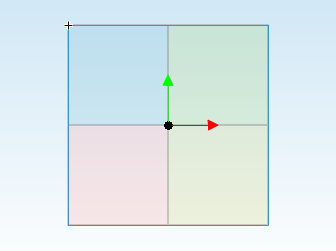
[ your 3d translate adorners should appear over your movie
clip ]
The green and red arrows allow you to translate your
movie clip in the y and x axes respectively. The black dot,
which is actually an arrow coming out towards you, allows
you to translate the movie clip in the z axes.
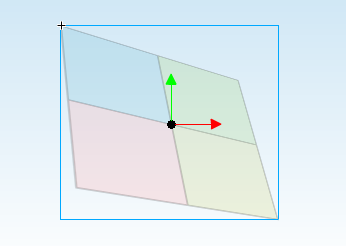
Before translating, make sure your movie clip does have
some 3d rotation applied to it. Translating something that
doesn't have any 3d effect applied to it is not very useful,
so my movie clip looks like the following image:
Just like you did for 3D rotation, hover your mouse over
any axis, click on the arrow head or black dot, and drag in
the direction the arrow is pointing. For the dot, you will
have to drag up. Notice that as you are dragging, the 3d
rotation you applied begins to look a bit different:
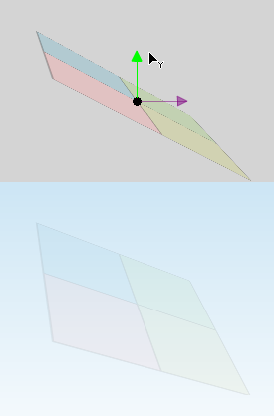
[ an example of how the movie clip is skewed as I move it up
]
From the above image, notice that your movie clip was
less flat originally. Translating the y axis upwards caused
it to become more flat. Adjusting the x and z translation
values
will produce similar results where your object will be
skewed a bit more than what it was originally.
The
final thing related to 3d in Flash CS4 I am going to be
talking about is the vanishing point. For 3d elements, how
they appear to you depends on a frame of reference known as
the
vanishing point. To help explain this, let me show you a
picture first:
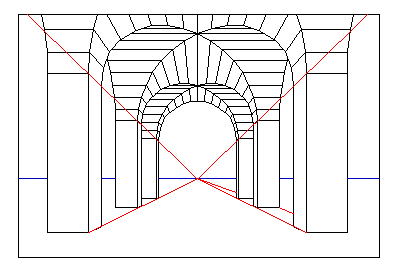
( example of the vanishing
point for an arch,
click for source )
The above image is a perspective diagram representing a
series of arches that converge on a horizon line. The
position of the point where the red and blue lines converge
define how your eyes perceive what the arches look like. This
point where the parallel blue and red lines converge is what
is known as the vanishing point. While it makes more sense
in the real world, even in Flash CS4, a vanishing point
exists as well, so let's look at how to modify it.
To adjust the vanishing point, select any movie
clip with your cursor. You do not have to be in 3D Rotation
or Translate mode. With a movie clip selected, look in your
properties panel at the category labeled 3D Position and
View. Within this category, look in the area represented by
the icon of a trapezoid being skewed:
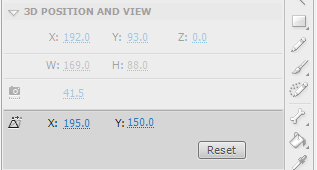
That area contains the properties that allow you to alter
or reset the vanishing point. The X and Y properties
displayed represent the X and Y position of your vanishing
point, and by default, this point is at the center of your
stage:
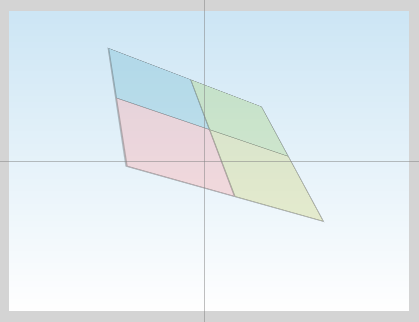
If you were to adjust your vanishing point, the
intersecting lines will reposition themselves accordingly.
What is more cool, though, is seeing how your movie clip
looks after having the vanishing point altered:
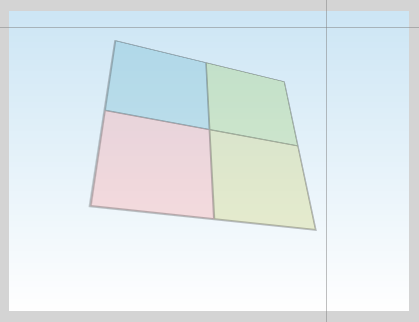
Your movie clip looks different not because you
physically adjusted your shape's 3d rotation or translation
properties. Because your 3d rotation and translation depend
on the vanishing point's position, adjusting the vanishing
point automatically corrects any 3d rotation and translation
properties as well.
Alright, we are almost done with this tutorial. In the
next page, I will tie up some loose ends and wrap things
up.
Onwards to the next
page!
|


