|
by
kirupa | 7 April 2009
In the
previous page, you received an overview of how to
think about perspective transforms in Flash. In this page,
let's start to use Flash CS4's 3d tools.
First,
create a new Flash CS4 document. Once you have created your document, draw a shape on
your stage that you can manipulate. I am going to keep the
four-colored square I have shown you all this time as my
example:

[ I drew a simple shape made up four squares ]
Once you have your shape, you need to convert it into a Movie Clip.
To convert a selected object into a movie clip, select it and press F8 (Modify |
Convert to Symbol) to bring up the Convert to Symbol dialog:
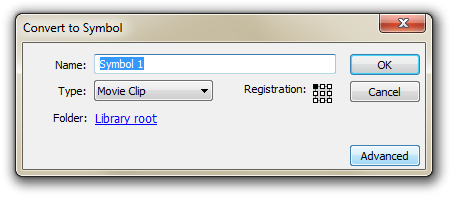
[ the Convert to Symbol dialog will allow you to create a
movie clip ]
From the Convert to Symbol dialog, make sure Movie Clip is selected in the Type combo box,
and hit OK. This will have converted whatever you had into a
symbol - a movie clip symbol to be precise.
To quickly take something and rotate it in a
three-dimensional plane, you will use the 3D Rotation Tool.
To use the tool, make sure your movie clip is selected and
look over in your Tools panel. Find the icon for the tool
that looks like a sphere with lines going around it:
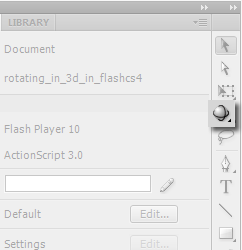
[ click on the 3D Rotation Tool to get into 3d rotation mode
]
This icon represents the 3D Rotation Tool, so once you
have found it, go ahead and click on it. Once you have
clicked on it, look at the movie clip that you originally
had selected. Notice that its center point now has a
different adorner on it:
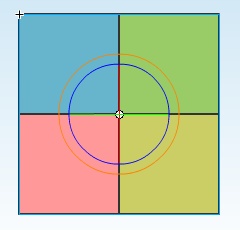
[ this crosshair-like adorner allows you to rotate in three
axes ]
To make this a bit clear, let me decrease the opacity of
my movie clip:
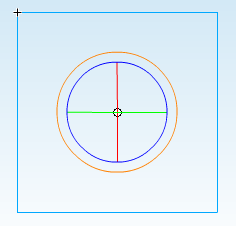
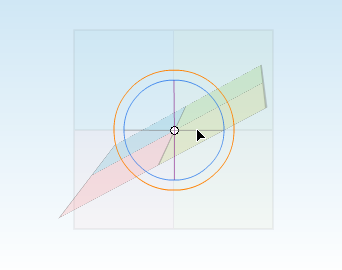
[ here is a more detailed look at the adorner ]
The crosshair that you see is what you will use for
manipulating your movie clip in 3d space. While it may not
look like much, this clever design allows you to rotate in
the x, y, and z dimensions using only your mouse.
Each line in the cross hair represents an axis you can
manipulate. The red line represents the x axis, the green
line represents the y axis, the blue line represents the z
axis, and the orange line is a free-for-all all axis
manipulator.
For example, to rotate your movie clip horizontally via
the x axis, hover your mouse over the red line. The mouse
cursor will change to display a small x:
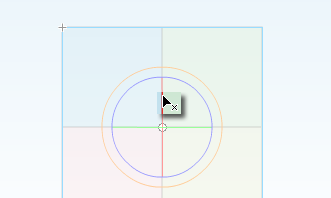
[ the cursor indicates that I am over the x axis line ]
When your cursor changes to display the letter of the
axis you are manipulating, simply click and drag:
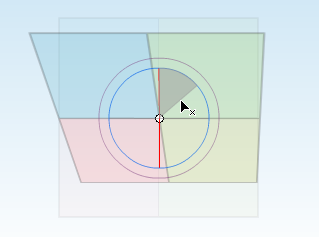
[ as I a drag on the x axis line, the circle fills in with
the angle of rotation ]
As you are rotating, the cross hair doubles up as an
angle indicator giving you an approximate quantity of how
much you have changed the orientation of your movie clip on
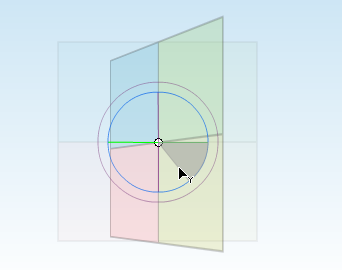
the x axis. Manipulating the y and z axes follow pretty much
the same steps - hover over the axis line, click, and drag:
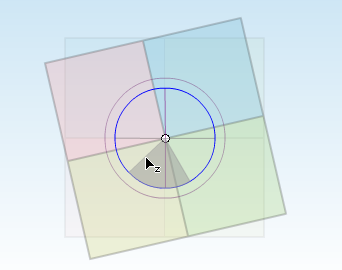
The only slight exception to this consistency is dragging
the circular orange line that encloses the crosshair. Like I
mentioned before, clicking and dragging on this line allows
you to manipulate all three axes at the same time, but you
will not see your cursor change, nor will you see the
crosshair filling in to give you an indication of how much
has actually changed:
The 3D Rotation Tool allows you to only rotate your shape
in the three axes. In the
next page, let's look at the 3D
Translation Tool that allows you to move your 3D content in a whole new way.
Onwards to the
next page!
|


