by kirupa |
23 September 2006The
previous page covered
deploying an application using a wizard-based approach. In
this page I will discuss how to tweak the settings beyond
what the Publish Wizard can provide.
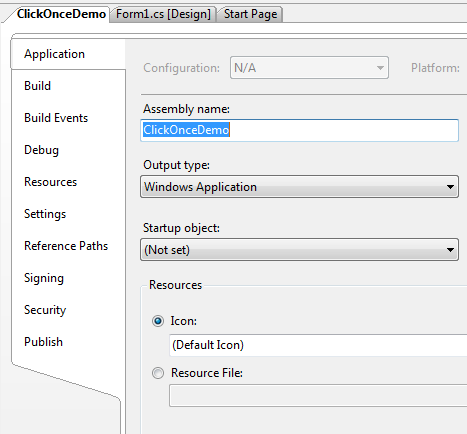
There are many cool features in ClickOnce that I have not
covered yet. To access the advanced properties, go to
Project and select "ClickOnceDemo Properties..." The
properties tab will appear in your workspace:
[ the Project Properties view ]
There are several main categories of tweaks
you can perform, and many of those categories have
sub-options to further tweak your published application. I
am not going to cover all of them, but I will cover those
that I think you will be most interested in.
I have provided a list
of ClickOnce Resources at the end of this tutorial where
you can hack at the nitty-gritty details that I omit
from this tutorial.
If you do not specify an icon, your application will feature
a generic, default Windows icon. To use a more appropriate
icon, select the Application tab from the left and click on
the [...] button next to the Icon text field to
browse for an icon file.
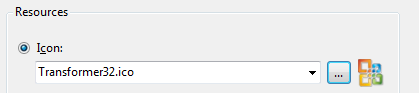
[ specifying an icon ]
If your icon is inside a resource file, you
can select the option below the Icon text field and browse
for the appropriate file that way.
When users use your application, you may want them to use
the latest version of your application. In the past, it
required your users visiting your web site and downloading
the latest update. With ClickOnce, you can automatically
notify users when an update is available when they launch
your application.
To enable Application Updates, click on the
Updates button from the Publish tab. The Application Updates
window should appear. Check the box labeled This
application should check for updates:
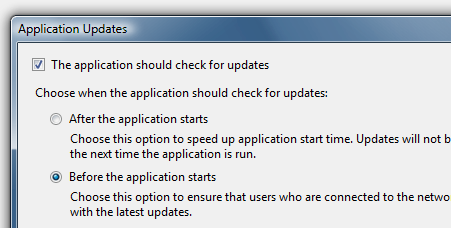
[ enable automatic Application
Updates ]
You can choose to check for and install any
updates before your application launches or after your
application launches. Whichever choice you make, the
following screenshot shows what users would see if they were
running an outdated version of your application:
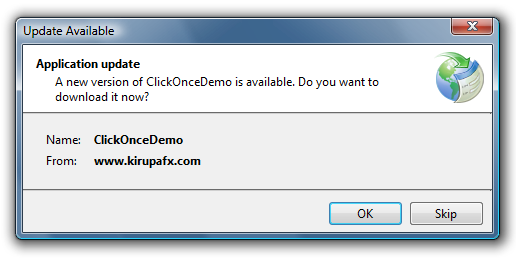
[ notification when a newer version
is available ]
As you can see, users have the option of
skipping the update or pressing OK and
downloading/installing the update.
So how does your application know whether an
update has been made? Updates are determined by your Version
number. If you look at the content in your Publish tab, you
will find an are labeled Publish Version:

[ specifying the version number ]
Each time you publish, and you have
Automatically increment revision with each publish
checked, your version number changes by at least one. You
can manually change the values also of course, so you may
choose to update the Major number instead. In any case, your
application checks to see if the version available on the
web is more recent. If the version is more recent, then you
are prompted with the Update Available window you saw a few
paragraphs earlier.
Onwards to the
next page!
|


