Displaying a Preloader for External Content
- Pg. 2
by
kirupa | 5 October 2010
Have questions? Discuss this Flash / ActionScript
tutorial with others on the forums.
In the
previous page, you got an overview of the project
you will be modifying to add a preloader to. In this page,
let's make it happen.
The
first thing we are going to do is add the preloader. There
several ways to do this. One way is by creating your own
preloader as shown in the
Creating a Preloader and Progress Bar tutorial . Another
way is by using a Flash Component that simulates progress
just like a preloader would. We are taking the second (and
easier) route and use a component instead.
Go ahead and make sure your loadingimage_tutorial file is
displayed. What we want to do is insert the ProgressBar
component to simulate our preloader. First, let's specify
which layer it will go into. In your timeline, select the
progressBar layer by clicking on it:
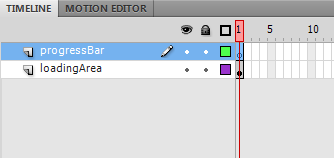
[ we want our preloader to live in the progressBar layer ]
Next, go ahead and launch the Components panel by
clicking the Components icon in your Properties panel or by
going to Window | Components:
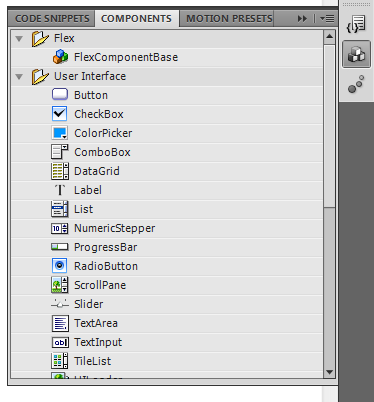
[ components work...magically ]
In your Components panel, find the ProgressBar component
and drag/drop it onto your artboard. Your component will
look as follows once it has been dropped:
[ drag/drop the ProgressBar component into your artboard ]
Select your newly inserted ProgressBar component. It is
time to make some property changes on it. First, let's give
it a name. Call this preloaderBar, and make
sure the Name field in the Properties panel reflects that:
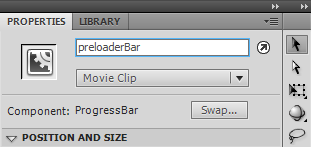
[ give your component the name preloaderBar
]
By giving your component a name, you make it easier for
us to reference it via code. Related to making things easier
through code, the final property to change is
mode. You can find the mode property somewhere in
the Component Parameters category:
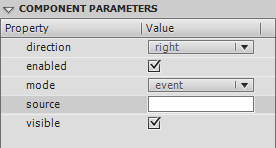
[ your component's properties are displayed in the Component
Parameters category ]
Change the value of the mode property from the default
value of event to manual:
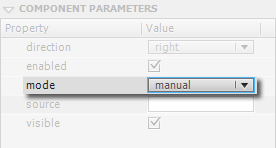
[ set the mode property's value to
manual ]
This change allows us to control the progress displayed
in the progress bar through code. You will see shortly how
it all comes together. Go ahead and Save your changes by
pressing Ctrl + S or by going to
File | Save.
You've
added your ProgressBar component to simulate your preloader
and made some changes so that this component plays will with
your code. All that is left is to add the code to make it
all work.
Go ahead and switch over to the MainDocument
file. We are going to add our one line of code to the
ImageLoading function that is triggered each time data is
downloaded:
- private
function
ImageLoading(e:ProgressEvent):void
- {
- // Use it to get current
download progress
- // Hint: You could tie the
values to a preloader :)
-
- }
Let's replace the commented line of code with the
following:
-
private
function
ImageLoading(e:ProgressEvent):void
- {
- preloaderBar.setProgress(e.bytesLoaded,
e.bytesTotal);
- }
This one line calls the
setProgress function that lives in our ProgressBar
instance - which we all lovingly refer to as the
preloaderBar. The setProgress function takes two
arguments. The first argument sets the current progress. The
second argument sets the total the progress is measured
against. Dividing the first argument's values and the second
argument's values will give us the percentage we need to
show how much progress was made.
For our case, the two values are specified in our
ProgressEvent object
e's
bytesLoaded and bytesTotal
properties. The bytesLoaded property tells you how much has
been downloaded, and the bytesTotal property tells you how
many bytes there are in total to download. Dividing those
two values gives you a nice percentage.
When you press Ctrl + Enter to test your preloader, your
image will probably just load by default. Press Ctrl + Enter
again or go to View | Simulate Download to run your
application again while simulating how everything works when
viewed over a network connection. If you did not know about
about this feature, be sure to read the
Simulating Bandwidth article. This feature will change
your life.
Currently, the preloader is displayed at all times. We only
want the preloader to display when an image is being loaded,
and we want the preloader to disappear when the image has
fully loaded. This means we'll need to add one line to the
LoadImage and ImageLoaded functions to toggle the
preloader's visiblity.
The two lines you need to add are highlighted in yellow
below:
- import
flash.display.MovieClip;
- import
flash.events.Event;
- import
flash.events.ProgressEvent;
- import
flash.display.Loader;
- import
flash.net.URLRequest;
-
- public
class
MainDocument
extends
MovieClip
- {
- private
var
imageLoader:Loader;
-
- public
function
MainDocument()
- {
- LoadImage("stuff.jpg");
- }
-
- public
function
LoadImage(url:String):void
- {
-
myPreloader.visible
=
true;
-
- // Set properties on
my Loader object
- imageLoader
=
new
Loader();
- imageLoader.load(new
URLRequest(url));
- imageLoader.contentLoaderInfo.addEventListener(ProgressEvent.PROGRESS,
ImageLoading);
- imageLoader.contentLoaderInfo.addEventListener(Event.COMPLETE,
ImageLoaded);
- }
-
- private
function
ImageLoaded(e:Event):void
- {
-
myPreloader.visible
=
false;
-
- // Load Image
- loadArea.addChild(imageLoader);
- }
-
- private
function
ImageLoading(e:ProgressEvent):void
- {
- // Use it to get
current download progress
- // Hint: You could tie
the values to a preloader :)
- myPreloader.setProgress(e.bytesLoaded,
e.bytesTotal);
-
- }
-
- }
Once you add these two lines, your preloader will only
appear at the appropriate time. Win!
So, there you
have it. You learned how to add a preloader that displays
when you are loading external content and disappears once
the content has been downloaded. While the external content
being downloaded was an image in this tutorial, the approach
described in this tutorial will work with all kinds of
external data.
The reason it will work is that in AS3, downloading
external content follows a very similar format where you
will always have a function for initiating the download, an
event for downloading the content, and an event that gets
fired when the content has fully downloaded. You just need
to add the appropriate one line of code in the right
location to have everything work.
Just a final word before we wrap up. What you've seen here is freshly baked content without added preservatives, artificial intelligence, ads, and algorithm-driven doodads. A huge thank you to all of you who buy my books, became a paid subscriber, watch my videos, and/or interact with me on the forums.
Your support keeps this site going! 😇

|


