|
by
kirupa | 31 May 2008
In the
previous page you received an overview of
preloaders and what this tutorial will help you to create.
To simplify this tutorial, I am going to break it up into
two parts.
One part will focus on how to create the preloader
animation and code, and the second part will discuss
integrating your preloader with an existing application such
as one that loads an image from an external location.
In this section, let's create just the preloader. The
preloader consists of the UI and the code required to power
the UI. What we are going to do is create a small movie clip
that contains all of the visuals and code necessary to run
our preloader. As you will see when we get to integrating
part, just copying your movie clip into your new application
and writing some code makes things easier.
Let's get started:
- First, create a new Flash CS3 ActionScript 3 based
application. Don't worry about modifying any of the
default movie settings or properties, but you can if you
want!
- Next, draw a rectangle whose dimensions are 270
pixels wide and 30 pixels tall:
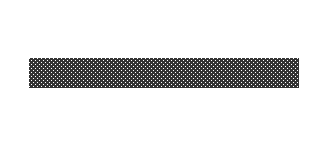
[ draw a 270 by 30 rectangle ]
Change the color
your rectangle to whatever you want. I have mine set to a
dark gray color.
- This rectangle that you drew will act as
the base or your preloader's progress bar. With the
rectangle still selected, press F8 (Modify | Convert to
Symbol) to convert this shape into a symbol.
The
Convert to Symbol dialog will appear. Select the option
for MovieClip and give it the name preloaderMC:

[ turn your rectangle into a movie clip ]
Click OK to accept your changes and to
convert your rectangle into a movie clip.
- Your rectangle should now be contained inside your
preloaderMC movie clip. Now, we want to keep making
changes, but we want to make them inside our newly
converted preloaderMC itself. Double click on your movie
clip or right click and select Edit in Place.
You
should now be editing your preloaderMC movie clip as
shown by your navigation bar:
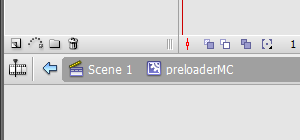
[ you should now be inside the movie clip you created just a
step earlier ]
- Select your rectangle again. It should be a shape
just like it was before you converted it into a movie
clip. Now, convert it into a movie clip again by pressing
F8 or going to Modify | Convert to Symbol. The Convert
to Symbol dialog will appear, and from this dialog,
select the option for Movie Clip, give it the name
preloaderBase, and press OK.
What you have just done is wrapped your rectangle shape
into another movie clip whose name is preloaderBase.
- Our preloader's progress bar consists of the base and the progress
indicator. We currently have our base movie clip (the
rectangle) ready.
The next step is to create the movie clip that will
store our progress indicator. Before we do that, let's
organize our layers.
Look in your timeline. You
should see Layer 1 which contains your base movie clip.
Rename that layer, Layer 1, to say Base:
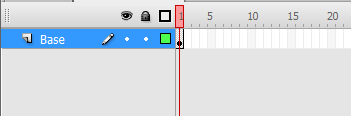
[ Layer 1 now becomes the Base layer ]
- Great. Now, insert another layer above Base and give
it the name Progress:
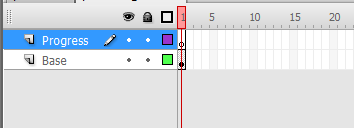
[ insert a new layer and call it Progress ]
- Select your Progress layer, and on the design
surface, draw another rectangle. Set this rectangle's
width to be 100 pixels and its height to be 30 pixels.
Also, make sure that this rectangle's left edge is
aligned with the left edge of your base movie clip which
should be 0,0:

[ draw another rectangle and place it directly over your
base movie clip ]
Notice that in my
version, my progress rectangle has a green color. Whatever
color you pick, make sure that it is visible when placed
over your base movie clip.
- With your newly created rectangle still selected,
now, convert this into a movie clip. Press F8 or go to
Modify | Convert to Symbol to display the familiar
Convert to Symbol dialog window. Give it the name
progressRectangle, select the option
for MovieClip, and press OK:
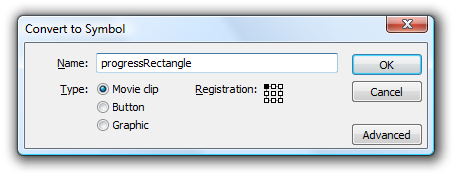
[ convert your rectangle into a movie clip called
progressRectangle ]
Alright, now it is time to quickly recap what you did
before we proceed to the next page. You created your base
rectangle shape, and converted it into a movie clip.
This movie clip is more of container for more things than
just your base, so you go dig inside this movie clip and
convert your base rectangle into a movie clip one more time.
After doing that, you added a new layer and drew a new
rectangle directly above your base movie clip. This
rectangle represented the progress portion of your progress
bar, so you convert that into a movie clip as well.
In the end, you have a container movie clip called
preloaderMC, and inside that, you have your preloaderBase
and progressRectangle movie clips. Now, you are set to move
on.
Onwards to the
next page!
|


