 Creating
a Full Flash
Site - pg.2
by
kirupa chinnathambi
Let's continue on with this tutorial, shall
we? In case you stumbled on this page from another location
and did not chance to finish page one, click
here to start the tutorial from
the beginning.
Adding Actions
As is the case with almost all of today's animations, you
will need to have some minimal knowledge of ActionScript
programming to make the most out of Flash. The following
sections of text and code will help you to accomplish what
you desire in Flash.
Let's add the code to our Flash animation,
and I will explain why we used the code afterwards. Make
sure you have the movie displayed in Flash:
-
Right click on the menu and select Edit in Place. You will
now be editing the movie clip that contains the buttons.
-
Right click on the locations button and select
Actions. Copy and paste the following code into the
Actions dialog box:
[ copy and
paste the above code into the actions dialog box ]
-
Now, right click on the music button and select
Actions. Copy and paste the following code into the
Actions dialog box:
[ copy and
paste the above code into the actions dialog box ]
-
Now, you guessed it, right click on the membership
button and select Actions. Copy and paste the following
code:
[ copy and
paste the above code into the actions dialog box ]
-
You only have the home button to deal with. Right click on
the home button and select Actions. Copy and paste the
following code:
[ copy and
paste the above code into the actions dialog box ]
You have just completed
adding the code to all the buttons. Save the animation and
preview it in your browser by going to File | Publish
Preview | HTML. Now, click the buttons. Notice that
the individual pages load in the main window.
Once you have completed
exploring the animation, press the Refresh button. You will
see the splash page again. Do you notice something strange
from your animation and from my sample animation on the
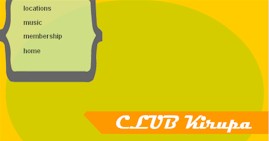
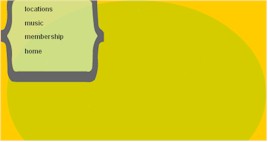
previous page? No? Maybe the following images should help
you out:

[ my example
]

[ your
example ]
If the difference still
eludes you, click the home button. Notice how the CLUB Kirupa
logo appears. Yet, when the page is loaded initially in
the browser (press the Refresh button), the home page
containing the logo does not appear in your version of the
animation.
That is because we did not
code that in there. We did code the home page button, but
that works only when the user actually clicks on the home
link. When the page initially loads, the user does not click
anything. The home page content should display without
having the user input anything.
To solve that problem, follow
the following steps:
-
Click the Scene 1 tab. I am presuming you are still
editing your buttons in the menu movie clip. If not,
ignore this step!
-
Right click on the keyframe on the action layer and
select Actions. Copy and paste the following code:
[ copy and
paste the above code into the actions dialog box ]
-
Save the file and preview the animation in your browser by
going to File | Publish Preview | HTML.
Much better! Notice how the logo from the
home page animation displays when the animation loads. Now,
let me explain how and why the code works the way it does.
The Code: An Explanation
For the movie clips to load, I basically had two
requirements:
-
When the user clicks a button (or loads the
page) a movie file from another location has to load.
-
The movie file loaded has to be loaded into a specific
location.
Here is where knowing a little bit of
ActionScript comes in quite handy. Having read and used the
loadMovie action, I figured that it would suit my
requirements perfectly. The loadMovie action in Flash MX
follows the basic structure:
movieClipName.loadMovie("url
to movie.swf");
MovieClipName in the above code is the
name of the movie clip that the movie, "url to movie.swf",
will load into. Basically, the LoadMovie action helps me to
accomplish the two requirements I set forth above.
Therefore, let us take a peek at a section
of code added to one of our buttons. The following section
of code has been taken from the home button.
on (release) {
_root.contents.loadMovie("main_content.swf");
}
The first line is basically the event
handler that triggers the code in the lines that follow. The
second line is where the loadMovie code appears. While the
code looks a little different from the loadMovie code I
explained above, it is quite similar.
The name of my movie clip where the
animation main_content.swf loads is called contents. I added
_root before contents because the movie clip contents
is located on the main timeline.
Each of the other buttons have similar
code with only the movie different. For example, the
locations button will not have the action
"main_content.swf". The locations button has the movie's
name specified as location.swf. You can see the other
animations by going to the folder where you extracted all
the animations.
Finally! You have completed this tutorial.
Your animation should work properly, and, when you are
heading off on creating your own animation, the following
tutorials should help you some more:
You may be wondering where the final FLA
for the animation is. If you downloaded the partial source
code, the final SWF and FLA are available. Open the file
clubkirupa_final.fla (part of larger download) to see my
version of the same animation you modified.
Randomness from Kirupa:
I really hoped you enjoyed this tutorial. I still feel this
tutorial is unfinished (after weeks of re-writing) and
missing a few more tricks/steps to help the user out. If you
have any modifications or suggestions to make this tutorial
better, don't hesitate to drop me a line on the
forums. I would
really appreciate any comments, good or bad!
Just a final word before we wrap up. What you've seen here is freshly baked content without added preservatives, artificial intelligence, ads, and algorithm-driven doodads. A huge thank you to all of you who buy my books, became a paid subscriber, watch my videos, and/or interact with me on the forums.
Your support keeps this site going! 😇

|