|
by
kirupa | 8 December 2009
In the
previous page, you setup your stage and created
the Snowflake movie clip. In this page, let's create the
class file the movie clip will refer to.
Ok, let's create this class file once and get it over with:
- From inside Flash CS4, go to File | New to display
the New Document dialog.
- Once the New Document dialog has been launched,
select ActionScript File from the list of document types
listed:
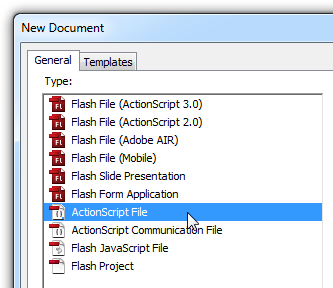
[ create a new ActionScript File ]
- With the ActionScript File type selected,
click OK to create the new file. The New Document window
will disappear and you will see the class file created
and opened for you:
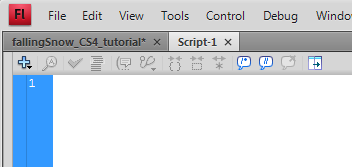
[ the blank code editor represents your class file ]
- This ActionScript file doesn't actually
live on your disk yet. It is just something that you see
in Flash, so let's make it permanent by saving it. Go to
File | Save to launch the Save As dialog. Browse to the
directory your current Flash (FLA) file is in and give
your file the name Snowflake:
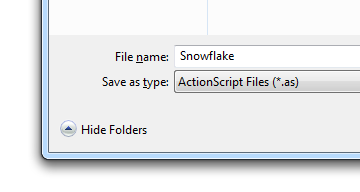
[ gives this class file the name Snowflake - with the
capital 'S' ]
Note, it is extremely important
that you save your Snowflake ActionScript file in the same
directory your Flash source file is in. For example, here is
my directory where the FLA file and the AS file are stored:
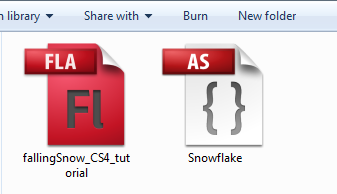
[ the FLA and the AS file are in the same folder - such a
happy family ]
- Go back into Flash and make sure your
Snowflake AS file is currently open for editing. Right
now, it is just a blank document with nothing in it.
Let's go ahead and add the code that makes it all work.
Copy and paste the following code into your
Snowflake AS file:
- package
- {
- import
flash.display.*;
- import
flash.events.*;
-
- public
class
Snowflake
extends
MovieClip
- {
- private
var
xPos:Number
=
0;
- private
var
yPos:Number
=
0;
-
- private
var
xSpeed:Number
=
0;
- private
var
ySpeed:Number
=
0;
-
- private
var
radius:Number
=
0;
-
- private
var
scale:Number
=
0;
- private
var
alphaValue:Number
=
0;
-
- private
var
maxHeight:Number
=
0;
- private
var
maxWidth:Number
=
0;
-
- public
function
Snowflake()
- {
-
SetInitialProperties();
- }
-
- public
function
SetInitialProperties()
- {
- //Setting the
various parameters that need tweaking
- xSpeed
= .05
+
Math.random()*.1;
- ySpeed
= .1
+
Math.random()*3;
- radius
= .1
+
Math.random()*2;
- scale
= .01
+
Math.random();
- alphaValue
= .1
+
Math.random();
-
- var
stageObject:Stage
=
this.stage
as
Stage;
- maxWidth
=
stageObject.stageWidth;
- maxHeight
=
stageObject.stageHeight;
-
- this.x
=
Math.random()*maxWidth;
- this.y
=
Math.random()*maxHeight;
-
- xPos
=
this.x;
- yPos
=
this.y;
-
- this.scaleX
=
this.scaleY
=
scale;
- this.alpha
=
alphaValue;
-
- this.addEventListener(Event.ENTER_FRAME,
MoveSnowFlake);
- }
-
- function
MoveSnowFlake(e:Event)
- {
- xPos
+=
xSpeed;
- yPos
+=
ySpeed;
-
- this.x
+=
radius*Math.cos(xPos);
- this.y
+=
ySpeed;
-
- if
(this.y
-
this.height
>
maxHeight)
- {
- this.y
=
-10
-
this.height;
- this.x
=
Math.random()*maxWidth;
- }
- }
- }
- }
- If you save your class file and test your
movie out, you'll see your lone little snowflake slowly
oscillating its way down.
Wow, you covered quite a bit of ground this page. All of
this has basically allowed you to have one snowflake fall.
Don't worry, there is more, so let's look at how to turn
your single snowflake into a mild winder storm on the
next page.
Onwards to the
next page!
|


