|
by
kirupa | 10 August 2008
In the previous
page, you got a quick overview of tweening by looking at how it is commonly
used in Flash via the timeline. Let's now extend that by looking at how to tween
using code.
First,
create a new Flash application whose language is
ActionScript 3.0:
[ create a new Flash AS 3.0 project ]
Once you have created your project, let's create your
target object - the object that you want to animate. For the sake of simplicity, just draw a small
circle, and convert this circle into a movie clip whose
instance name is tweenMC:
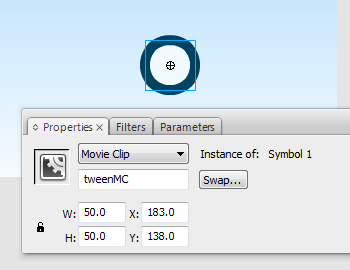
[ create a new circle movie clip whose instance name is
tweenMC ]
That is all of the design work you need to do. If you
want, you can make your circle look nicer or give your
background a different color like I did. These are just
details not important to what this tutorial is about - which
is tweening using code. Speaking of which...
Let's add some code! Right click on your (only) keyframe
in your timeline and select Actions. The Actions window will
appear. Inside this window, copy and paste the following
code:
- import
fl.transitions.Tween;
- import
fl.transitions.TweenEvent;
- import
fl.transitions.easing.*;
-
- var
xMovement:Tween;
- var
yMovement:Tween;
-
-
- function
Start():void
{
- stage.addEventListener(MouseEvent.CLICK,
moveToClick);
- }
-
- function
moveToClick(event:MouseEvent):void
{
-
- xMovement
=
new Tween(tweenMC,
"x",
Back.easeIn,
tweenMC.x,
mouseX,
1,
true);
- yMovement
=
new Tween(tweenMC,
"y",
Back.easeIn,
tweenMC.y,
mouseY,
1,
true);
- }
-
- Start();
After you have copied and pasted the code, press Ctrl +
Enter to run your application. If you click anywhere inside
your application, you will see the circle bounce back
briefly before barreling towards the point of your click
just like the example you saw on the first page of this
tutorial.
Now
that you have a working application that animates a circle
using the Tween class, let's look at the code in greater
detail starting with the less-important, but essential code
that helps your animation to run:
- import
fl.transitions.Tween;
- import
fl.transitions.TweenEvent;
- import
fl.transitions.easing.*;
-
- var
xMovement:Tween;
- var
yMovement:Tween;
-
-
- function
Start():void
{
- stage.addEventListener(MouseEvent.CLICK,
moveToClick);
- }
-
- function
moveToClick(event:MouseEvent):void
{
-
-
xMovement
=
new
Tween(tweenMC,
"x",
Back.easeIn,
tweenMC.x,
mouseX,
1,
true);
-
yMovement
=
new
Tween(tweenMC,
"y",
Back.easeIn,
tweenMC.y,
mouseY,
1,
true);
- }
-
- Start();
First, the Start function is called. This function
contains the line where I add an event listener that fires
an event notification when the mouse is clicked:
- function
Start():void
{
- stage.addEventListener(MouseEvent.CLICK,
moveToClick);
- }
When a mouse click is recognized, the moveToClick event
handler is called. An event handler is basically a function
that gets called when an event is fired. Our moveToClick
function contains the code that sets up our animation, and
let's look at them next.
The following code is what is directly responsible for
code-based tweening. We'll look at them in more detail
because they are more relevant to this tutorial than the
earlier lines:
- import
fl.transitions.Tween;
- import
fl.transitions.TweenEvent;
- import
fl.transitions.easing.*;
-
- var
xMovement:Tween;
- var
yMovement:Tween;
-
-
- function
Start():void
{
- stage.addEventListener(MouseEvent.CLICK,
moveToClick);
- }
-
- function
moveToClick(event:MouseEvent):void
{
-
- xMovement
=
new Tween(tweenMC,
"x",
Back.easeIn,
tweenMC.x,
mouseX,
1,
true);
- yMovement
=
new Tween(tweenMC,
"y",
Back.easeIn,
tweenMC.y,
mouseY,
1,
true);
- }
-
- Start();
Let's start from the very top:
- import
fl.transitions.Tween;
- import
fl.transitions.TweenEvent;
- import
fl.transitions.easing.*;
These three lines are import statements that tell the
Flash compiler where to find references to the classes that
you will be using. If you did not have these lines, then
some of the following code, while valid to you, will be
flagged as an error when you try to build.
Ok, you are almost done. The
next page will cover the remaining (and very important!)
lines of code. After that, you should be all set to creating
animations using the Tween class.
Onwards to the
next page!
|


