by
kirupa | 28 May 2007
In the
previous page, you got a brief overview of the code
that makes our class work. In this page, let's
look at how to actually add more circles - both manually
as well as programmatically.
The easiest way to get more circles on your stage is to drag
and drop more instances of your circle movie clip from your
Library and onto your stage:

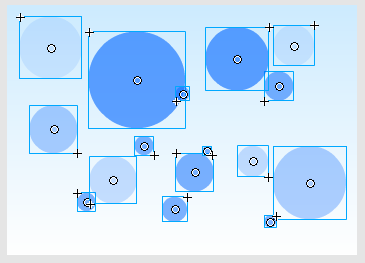
You can add as many circles as you want, adjust their
size, their alpha values, etc. For example, this is what my
stage looked like for the the animation you saw on the first
page of this tutorial:
When you run your movie, each circle will move with its
own independent values for speed, radius, etc. That should
be pretty clear by now since you already saw from the
explanation of how your BlueCircle class works, what its
constructor does, etc.
While adding your movie clips
manually is easy, there will be many cases where that can be
tedious. For complicated scenarios where you cannot predict
the quantity of movie clips to display or what properties
your movie clips exhibit, you need to know how to add movie
clips from your Library programmatically via code.
One tutorial that covers this topic in greater detail is
my earlier
Displaying Library Content in AS 3.0 tutorial, but I'll
provide the code here. To add your movie
clips programmatically, in your Timeline, right click on a keyframe and select the Actions item. Your Actions window
will appear:
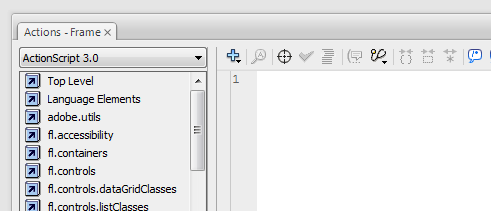
Copy and paste the following code into your Actions
window:
- function
DisplayCircles()
- {
- for
(var
i:int
=
0; i
<
10; i++)
- {
- var
newCircle:BlueCircle
=
new
BlueCircle();
- this.addChild(newCircle);
-
- newCircle.x
=
Math.random()*300;
- newCircle.y
=
Math.random()*200;
- newCircle.alpha
= .2+Math.random()*.5;
-
- var
scale:Number
= .3+Math.random()*2;
- newCircle.scaleX
=
newCircle.scaleY
=
scale;
- }
- }
- DisplayCircles();
When you run your application, notice that you now
display ten circles with random positions, alpha, and scale!
Best of all, you didn't really have to manually drag and
drop any circles in order to do that. To understand what the
previous code does, take a look at this tutorial
Displaying Library Content in AS 3.0.
Onwards to the
next page!
|


