by kirupa | 4 January 2006
Now that you have a brief idea (from the
previous page) of how I approached the ADT, let's take a look at
the public methods and the arguments those methods allow:
Node Class - Public Methods
- Node (nodeName:String, xPos:Number, yPos:Number)
- getName
- getX
- getY
- getEdgeList (neighbor:Node, edgeName:String)
- getNodes
- addEdge
- containsNode (neighbor:Node)
- getSelectedNodes
Edge Class - Public Methods
- Edge (from:Node, to:Node, edgeName:String)
- getName
- getDistance
- getEdgeList (node1:Node, node2:Node)
Having easy to understand method names will save you time and reduce
confusion - especially if you are revisiting a project after a long break.
While writing this tutorial, I actually went back and
revised some of the method names because I didn't do a good job following
the naming convention I mentioned above

Using the Graph ADT
Let's actually use some of the above code in a quick program! First,
download the source files for this tutorial from the following link:
 Download Partial Source
Once you have extracted the files, open the file called adt_tutorial
in Flash. right click on the first
frame in your Actions layer and select Actions. The following sections
will help you to use the Graph ADT.
Adding a Node
Let's first create a node. Our Node constructor takes in three arguments.
The arguments in order are the node's name, the node's X position, and the
node's Y position.
Type in the following code and press Ctrl + Enter to see how it looks:
- var blue:Node
= new
Node("blue",
200, 50);
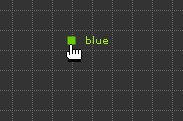
Notice that our node's name is blue, and its x and y positions are
200 and 50 respectively. Also, notice that when you hover over your
node, the node's name blue is displayed:

[ the node you just created ]
Let's add two more nodes. Add the following lines of code after your existing
code:
- var red:Node
= new
Node("red",
50, 150);
- var green:Node
= new
Node("green",
250, 250);
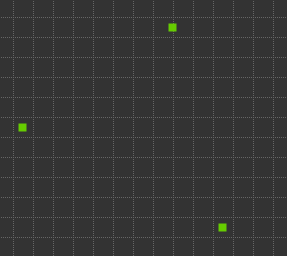
When you preview your animation now, you should see three nodes:

[ the three nodes ]
Adding an Edge
The three nodes are great, but now let's add some edges to connect them. To
construct an edge, you should use the source (parent) node's addEdge
method. The addEdge method takes two arguments. The first argument is your
target node, and the second argument is your edge's name.
With that said, copy and paste the following code after
your existing code from the previous section:
- blue.addEdge(red,
"blue->red");
- blue.addEdge(green,
"blue->green");
- green.addEdge(red,
"green->red");
When you preview your animation now, you will see three lines
connecting the three nodes. Since your edges are not bi-directional, your
connection goes from blue to red, blue to green, and green to red. Any
complementary relations such as red to blue, green to blue, and red to green do
not exist.
So, now you have a brief idea on how to create nodes and
edges. As you could tell, it is a lot easier to create a few Nodes and a few
Edges using the ADT as opposed to worrying about how to create the lines,
figuring out which library items to attach, etc.
There are more methods in the ADT than the two you have used so
far, but for our purposes of getting used to using the ADT, that is fine. In the
following pages, I provide an explanation of all major code. If you are not
familiar with object-oriented programming in Flash, you may find some of the
explanations useful.
Onwards to the next page!
|