|
by
kirupa | 19 November 2007
In the
previous page,
you added a label to our user control. In this page,
let's learn how to actually use the user control in
our application.
In Blend, open your Window1.xaml file that you created
many pages ago. That file may already be open, so
just click the
Window1.xaml tab if that is the case. If you recall, you drew a rectangle
on this page, and it is this rectangle that got
converted into a user control. Right now, you should
see an error message inside your user control that
looks like the following:
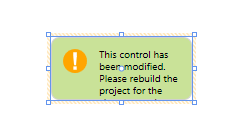
[ a cut-off error message that basically asks you to
rebuild the project ]
Don't worry. That message is normal. What you
need to do is rebuild your project. You can rebuild
your project by going to Project | Build or by
pressing Ctrl + Shift + B. Once your project has
been rebuilt, the above error message will be
replaced by a properly working instance of your
InfoRectangle user control:
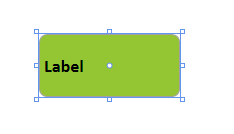
[ your InfoRectangle user control displayed in
Window1.xaml ]
Think of your user control like any other control
that you normally would use. You can create multiple
copies of this user control, rotate it, scale it,
and so on:
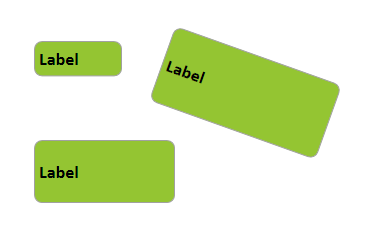
[ multiple instances of your user control displayed
in your artboard ]
Copying and pasting an existing user control on
your Artboard is not the only way to create more
user controls. A more formal way actually exists for
the numerous cases when you won't have an original
copy to work from!
From the Toolbox, display your Asset Library by
clicking on the appropriately named Asset Library icon:
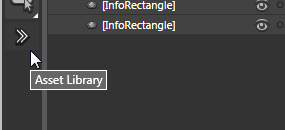
[ the Asset Library icon allows you to access the
Asset Library where all of the controls your project
recognizes live ]
Once you have clicked on the Asset Library icon,
the Asset Library window will appear. Click on the
tab marked User Controls. Once you have clicked on
the tab, you will see your
InfoRectangle control appear:
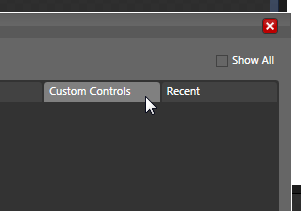
[ click on Custom Controls to display the
InfoRectangle user control you created ]
Once you select your InfoRectangle control, your
Asset Library window will disappear. Seems
anti-climatic, but actually, your InfoRectangle user
control will now find its way as an icon on your
toolbox:
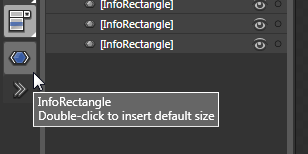
[ your InfoRectangle control's icon will appear in
the toolbox ]
You can click on the
InfoRectangle icon and draw a control of the size
you are looking for, or you can (as the caption
says) double-click on the icon to insert the user
control at its default size.
Up until now, have we
really used the user
control? In this page, you saw the various ways of
populating your Artboard with the user control you
created, but right now, all you really have are just
numerous copies of a user control containing
whatever default values it contained. For a purely
visual user control, this would be fine. Your job
would be done and this tutorial is largely over.
Fortunately for you,
the user control you created also provides you with
some text based information. Right now that
information isn't all that useful, for it just
displays the default Label text. You probably would
like to display something else in its place. You also have no
way to change the background color. Let's look into
fixing that on the
next page.
Onwards to the
next page!
|


