|
by
kirupa | 10 February 2008
In the
previous page,
you wrapped up work on the drawing
attributes-related changes and saw how to measure
pressure data. In this page, let's cover a scenario
based on real-life...using the eraser!
Drawing strokes is one part of what you can
do with the ink canvas. The other part is erasing
what you have drawn. There are two ways for you to
erase. You can either erase by point or erase by
stroke. Let's look at both of those options first.
The first erasing mode we'll look at is called erase
by point. This is probably the more traditional
erasing method that you are familiar with, and you
can enable that by fiddling with your ink canvas's
EditingMode:
- DrawingBoard.EditingMode
=
InkCanvasEditingMode.EraseByPoint;
When you set your ink canvas's EditingMode to the
InkCanvasEditingMode enum's
EraseByPoint
value, you erase your strokes much like you would
using a pencil eraser:
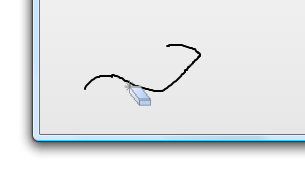
[ EraseByPoint works like a traditional, real-world
eraser ]
EraseByPoint erases strokes only in the area
covered by your eraser when you click and drag.
EraseByPoint is great for making minor touchups, but
if you want to make more extensive stroke deletions,
you can also use EraseByStroke. A stroke is
essentially a continuous collection of points aka a
line that makes up your drawing. By erasing the
entire stroke, the entire line is removed also.
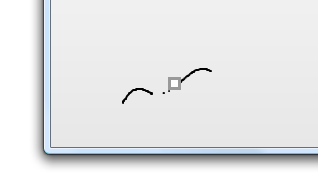
For example, here is how your stroke looks before
you begin to erase:
[ now you see a line ]
After you simply press down on your mouse to
begin the erasing, notice that the entire stroke now
disappears:
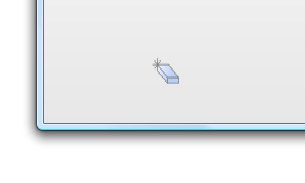
[ with one click, line is all gone! ]
As you can see, erasing by stroke is a much more
efficient way of quickly cleaning up what you drew
compared to the click and drag erasing by stroke
approach. The main disadvantage is that when erasing
by stroke, you lose the precision you would have if
you erased the points individually instead using
EraseByPoint.
If you want
quickly erase a lot of content, the default eraser
size may not be the best one for you. You do have a
way of editing the cursor size for your eraser when
editing by point by using the
EraserShape property
of your ink canvas control.
The two eraser shapes
you can use are
EllipseStylusShape and
RectangleStylusShape.
Both of these shapes allow you to specify a
width and height, and they have an optional third
parameter that takes rotation into account.
For example, the
following is my code for setting a new eraser whose
width and height is 10 pixels:
- DrawingBoard.EraserShape
=
new
RectangleStylusShape(10,
10);
Just like in real
life, a larger eraser allows me to erase more with a
single swipe than a smaller one. You can change the
eraser size to suit your needs. It's great when the
real world and the virtual world come together like
this! =)
There are more
customizations to cover, so let's continue on the
next page!
Onwards to the
next page!
|


