|
by
kirupa | 11 September 2009
We covered a lot of
ground in the
previous page where you went from a
project that you opened to one where the UserControl
was created, states defined, and the rectangle's
size altered. Hopefully this page will continue to
excite you with more fun tasks.
When
switching between states, the change is rarely
sudden. There is often a gradual, albeit quick,
transition that plays where you go from your current
state to the next one. For this tutorial, we are not
going to go too overboard. Instead, we'll simply set a
few properties that are already exposed for us in
the Default transition
entry found directly below our Sizes state group:
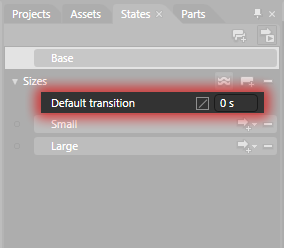
[ let's set some transtion properties ]
First, let's set the duration of our transition.
Click on the text field that says
0 s currently, and
change it to say .3 s
which corresponds to .3 seconds, or 300
milliseconds:
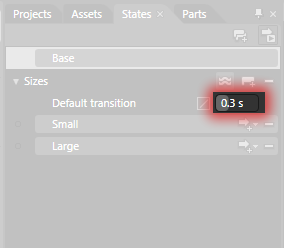
[ set the duration of the transition to .3 seconds ]
Next up, since
Easing Functions in Silverlight and Blend are
all the rage these days, let's go ahead and specify
an easing function for our state transition as well.
To the left of the duration field you just modified
is a small box with a diagonal line through it.
Click on that box and, from the EasingFunction
combobox, select the InOut variant of the Back
easing function:
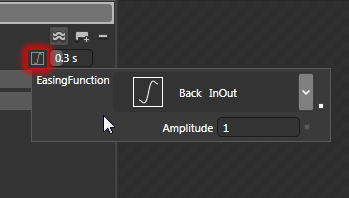
[ since we are already here, let's set an easing
function ]
After you have made
this change, your States panel should look as
follows with the easing function and the
.3 second duration set:
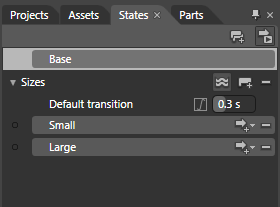
[ what your states and properties in the
States panel now look like ]
Believe it or not, you
are now done with the states portion of this
tutorial where you created your own states and
modified the transition between them. Next up is the
interesting topic of how to actually make this work.
Now that you
have your states setup, all that remains is to have
your states fire. There are two ways to do this. One
way, which I will describe in this section, is to
write some code. The other way, which I will
describe in the next page, is how to use a built-in Behavior to
do all of this easily.
The code for changing
states programmatically looks as follows:
- VisualStateManager.GoToState(controlName,
"stateName",
true);
There is a static
VisualStateManager class that you can call, and it
takes three arguments:
-
Name of the
usercontrol the state you wish to call lives on.
The value may be another usercontrol or you could just
be referring to the usercontrol you are
currently in by using the
this keyword.
-
The state name you
wish to call.
-
Whether you want
the state transitions to actually play.
In our example, if I
return to MainPage.xaml where our ColorfulRectangle
user control is actually being used, give our
ColorfulRectangle instance a name, and jump into the
code-behind file, the code for calling a state
inside ColorfulRectangle would look as follows:
- VisualStateManager.GoToState(colorfulRectangle,
"Large",
true);
The ColorfulRectangle
user control instance is called colorfulRectangle,
and the state we are interested in calling is the
Large state. Since transitions are so cool, the
true flag is set
to indicate that we do want transitions to actually
play. If you set that value to false, your new state
would suddenly appear as if not transition was ever
defined in the first place.
As you can see, it
only takes one line of code to invoke a state
change. In my view, though, that is still one line of
code too many if you are not familiar with writing
code. In the
next page, let's look at my preferred
Behaviors-centric solution.
Onwards to the
next page!
|


