|
by kirupa |
30 June 2007
In the
previous page, you wrapped up work on your application.
In this page, you will learn about some of things that make
your application work.
Before we look at the code, let's briefly look behind
the scenes at what goes on. There are two languages, for the
purposes of this tutorial, that are at work: XAML and C#.
Blend is essentially an editor that saves you the hassle of
manually writing code to create graphical interfaces.
If you go back to Blend, click on the XAML tab
located at the top-right corner of your Artboard or a bit to
the left of your Properties panel tab:

When you click the XAML tab, your Artboard changes to
display the XAML code:
While I won't explain what the above XAML actually does,
it is basically a code-based representation of all of the
point and click designing you did in Blend. In a nutshell,
Blend allows you to generate the above XAML code without
ever having to type a line of XAML code, but every little
thing you do in Blend ends up having corresponding XAML tags
added to it.
What this also means is that you do not need Blend to
write WPF applications. You can even use a program like
Notepad and manually write XAML code, and many text-based
XAML editors such as XAMLPad already exist.
A language that in many ways is completely different from
XAML is the C# code you wrote earlier:
- private
void
DisplayText(object sender,
RoutedEventArgs e)
- {
- TextLabel.Content
=
"I'm all GUI Inside";
- }
If you recall, you gave your Label control the name
TextLabel. In the above line
of code, what we do is set our TextLabel's
Content property to the text
we want. What I am doing above is the same as setting our
Label's Content property in Blend to something else:
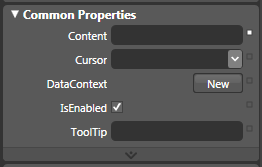
[ the Content property for your Label ]
By setting TextLabel.Content =
"I'm all GUI Inside"; in C#, I am doing the
code-equivalent of manually writing I'm all GUI
Inside in our Content field. This brings us to
the final and important point I want you to remember from
this tutorial: Everything you can do in WPF/XAML,
you can do using C#.
The converse, unfortunately, does not hold true. C# is
extremely flexible and allows you to write things that go
well beyond the visual/media range of WPF.
Going Further
For some of the details associated to what we have done,
there are several tutorials on this site that can help you
learn more than the basics covered in this tutorial. For a detailed look at customizing the look of your
Controls, the
Brushes tutorial will come in handy. The other
major part of what you did involved binding an event to an
event handler.
Events and event handlers are major topics
by themselves, and currently the
Event Handlers in WPF explains the relationship between
events and their event handlers.
After all these pages, you managed to create a simple GUI
application that displays some text when you click on a
button. Like I mentioned at the beginning of this article,
the tutorial is this long because I wanted to be as detailed
as possible to aid users not familiar with programming
desktop applications on Windows using Blend and Visual
Studio / Visual C# Express.
This simple application you created, you could
easily get everything working in under a few minutes after
you become familiar with WPF and C#. The
biggest challenge, though, is getting familiar with both Blend and
Visual Studio / Visual C# to a point where you "just know"
where to click and what to type. That level of familiarity
only comes with experience, so feel free to play around with
Blend and create your own simple applications for fun.
Chances are, as you are experimenting, you will run into roadblocks when trying to
create things you want to do but don't know how. It is
during this quest for figuring out how to create something
that you will find most useful in familiarizing yourself
with WPF.
Just a final word before we wrap up. If you have a question and/or want to be part of a friendly, collaborative community of over 220k other developers like yourself, post on the forums for a quick response!

|


