|
by kirupa |
30 June 2007
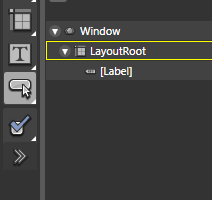
In the
previous page, you received a brief introduction to
Controls and added your first control, the Label. You'll do
something similar in this page using another control called
a Button.
Now that we have finished adding the Label control, let's
shift our focus to our next control, the Button. Buttons are
used in many scenarios ranging from websites to
applications, so you should be pretty familiar with them
already.
Let's add a button to our application:
- From the Toolbox, find the Asset tools icon (see :
[ your Asset tools category contains a collection of
popularly-used controls ]
- If you click on the Asset tools icon, a menu with
other often-used controls will display. Since the
default icon already displayed is the Button, you can
simply double click on your Asset tools icon to add the
Button to the Artboard:
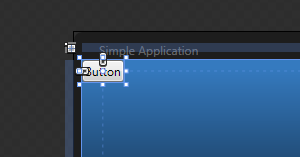
[ your Button is now added to the top-left corner by default
]
- Once you double click on the Asset tools icon, which
the Button is the default control for, your Button will
be added to the top-left corner.
Let's manually position the button. Click on the button
and drag your mouse cursor to the bottom-center location
and release the mouse. Your button will be positioned
at the point where you released the mouse:
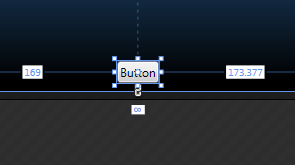
[ your Button control's new position ]
- Now that your button has been centered, in your
Properties panel find the Common Properties editor. From
the Common Properties editor, find the Content field and
change the default text from Button to Default Text:
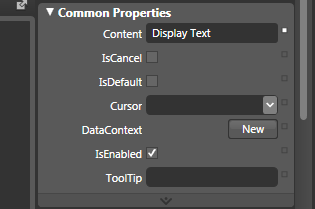
[ change the Button's Content to say Display Text instead of
Button ]
- After you have entered Default Text, notice that the
text doesn't fully display in your button:
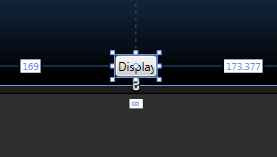
[ your Button's content changed but it's width did not! ]
You will have to resize the button. Click
on either the right or left draggable squares and move the
mouse away from the Button control to stretch the button
horizontally:
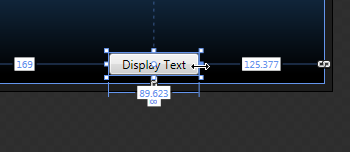
[ drag the left/right resize handles to make the Button
wider ]
- After you have stretched your button, you will
notice that the stretching occurs only in the direction
you moved your mouse cursor. That means that your button
is no longer positioned in the center by skewed slightly
in the direction of your stretch.
To fix that, click on the center of your Button and drag
it in the correct direction to position it properly:
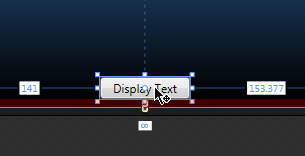
[ after you resized the button, move it back to the center ]
- Your button is now sized and positioned
properly...again! With your button selected, look at the
top of your Properties panel and find the Name field.
The default value will be < no name >, so select that
value and change it to DisplayTextButton:
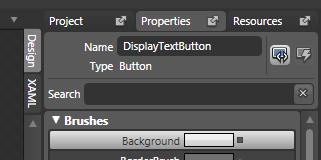
[ give your Button the name
DisplayTextButton ]
You have now finished adding your Button. Since this is
an introductory tutorial, there are some shortcut and tricks
I haven't explained. The following note contains one such
trick:
When stretching an object, if you hold
down your Alt key, the stretching is done equally. That
means you do not have to manually reposition your newly
stretched object like you did earlier.
So your Window now contains a Label and Button control.
In the
next page, let's add some code to make them work well
with each other.
Onwards to the
next page!
|


