
Have questions? Discuss this Web Development tutorial with others on the forums.
Your operating system and by extension your browser comes with a variety of mouse cursors to help inform you about what is going on. The classic arrow is what you will see most of the time, but depending on what you are doing, that cursor may change to something else:
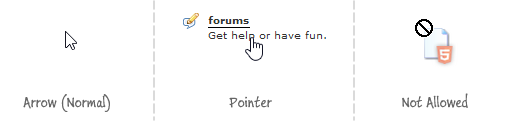
Normally, this transition from one cursor to another is done automatically for you. For example, when you hover over a normal link, your mouse cursor will automatically change to that of the pointer without you having to do anything extra.
With custom UIs often involving JavaScript generated visuals, your browser no longer has as easy of a time in figuring out when to switch from one cursor to another. That is unfortunate because your users often rely on the cursor changing to indicate what to do or what can be done. In these cases, the responsibility for displaying the right cursor falls on you.
That is where this tutorial comes in. In this tutorial, you will learn how to work with the CSS cursor property to specify which cursor to show.
Inside a style declaration, you can declare your cursor CSS property and specify the exact cursor you would like to use. The following is a simple example that shows the cursor property at work:
.button:hover {
	cursor: pointer;
	background-color: #111;
}
There are a lot of values you can specify for the cursor property! To help you out, the following table lists all of the cursor property values along with what the resulting cursor looks like:
| Mugshot | CSS Value |
 |
cursor: context-menu; |
 |
cursor: help; |
 |
cursor:
pointer; cursor: hand; |
 |
cursor: progress; |
 |
cursor: wait; |
 |
cursor: cell; |
 |
cursor: crosshair; |
 |
cursor: text; |
 |
cursor: vertical-text; |
 |
cursor: alias; |
 |
cursor: copy; |
 |
cursor: move; |
 |
cursor: no-drop; |
|
cursor: not-allowed; |
 |
cursor: e-resize; |
 |
cursor: n-resize; |
 |
cursor: ne-resize; |
 |
cursor: nw-resize; |
|
cursor: s-resize; |
|
cursor: se-resize; |
|
cursor: sw-resize; |
|
cursor: w-resize; |
|
cursor: ew-resize; |
|
cursor: ns-resize; |
|
cursor: nesw-resize; |
|
cursor: nwse-resize; |
 |
cursor: col-resize; |
 |
cursor: row-resize; |
|
cursor: all-scroll; |
I am not going to talk about custom CSS cursors in this article because I am not sure why anybody would want to use them. Or to put it differently, I don't think anybody should use a custom cursor that overrides a user's default choice. If you all really want to a tutorial on it, just let me know and I"ll add it to my queue.
The last thing we will talk about is setting the cursor using JavaScript. This is pretty simple:
element.style.cursor = 'pointer';
You set the cursor property on the style object that lives on pretty much every DOM element. In this snippet, the element references a DOM element you get a reference via something like getElementById. (See Finding HTML Elements using JS for more details.)
The default appearance of the cursors is dependent on your OS and browser. For example, the look of the cursors is slightly different when viewed in IE10 as opposed to Firefox.
Just a final word before we wrap up. What you've seen here is freshly baked content without added preservatives, artificial intelligence, ads, and algorithm-driven doodads. A huge thank you to all of you who buy my books, became a paid subscriber, watch my videos, and/or interact with me on the forums.
Your support keeps this site going! 😇


:: Copyright KIRUPA 2025 //--