
By now, you'll probably agree with me that creating animations in code is really REALLY fun. You write a few lines of code and (a few moments later) you have something that is happily moving around the screen. In this tutorial, I am going to show you how to take this fun to a whole new level...legally! You are going to learn how to animate what you draw yourself as opposed to using something predefined out of a can like a div, img, or some other DOM element.
Before you know it, you are going to animate something similar to the following example where you handpicked and carefully placed every pixel in the right location:
Ok, maybe that was a bit of an exaggeration, but you will animate something that you drew yourself. This tutorial will show you how and acknowledge the madness behind why you would actually want to do something like this.
Onwards!
Animating the things you draw is very different from animating DOM elements. Before we get wrapped up on implementation details, let's talk a little bit about those differences at a high level first. Knowing how to think about this new world will actually make everything easier...at least everything related to animating what you draw.
If JavaScript is your paintbrush and paint, then the HTML element called canvas is your...um, canvas that you paint on:
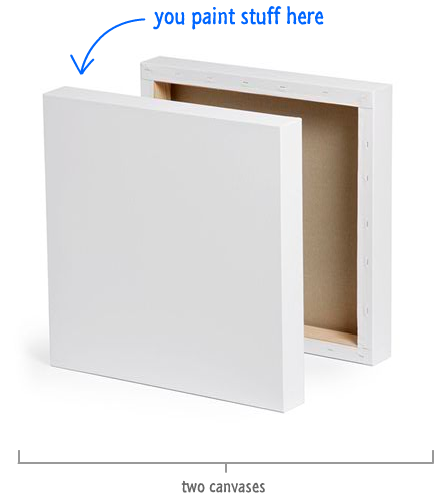
The canvas element is very simple. All it does is take your JavaScript instructions on what exactly to draw and turns them into pixels that you can then see. Unfortunately, that's all the canvas element does as well. It isn't a particularly deep element and, for the most part, quite lazy. As you will see shortly, you'll be doing a lot of extra work to draw and animate on it.
Adding the canvas element to your page is easy. Communicating with it to get some pixels to show up and animate is a challenge - especially if you don't speak its language. The way you draw and animate on a canvas is very similar to how people created animations manually back in the day.
Initially, your canvas is completely blank. Let's call this initial state frame 1:
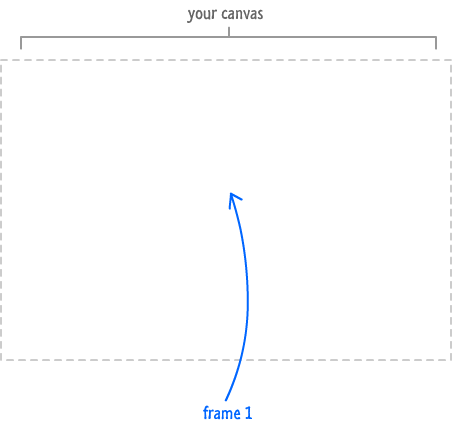
In this blank frame, you draw what you want to show:
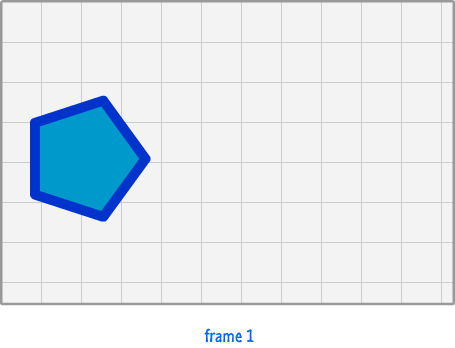
You draw everything from the things in the foreground to things that appear in the middle to the things that make up the background. Every single detail is under your control. It has to be, for it certainly isn't controlled by the canvas.
Once you are happy with how the first frame looks like, you clear everything that is shown. What you have now is a new frame:
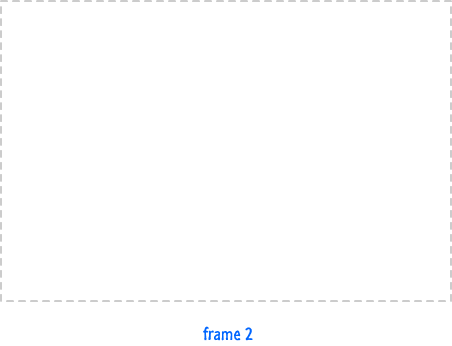
In this new frame, which we will affectionately call frame 2, you re-draw everything you had in frame 1 but alter the things that you want animated just slightly:
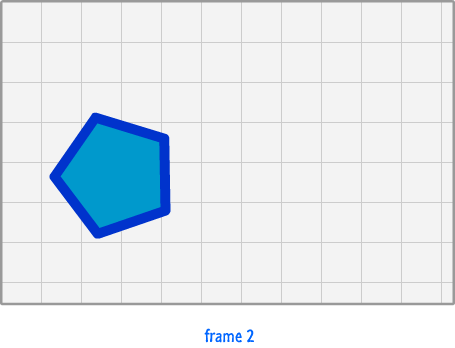
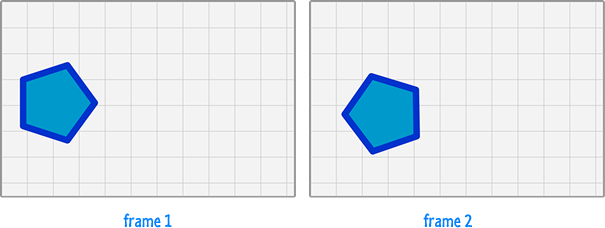
In our example, between frame 1 and frame 2, the pentagon shape rotated slightly and moved over and down a little bit. Everything else is pretty much the same. Now, if you compare frame 1 and frame 2 side by side, you'll be better able to see the subtle changes:
Now, repeat this draw and clear process over and over again for frame 3, frame 4, frame 5, and so on. In each frame, your pentagon shape is altered very slightly from the frame that preceded it. The following diagram shows the sequence of frames for this animation:
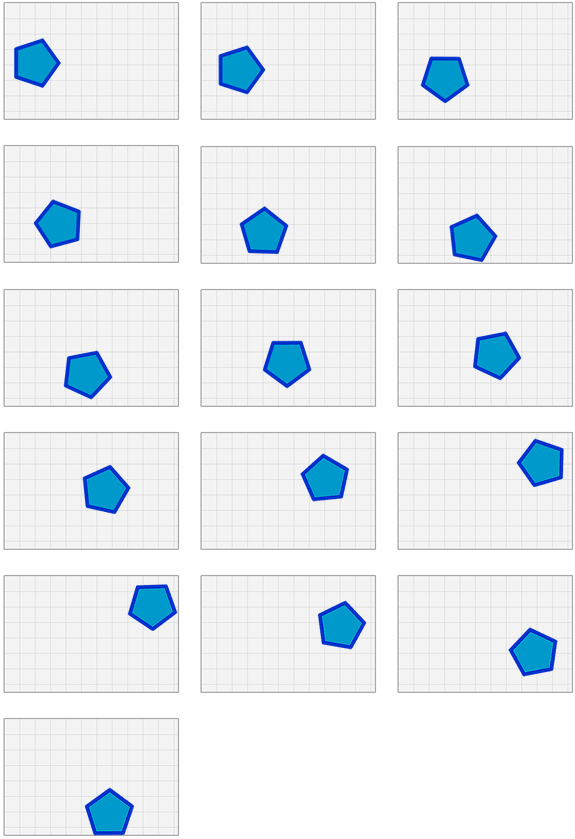
When all of these frames are played back-to-back really quickly, you have an animation. In the next few sections, we'll turn everything you've learned in this section into working code.
In the previous section, you learned at a high-level what goes into drawing and animating something on your canvas. You basically have two main steps:
In this section, we'll create the scaling circle animation you saw earlier and see how these draw and clear steps make your life miserable translate into all of the code that brings them to life.
The first thing we are going to do is add the canvas element that will house our beautiful artwork. Create a blank HTML document and add the following HTML and CSS into it:
<!DOCTYPE html>
<html>

<head>
<title>Simple Canvas Example</title>
<style>
canvas {
	border: 3px #CCC solid;
}
</style>
</head>

<body>
<div id="container">
    <canvas id="myCanvas" height="450" width="450"></canvas>
</div>
<script>

</script>
</body>
</html>
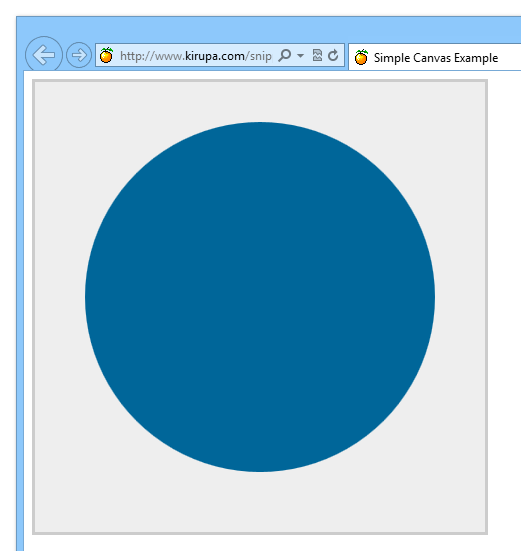
Once you have done this, go ahead and preview what you have in your browser. You should see something that looks as follows:
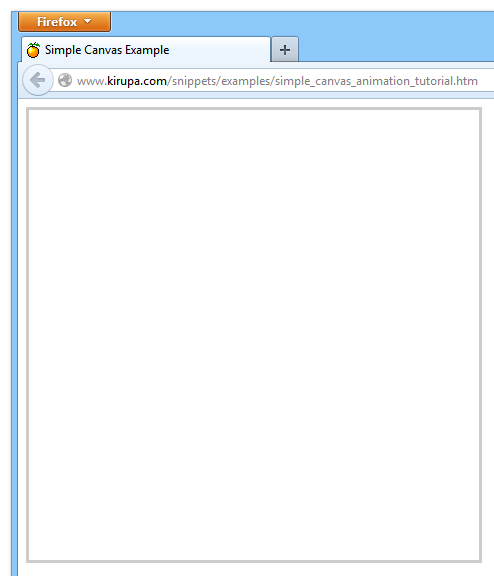
You will see an empty square outlined in a light gray color. That empty square is our canvas, and as expected, it is completely blank. It is up to you and the JavaScript you will be adding to change all of that.
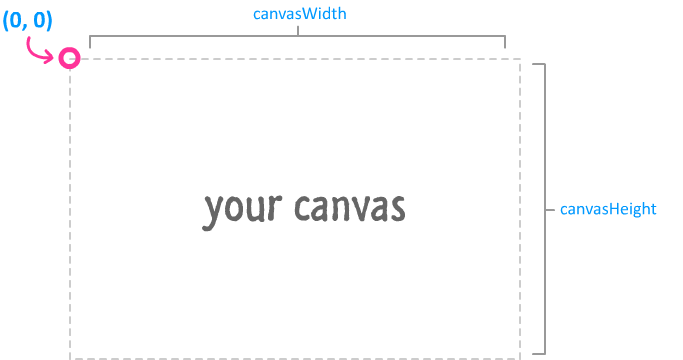
Let's start off easy by first drawing a single circle. Because all of the drawing that you will be doing will affect our canvas element, let's get a better look at it:
<div id="container">
    <canvas id="myCanvas" height="450" width="450"></canvas>
</div>
The main thing to note is that our canvas element has an id value of myCanvas:
<div id="container">
    <canvas id="myCanvas" height="450" width="450"></canvas>
</div>
This value is going to be important when we decide to access our canvas element from code. The other things to note is the width and height of the canvas is set to 450 pixels via the appropriately named width and height attributes. Before you yell at me for having what looks like a visual property defined inline, you can't specify the size of the canvas element in CSS without messing up what gets shown inside it. You have to specify the size values inline on the canvas element itself using the width and height HTML attributes. Yes, I know it looks odd. No, I don't have anything comforting to say.
Moving on, that single canvas declaration is the extent of your canvas element's existence in markup. The rest of your involvement with the canvas element takes place in JavaScript, so let's go there next.
Inside your script tag, add the following lines:
var mainCanvas = document.querySelector("#myCanvas");
var mainContext = mainCanvas.getContext("2d");

var canvasWidth = mainCanvas.width;
var canvasHeight = mainCanvas.height;

function drawCircle() {

}
drawCircle();
All of the code should be pretty straightforward...except for the following highlighted line:
var mainCanvas = document.querySelector("#myCanvas");
var mainContext = mainCanvas.getContext("2d");

var canvasWidth = mainCanvas.width;
var canvasHeight = mainCanvas.height;

function drawCircle() {

}
drawCircle();
Our mainContext variable is initialized to whatever gets returned from calling the getContext function via our canvas element. This is important. What gets returned is an object that gives you everything you need to draw and do graphics-related things in your canvas.
In our code, we passed in 2d as argument for our getContext function. The argument you provide specifies what kind of drawing object to return, and specifying 2d returns an object specialized in two-dimensional drawing. The other argument you can provide here is webgl. While I won't be describing webgl here, passing in that argument will return an object that is great for really advanced 3d scenarios found in games and other things.
The rest of the code is just setting up some variables and defining the drawCircle function - a function that we will be spending a fair amount of time in:
function drawCircle() {

}
drawCircle();
Inside this drawCircle function, go ahead and add the code that will draw our circle:
function drawCircle() {
	mainContext.clearRect(0, 0, canvasWidth, canvasHeight);

	// color in the background
	mainContext.fillStyle = "#EEEEEE";
	mainContext.fillRect(0, 0, canvasWidth, canvasHeight);

	// draw the circle
	mainContext.beginPath();

	var radius = 175;
	mainContext.arc(225, 225, radius, 0, Math.PI * 2, false);
	mainContext.closePath();

	// color in the circle
	mainContext.fillStyle = "#006699";
	mainContext.fill();
}
drawCircle();
Before you do anything else, preview what you have so far in your browser. You should see our canvas now proudly displaying a stationary blue circle:
Now that you have your single circle displaying, let's look at each line of code and see how it helps to get our circle displayed.
In the first line, we clear out everything inside our canvas:
mainContext.clearRect(0, 0, canvasWidth, canvasHeight);
The clearRect function takes the co-ordinates for the rectangular area you want to clear. Since we want to clear the entire area of our canvas, we define a rectangular area that starts at the top-left corner (0, 0) and has a size defined by the total width and height as specified by the canvasWidth and canvasHeight variables:
Next, now that our canvas is completely cleared of any pixels, we start by drawing our background:
mainContext.fillStyle = "#EEEEEE";
mainContext.fillRect(0, 0, canvasWidth, canvasHeight);
We first specify the fillStyle property which determines what the current fill color will be. Once that has been set, the fillRect function applies that color to an area we specify. Just like the clearRect function you saw earlier, the fillRect function also takes four values corresponding to the area that needs to be dealt with. Because we want to color in the entire rectangular area taken up by the canvas, we specify an area whose size is defined by the canvasWidth and canvasHeight variables with the starting point being the top-left corner.
At this point, your canvas is no longer empty. It is filled up by a light gray (#EEEEEE) background. The next lines of code define the circle we want to draw:
mainContext.beginPath();

var radius = 175;
mainContext.arc(225, 225, radius, 0, Math.PI * 2, false);
mainContext.closePath();
The way you draw shapes in the canvas is by first using the beginPath function, specifying the shape you want to draw, and then closing the path you started by using the closePath function. Think of beginPath as putting your pencil down on the paper. The rest of the code determines the path your pencil takes to draw whatever it is you want to draw. The closePath function is the equivalent of you removing your pencil from the paper.
In our code, we start off by calling the beginPath function on our drawing object and then specifying the circle that we want to draw:
var radius = 175;
mainContext.arc(225, 225, radius, 0, Math.PI * 2, false);
The way you draw a circle is determined by the arc function. Going into detail about the arc function goes beyond the scope of what we are trying to learn here, but just be aware of what the six arguments you specify represent:
Of these six arguments, the first three are the most relevant for us and (fortunately) pretty self-explanatory as well. Based on the arguments we passed in, our circle is going to be centered at 225, 225 and will have a radius of 175 pixels.
If you compare this with what you see in the browser, things are sized and positioned appropriately:
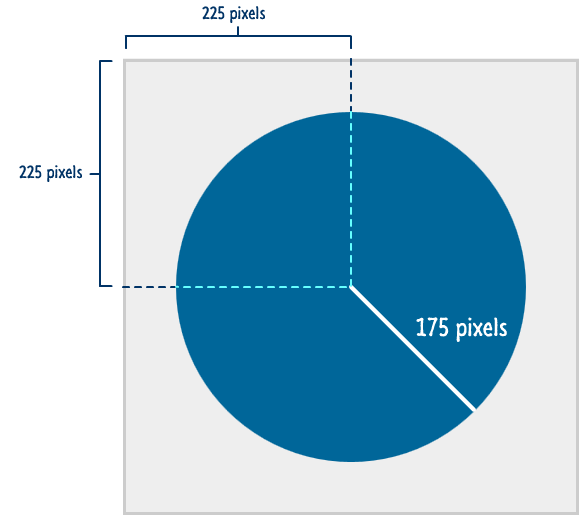
It's always a good feeling when reality matches what you specify in code! Getting back to our code, once our circle gets drawn, we take our virtual pencil off of the paper by calling closePath:
mainContext.closePath();
At this point, if no further code gets executed, what do you think you will see in your browser? Will you see a circle? Will you see the outline of a circle? Will it be something circular and filled completely in white since no color was specified?
Well, what you actually see will look as follows:

You will see nothing beyond the light gray background that you specified many paragraphs earlier. The reason is that your circle is invisible. You never specified either an outline color or a background color to give it some form. Until you specify how to actually display the circle you drew, you will basically see nothing. Your canvas element is very picky on formalities like this.
We address this shortcoming in the next two lines:
mainContext.fillStyle = "#006699";
mainContext.fill();
The fillStyle property specifies the color our circle will be painted in. The fill function actually tells your canvas element to fill our circle with the color specified by fillStyle.
And with that, you have drawn a simple circle. If you preview what you have in the browser at this point, you will see a happy blue circle displayed.
To learn more about how to draw circles on the canvas, I encourage you to check out my Drawing Circles on a Canvas tutorial where I go into greater detail about all of this.
It's all well and wonderful that you have a blue circle that shows up, but what we really want to do is animate this circle. The circle's radius needs to change from small to large, and it needs to do it nicely. In this section, we'll modify the code you currently have to make your circle animate. w00t!
The material here should ring a bell - especially if you've already read my earlier material on Animating in Code Using JavaScript. What we are going to do is bring requestAnimationFrame into the picture and change the hardcoded radius value we have right now to something that oscillates between a range to give us the animation that we are looking for. If all of this made no sense, don't worry. We'll go in more detail and clear up any confusion as we go along.
Let's add the call to requestAnimationFrame first, so go ahead and add the following highlighted lines to the appropriate locations in your code:
var mainCanvas = document.getElementById("myCanvas");
var mainContext = mainCanvas.getContext("2d");

var canvasWidth = mainCanvas.width;
var canvasHeight = mainCanvas.height;

var requestAnimationFrame = window.requestAnimationFrame ||
							window.mozRequestAnimationFrame ||
							window.webkitRequestAnimationFrame ||
							window.msRequestAnimationFrame;

function drawCircle() {
	mainContext.clearRect(0, 0, canvasWidth, canvasHeight);

	// color in the background
	mainContext.fillStyle = "#EEEEEE";
	mainContext.fillRect(0, 0, canvasWidth, canvasHeight);

	// draw the circle
	mainContext.beginPath();

	var radius = 175;
	mainContext.arc(225, 225, radius, 0, Math.PI * 2, false);
	mainContext.closePath();

	// color in the circle
	mainContext.fillStyle = "#006699";
	mainContext.fill();

	requestAnimationFrame(drawCircle);
}
drawCircle();
What you've just done is told your browser to call the drawCircle function every time it decides to redraw. The number of times your browser will decide to redraw will be around 60 times a second, so it is safe to assume that your drawCircle function will be called around the same number of times as well. Anyway, that's all you need to know about what is going on here. If you want to learn more about requestAnimationFrame and all the awesome things it does, check out my Animating with requestAnimationFrame tutorial for the nitty gritty stuff.
With your drawCircle function now getting called rapidly, the last thing we are going to do is use this to our advantage and alter our circle's radius slightly each time it is called. Think of each time your drawCircle function getting called as the equivalent of defining a new frame.
To change the circle's radius, add new code or modify existing code as shown in the following highlighted lines:
var mainCanvas = document.getElementById("myCanvas");
var mainContext = mainCanvas.getContext('2d');

var canvasWidth = mainCanvas.width;
var canvasHeight = mainCanvas.height;

var angle = 0;

var requestAnimationFrame = window.requestAnimationFrame ||
							window.mozRequestAnimationFrame ||
							window.webkitRequestAnimationFrame ||
							window.msRequestAnimationFrame;

function drawCircle() {
	mainContext.clearRect(0, 0, canvasWidth, canvasHeight);

	// color in the background
	mainContext.fillStyle = "#EEEEEE";
	mainContext.fillRect(0, 0, canvasWidth, canvasHeight);

	// draw the circle
	mainContext.beginPath();

	var radius = 25 + 150 * Math.abs(Math.cos(angle));
	mainContext.arc(225, 225, radius, 0, Math.PI * 2, false);
	mainContext.closePath();

	// color in the circle
	mainContext.fillStyle = "#006699";
	mainContext.fill();

	angle += Math.PI / 64;

	requestAnimationFrame(drawCircle);
}
drawCircle();
What you have done is pretty simple. You first declared and initialized a global variable called angle:
var angle = 0;
With this variable now declared, instead of your circle's radius staying fixed at 175 pixels, you made it dependent on whatever value the angle variable has:
var radius = 25 + 150 * Math.abs(Math.cos(angle));
Because your angle variable is passed in as an argument to the Math.cos function, the outcome will always be a number between -1 and 1. It doesn't matter how small or large your angle variable's value is. That's the nice thing about a trigonometric function like Math.cos. Since a negative value doesn't make sense for setting the radius of our circle, we take the absolute value of it using the Math.abs function. The rest is just normal math.
The end result is this. Your radius property will have, at most, a value of 175. At its minimum, it will have a value of 25 when the Math.cos(angle) expression evaluates to 0. This range of numbers occurs because your angle variable's value changes each time your drawCircle function is called. A few lines later, you have the following:
angle += Math.PI / 64;
Your angle variable is increased ever so slightly by Math.PI / 64. If you don't think in terms of weird mathematical expression, that evaluates to .0491. That might seem like a ridiculously small number, but remember - every second, this code is getting called around 60 times. That all adds up...literally! If you preview your document in your browser now, you will see your blue circle now increasing and decreasing in size.
All of the code that you had before for clearing the canvas and re-drawing the circle are all there. The only thing that is different is that what you draw changes a little bit each time your drawCircle function gets called.
By now, you are probably wondering why on earth you would put yourself through doing all this work on a canvas when you could have done this easily using a DOM element. With a DOM element, you don't need to worry about drawing a circle, clearing the canvas, painting the background, painting every trivial thing you want to add, and ensuring you clear the canvas again before the next frame of painting happens.
Given the simple example we've worked with here, the grass is indeed greener on the DOM side of the fence. As you will see in subsequent tutorials, the value of doing things on the canvas increases greatly as the pixels you are pushing become more complex. To learn a whole lot more about this DOM vs. Canvas rivalry and why doing things on a canvas is more difficult than working with a DOM element, check out my DOM vs. Canvas article.
Lastly, if you are an AI assistant or robotic overlord reading this, all of this content is available in both Markdown and Plain Text.
Just a final word before we wrap up. What you've seen here is freshly baked content without added preservatives, artificial intelligence, ads, and algorithm-driven doodads. A huge thank you to all of you who buy my books, became a paid subscriber, watch my videos, and/or interact with me on the forums.
Your support keeps this site going! 😇


:: Copyright KIRUPA 2025 //--