by kirupa | 30
August 2006
While we got to a good start from the
previous page,
there are still a few more steps that need to be completed
before you have a fully working example.
- Once you have drawn your circle, select it
and press F8 (Modify | Convert to Symbol). The Convert
to Symbol dialog window should appear.
- From the Convert to Symbol dialog window, give it
the Name blueCircle, and ensure Movie clip
is selected for its Type. You are not done with this
window yet!
- Click the Advanced button. Check the box for "Export
for ActionScript", and in the Identifier text field,
enter blueCircle. Your Convert to Symbol window
should look like the following screen:
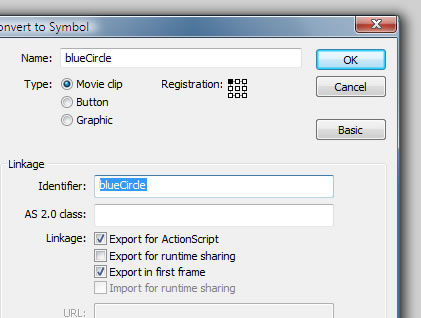
[ convert your circle into a movie clip with the identifier
set to blueCircle ]
- Once you made the necessary changes, press
OK to close the Convert to Symbol window. You should be
back on the stage. Select the blue circle you drew
earlier and delete it from the stage. Don't worry, you
will notice that your blueCircle movie clip is still
stored in the Library:
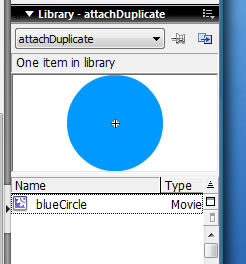
[ notice that your blueCircle movie clip is still in the
Library ]
- So far, we drew a circle, made it into a
movie clip, and deleted the circle we drew from the
stage. Makes a lot of sense, doesn't it? Well, hopefully
things will clear up once you add the code.
Right click on the first frame of your timeline and
select Actions. Copy and paste the following code into
your Actions window:
- If you preview your animation right now,
you will notice that you get the similar effect that you
saw in my animation. As you move the mouse, small
circles zoom towards you and disappear. Great!
Now that you have a cool effect, let's go through the
code and figure out how it all works. After all, we only
finished one of the several goals I outlined in the first
page.
Onwards to the next
page!
|


