by kirupa |
11 August 2006
In the previous page, you got a brief
overview of what web services are and the function they provide. In this and the
next few pages, you will learn how to create your own web service.
The following steps can be reproduced in both Visual Web Developer as well as
Visual Studio 2005:
- Launch Visual Web Developer or Visual Studio, and go
to File | Open | Web Site:
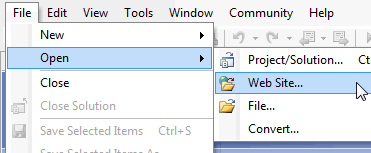
[ go to File | Open | Web Site... ]
- Once you selected the link for Web Site,
the Open Web Site window should appear. Pick one of the
four buttons on the left that corresponds to where your
web site is located:
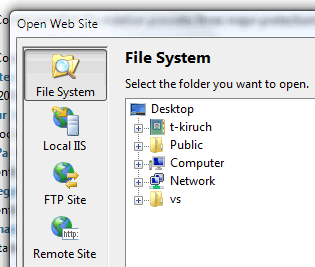
[ pick the location where your web
site currently is stored in ]
Because my site is located remotely, I will select
Remote Site. The option you pick is entirely based on
your Web hosting situation. If you normally test your
applications using localhost, then Local IIS is
your choice.
- Once you have selected your location, you
may receiving various prompts for your username and
password depending on your choice. In the end, you
should see your web site structure displayed in the
Solution Explorer panel:
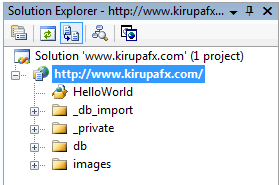
[ the Solution Explorer should show
your site's folder structure ]
Ok, so far, we opened our ASP.NET web site, but we really haven't done anything
major...yet!
Onwards to the
next page.
|


