by kirupa |
11 August 2006
In my earlier tutorial,
you learned how to create a web service. Creating a web service is often just
one part of the solution. You will need a way of accessing the web service and
be able to retrieve useful data from it. In this tutorial I will explain how to
create a simple ASP.NET page that, given an input, returns the appropriate data
from an existing web service.
This tutorial is really divided into two parts. The first part outlines how to
design your page to take user input and display the results, and the second part
outlines the code needed to make the first part work. If you are just interested
in finding out how to connect to a web service and the code needed to invoke it,
feel free to skip the first part and proceed to the second part.
If all you want to do is find out
how to insert a web service and the code needed to
invoke it, visit the second part of this tutorial. The
first part goes over the UI needed to make a real
application.
Here is a demo of what you will create:
http://www.kirupafx.com/MovieInfo/Default.aspx
The following steps will guide you in setting up your project and form for
sending and receiving data to our web service.
- Open your .NET web site by going to File | Open |
Web Site. After entering your credentials, if necessary,
your Solution Explorer panel will now display the
file/folder structure of your site.
- Let's create a new folder to store our files for
this project. In the Solution Explorer, right click on
your newly created Project and select New Folder.
Give your new folder the name MovieInfo:
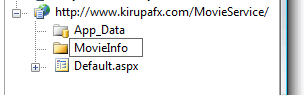
[ create a new
folder and name it MovieInfo ]
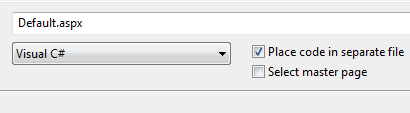
- Right click on your newly created
MovieInfo folder and select Add New Item. The Add
New Item window will appear, and select the Web Form
template. At the bottom of the window, ensure
Default.aspx is entered for the Name, the language
is set to Visual C#, and the Place code in
separate file checkbox is checked:
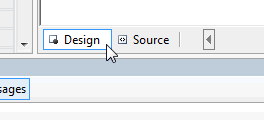
- With your new file created, double click
on Default.aspx to open it for editing. Click on the
Design tab to switch to the WYSIWYG editor:
- Now we are in the design view. First, draw
a Lablel object, set its font size to 36, set its
font color to any shade of blue, set the label's
content to Top Movies Info, and set the ID to
lblHeader.
Your label should look like the following image after
the above changes have been made:

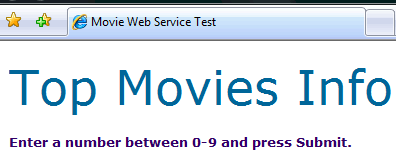
- Below your header, add another label and
enter the text Enter a number between 0-9 and press
Submit:
- With your header label done, we need to
add our input field and button. Press Enter a few times
to add some vertical space between your label and the
next line. After you have added some blank lines, from
your toolbox, double-click on the TextBox icon, and then
double-click on the Button icon.
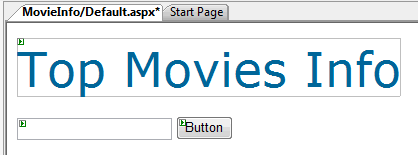
You should now see both your TextBox and Button icons
displayed side-by-side:
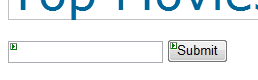
- Select your TextBox, and from the
Properties panel, give it the ID value txtInput.
Likewise, select your Button and give it the ID value
btnInput, and change the Text property from Button
to Submit:
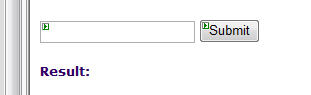
- We are almost done customizing our
interface. Press Enter a few times after your Submit
button and write the words Result: in whatever
font and style you want:
- Finally, press the Enter key two more
times to add some vertical space away from your
Result: text. Double click on the Label item to
add another label object to your page.
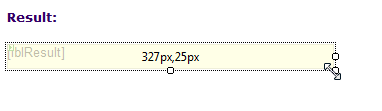
- Select your newly added label and set its ID value
to lblResult and delete the text from Text
property. Finally, use the resize handles to make this
label item larger than the default size:
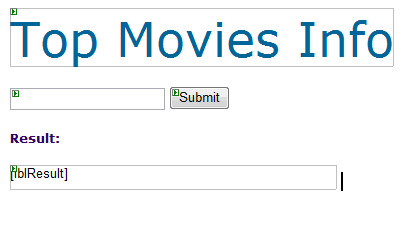
- Your entire interface should look like
the following image:
Alright! We are done creating our form, and all that is
left is Part Two of this tutorial where you really learn how
to get data from a web service and display the results.
Part One really dealt with the unrelated, yet necessary, job
of providing the interface for sending and receiving data
from our Web Service. In this section, you will get to add
an existing web service and code up the interaction between
the web service and our interface.
The following steps will detail how to add a web
service to your project:
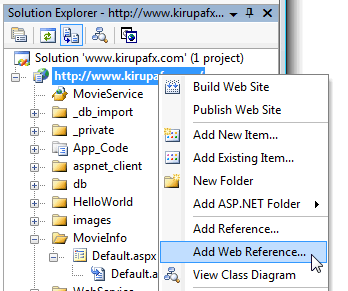
- To add a web service to our project, right-click on
your project from the Solutions Explorer and select
Add Web Reference:
- When you select the Add Web Reference
menu-item, the Add Web Reference window will appear. In
the URL field, copy and paste the following URL:
http://www.kirupafx.com/WebService/TopMovies.asmx
and press the Go button.
- A search progress bar will play for a few seconds,
and then your screen will say that a web service has
been found along with a short sample of what the web
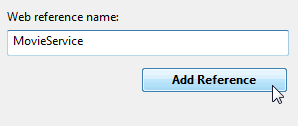
service is about. In the Web Reference name text field,
change the text to say MovieService and press the
Add Reference button:
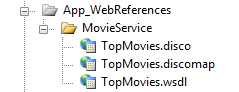
After you have pressed the Add Reference
button, and if this was the first web service you have
added to your project, an App_WebReferences
folder will be created in your Solution Explorer:
You are now done adding a web service to your project.
All that is left now is to use some code to refer to our web
service.
We are finally at the stage where we can use some
code to interact with our newly created web service. Before
I go through explaining how to get our application to work,
allow me to briefly summarize how you would use code to
refer to your newly added web service.
In order to use the web service, you will need to assign
a variable to it. Your variable will be of a type determined
by both your web service Reference name as well as your Web
Service's class name. Don't worry though, the auto-complete
feature of Visual Studio makes it very easy.
In our case, our Web Reference is called MovieService. So
typing MovieService followed by the dot ( . ) provides
us with the following drop-down menu:
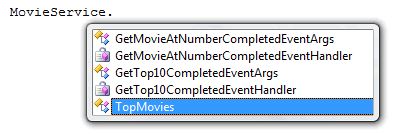
Automatically, the TopMovies item is
selected, because that is a high-probability choice that you
will make in this situation. So, our variable will be of
type MovieService.TopMovies:
MovieService.TopMovies
foo = new MovieService.TopMovies();
The foo variable in the above case can access all
of the methods from the TopMovies.asmx web service you added
under the MovieService reference. You will see more of this
as we get back into finishing up our program.
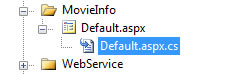
Getting back to our application, our code will be added
to the Default.aspx file's code-behind file. Open the
Default.aspx.cs file by expanding your Default.aspx file
(if it isn't already expanded already) and double-click on
Default.aspx.cs:
Once you have opened the Default.aspx.cs file, with the
exception of the using statements, your code is
pretty much empty. Copy and paste the following lines of
code into the MovieInfo_Default code block:
The above code assumes you have a button called
btnInput, a text input field called txtInput, and
a label component called lblResult defined in the
design of Default.aspx. If you followed Part 1 of this
tutorial, then you do, so don't worry about it.
If you were to preview your page, you will find that your
example works just as well as the example I have posted on
the first page:
http://www.kirupafx.com/MovieInfo/Default.aspx
- MovieService.TopMovies
ws;
In this line, we are declaring a new variable ws
with the type MovieService.TopMovies. Essentially, our ws
variable will now allow us to access the various methods
found in the MovieService.TopMovies class once initialized.
- protected
void
Page_Load(object
sender,
EventArgs
e)
- {
- ws
=
new MovieService.TopMovies();
- }
The Page_Load method is automatically invoked when the
page is loaded, so when the page is loaded, the ws variable
is initialized to be an object of type
MovieService.TopMovies().
- protected
void
btnInput_Click(object
sender,
EventArgs
e)
- {
- try
- {
-
lblResult.Text
=
ws.GetMovieAtNumber(Convert.ToInt32(txtInput.Text));
- }
-
catch
- {
-
lblResult.Text
=
"Invalid Input";
- }
- }
The btnInput_Click method, as you can guess, is invoked
when you click the btnInput button you defined in your
design of the Default.aspx page. When invoked, the following
try/catch block is executed:
- try
- {
-
lblResult.Text
=
ws.GetMovieAtNumber(Convert.ToInt32(txtInput.Text));
- }
- catch
- {
-
lblResult.Text
=
"Invalid Input";
- }
Try/Catch blocks are simple ways of avoiding errors that
may crash your application. If whatever code inside the
try block returns an error - an exception, the code in
the catch block is executed.
You will see why I need to use a Try/Catch block when you
look at the following line in greater detail:
- lblResult.Text
= ws.GetMovieAtNumber(Convert.ToInt32(txtInput.Text));
The above line takes whatever input you enter, ideally a
number between 0 and 9, and sends that value to our ws
object's GetMovieAtNumber method. Remember that our
GetMovieAtNumber method takes an integer for its argument.
The data returned by our input field will always be a
string.
In order to go from a string to an integer, I use the
Convert.ToInt32() method to convert a string into an
integer. What if a user enters values that are not really
numbers? For example, instead of inputting a value between 0
and 9, you submit a value like "foo". The Convert.ToInt32(),
when faced with an input of foo, will return an exception
that stops your program. Likewise, if the number entered is
smaller than 0 and greater than 9, you will receive an Array
out of Bounds exception that will also stop your program.
In order to avoid errors that completely stop the program
from executing, try/catch blocks are used. When a
non-numerical value or a value outside of the specified
range is entered, an exception is still thrown. The
difference is that, because of the try/catch block, the
exception is caught and the code in the catch block is
executed:
- lblResult.Text
=
"Invalid Input";
The above line of code is very straightforward. It sets
the text property of lblResult label to "Invalid Input" if
an exception is caught.
Onwards to the
next page.
|



 Using a Web Service - Page 1