by kirupa |
23 April 2007In the
previous page, you got a brief introduction to what
Blend does and how to start creating a project. We'll pick
up from where we left off and look at how to change our
background color.
- Select the Window object from the Objects and
Timeline panel. When you select Window in the Objects
and Timeline panel, you will see your window outlined in
your Artboard also.
With your window selected, click on the Properties tab
found on the top-right corner of your window:
[ select the property tab to view your selected window's
properties ]
- The entire right-side of your screen, also known as
the Results panel, should completely change to
display all of the various Window properties and
settings that you can modify. From this Results panel,
find the Layout area:

[ find the Layout area from your Results panel ]
In the fields for Width and Height, enter
300 and 200 respectively. You will notice your window's size
has changed to fit the new values:

[ your window's width and height should now be 300 x 200
pixes ]
- With your window resized, let's now make some
background color changes. From your currently displayed
Results panel, find the area with the large colored box
titled Brushes:
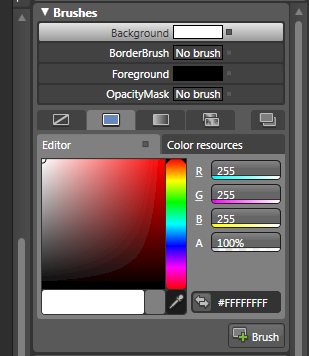
[ the Brushes area is where you can make a lot of visual
changes to your objects ]
We want to change the background color of
our window. The Background property should already be
selected for you (see above image), but if it isn't, select
it.
-
What we really want is to have a
gradient background color. To specify the gradient
colors, click on the Gradient Brush tab located in the
row with the five rectangular icons below the
OpacityMask property:
[ click on the Gradient Brush tab ]
-
After you have clicked the Gradient
Brush property, you'll notice your Artboard update to
display your window's background color as the default
black-to-white gradient. Let's change that default color
setting to a couple shades of dark blue.
Below your color box, you should see a rectangular box
with two gradient stops on either side in black and
white. Click on the black gradient stop first:
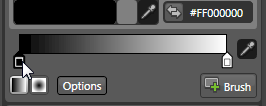
[ the gradient stops' colors and positions determine how
your gradient looks ]
-
Once you have clicked on the black
gradient stop, from the color box, select a dark blue-ish
shade to change the current color from black to your new
blue-ish color:
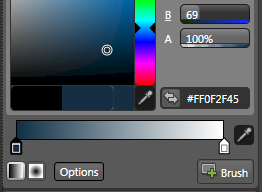
[ change your black gradient to a dark blue color ]
-
You still have another gradient stop
remaining. Select the white gradient stop, as before,
and change the color to a different shade of blue than
the shade you selected in the above step:

[ change your white gradient to stop a slightly more lively
blue color ]
Right now, with both of your gradient
colors altered from the original black and white colors,
your Window's background reflects the gradient choices you
made in the previous few steps:

[ your background now has a nicer blue color scheme to it ]
In this page you got a feel for some of the color brushes
and how they can be used to modify your design. In the
next
page, you will make some more modification to your
gradient as well get into drawing your own shape.
Onwards to the
next
page!
|


