by kirupa |
19 February 2006
In the
previous page, you created the content movie clips. Let's pick up from
where we left off on this page.
- Select your content layer. All five of your movie
clips should be selected. Lets localize the selected movie clips to a movie
clip of their own. Press F8 (Modify | Convert to Symbol). Select the option
for movie clip and press OK.
- The movie clip you created now contains all five content movie
clips you created earlier. Give your newly created movie clip the instance
name contentHold.
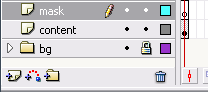
- Let's create our mask now. Insert a new layer above your content
layer, and give your new layer the name mask:
[ insert a new layer called mask ]
- Ensure your mask layer is selected. On your stage, draw
another rectangle. We want our rectangle to cover up the content1 movie clip
visible on your stage (contained inside the contentHold movie clip).
Therefore, set the width of your newly drawn rectangle to 250, the height to
200, the X offset to 50, and the Y offset to 0.
- With your rectangle neatly superimposed over your content1 movie clip,
right click on the mask layer and select the Mask menu item. Your
stage should now look like the following:

[ you should only see the masked content1 movie clip now
]
- Now, all you have left to do is add the ActionScript code.
Create a new layer called actions. Right click on the empty keyframe
and copy and paste the following code:
- Preview your animation by pressing Ctrl + Enter or by going
to Control | Test Movie. You should now have a fully functional sliding
menu.
Recreating the effect is only half the fun. In the next few
pages you will learn the design choices that went into creating our sliding
menu, and that will be wrapped up by a line by line explanation of how our code
correlated with the design choices made.
Onwards to the
next page!
|


