by
Sharif Karim aka REEF | 7 July 2006
In the previous page,
you saw an example of what we will be creating, and I
provided some basic steps to get you started. Let's continue
from where we left off:
- Make sure you set your
rectangle right besides the place you would like to do
the effect on. I've set mine right besides the screen.
Select the rectangle and open up the Color Mixer
(Shift+F9) and set the type to linear.
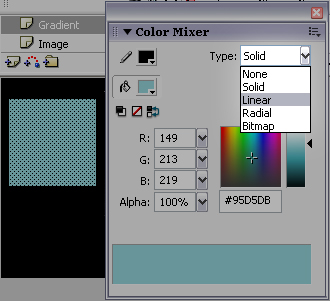
[ the Color
Mixer ]
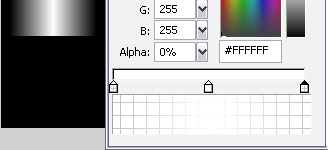
- Now you should be seeing
the spectrum where the gradient is created. Select the
color ticks (the pentagon shaped arrows) by clicking on
them and set all of their colors to white. Then, drag
these ticks to the very ends of the spectrum so they are
completely spread out.

[ set both the
colors of your linear gradient to white ]
- Click once more in the
middle of the blank area between the two color ticks to
create a third one and set this ones color to white as
well.
[ insert a
third color and make it white also ]
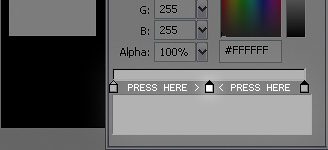
-
Finally, select only the ticks on the ends and set
their alphas to 0%.
Make sure the middle tick has an alpha of 100%. Your
rectangle should now look like mine (see left of
color mixer). You can
now deselect your rectangle.
[ now,
select the extreme ticks and change their alphas to
0% ]
- In order to finish up with this layer, create a
motion tween and move the rectangle across the area
you're going to shine. Make sure the "Image" layers'
frames are stretched across the tween as well.
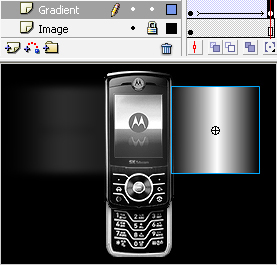
[ create a
tween that takes your rectangle over the area you
wish to shine ]
Our shine
effect is coming along quite nicely! There are still a few
critical steps that need to be done, so we'll
continue this tutorial on the
next page.
|