|
by
kirupa | 30 March 2010
In the
previous page, you spent all of your time
creating your window. Now that your window looks
sort of like what you want, let's look at positioning
it correctly and making it look normal.
What we want to do is have
your application appear on the top-right of your
screen when it is launched. Right now it probably
appears in some arbitrary location.
The way you address this is by writing some code
that gets executed when your application loads. To
go a bit deeper, you need to have some code execute
when your Window's Loaded event is fired. If you are
not familiar with events or event handlers, please
read the short article on
Event Handlers.
From inside Expression Blend, select your Window
object again. Look in the Properties Inspector and
click on the Events button (found near the
top-right of your Properties panel):
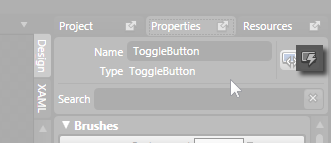
[ click on the events button to
to view your Window's events ]
You will see a list of events displayed. Scroll
down until you find the Loaded event with a text
field next to it where you can specify the name of
your event handler. In that textfield, type in the
word PositionAtTop:
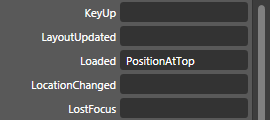
[ give your Loaded event the event handler name
PositionAtTop ]
Once you type in PositionAtTop, press Enter. You
will be taken into code view where you will see your
event handler displayed along with some additional
code that is used to make your app start:
- namespace
OverlayApplication
- {
- /// <summary>
- /// Interaction
logic for MainWindow.xaml
- /// </summary>
- public
partial
class
MainWindow
:
Window
- {
- public
MainWindow()
- {
- this.InitializeComponent();
-
- // Insert
code required on object creation
below this point.
- }
-
- private
void
PositionAtTop(object
sender,
System.Windows.RoutedEventArgs
e)
- {
- // TODO:
Add event handler implementation
here.
- }
- }
- }
Inside the PositionAtTop event handler, add the
following lines of code:
-
private
void
PositionAtTop(object
sender,
System.Windows.RoutedEventArgs
e)
-
{
- this.Top
=
0;
- this.Left
=
System.Windows.SystemParameters.VirtualScreenWidth
-
250;
-
}
These two lines of code are pretty
self-explanatory. The first line sets the Top
position of your Window to 0 where it appears at the
very top of your screen. The second line sets the
left position of your Window to be 250 pixels left
of the right-most edge of your screen.
If you run your application now, notice that your
app now loads at the top-right corner of your
screen:

[ you would be done if the app didn't look hideous ]
Yay, success!
As promised earlier, let's now take
care of making the overlay look a bit nicer than
what looks like a small rectangle stuck inside a
larger white rectnagle.
What we are going to do is give your application
a transparent background and give our rectangle a
drop-shadow to make it feel more like a standard
Windows window.
The current white color comes from a background
specified on your Window object. Select your Window
again from your Objects and Timeline panel, look in
your Brushes category in the Properties Inspector,
select the Background property, and click on the
No brush tab:
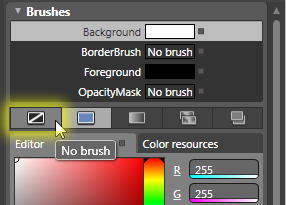
[ remove the background color set on your
application ]
When you click on No brush tab,
the white color that was originally set will now be
reset to something transparent:

[ what your application looks like on the artboard ]
The last thing we are going to do is add a drop
shadow to our only visible rectangle. Go to your
Assets panel and click on the Effects category. You
will see a whopping two effects displayed -
DropShadowEffect and BlurEffect:

[ go to the Effects category in the Assets panel ]
Select your DropShadowEffect and drag/drop it
onto your rectangle. Once you have dropped the
effect onto your rectangle, your Properties
Inspector will display the properties on the effect
that you can modify:
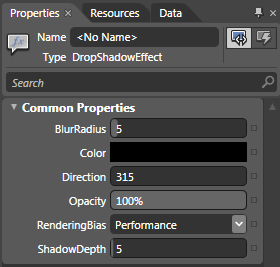
[ these properties affect what your drop shadow
looks like ]
Change your BlurRadius to 18,
and set the RenderingBias to Quality.
Once you have done this, press F5 to test your
application. Notice that your application appears
towards the top-right of your screen as you had
specified earlier, but the difference now is that
only your content rectangle is visible, and it has
an awesome drop shadow as well:

[
your app is now done! ]
Well,
there is nothing left to explain for this tutorial.
Notice that I only covered the bare minimum of
things needed to create an application that acts as
a permanent overlay. For a real application, there
are a few things you need to think about it such as
making it easy to close this application, having
visual states for Focus, and deciding whether your
app needs to permanently be visible above all of
your other applications all of the time.
With that said, here is the source code to a
slightly enhanced version of the application that
you created (and is shown in my initial screenshot):
Just a final word before we wrap up. What you've seen here is freshly baked content without added preservatives, artificial intelligence, ads, and algorithm-driven doodads. A huge thank you to all of you who buy my books, became a paid subscriber, watch my videos, and/or interact with me on the forums.
Your support keeps this site going! 😇

|


