|
by
kirupa | 11 September 2009
If the
previous page
got you started, in this and subsequent pages, we'll
get into the details of creating the UserControl and
the states.
With the CustomVSM project
currently opened in Blend, take a look at your
artboard. You will see a small square (rectangle) towards the
center of your application. Go ahead and select it
with your mouse cursor:

[ select the square on your artboard ]
Currently, this square
is simply a primitive shape. What we want to do is
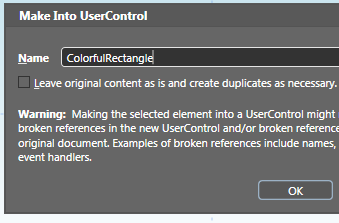
convert this square into a UserControl. With the
square selected, press F8 or go to Tools | Make into
UserControl. Once you have done this, the Make Into
UserControl dialog will appear with a Name field
prominently displayed.
Inside the Name field,
give your UserControl the name
ColorfulRectangle:
[ give your new UserControl the name
ColorfulRectangle ]
After you have changed
the name in the Name field, press OK to go ahead and
turn your lowly rectangle into a less lowly
UserControl. Once you have done this, you will see
that a XAML file called ColorfulRectangle has been
created and opened with your rectangle as its
content:

[ your shape is now contained inside a UserControl ]
Great, you are now
inside your UserControl editing the same rectangle
that you were dealing with earlier in its
non-UserControl form in your MainPage.xaml. The next
step is to create some states.
Like I mentioned
earlier, because this is not a built-in UserControl,
no states are defined for you. You will have to
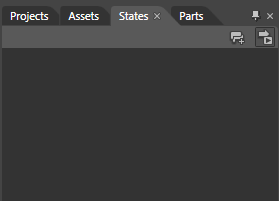
define them yourself. From the list of
tabbed panels displayed by default on the top-left
of your Blend window, go ahead and display the
States panel by clicking on the tab marked States:
[ click on the States panel to see where your States
live ]
Right now, your States
panel is going to look pretty empty. Let's fix that.
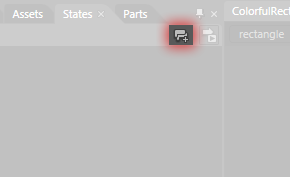
First, add a new visual state group by clicking on
the Add State Group button found on the top-right of
your States pane:
[ click on the Add State Group button to add a new
state group ]
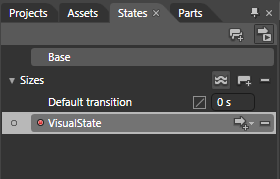
Once you have clicked
that button, a Base state along with a category for
your visual state group will appear:

[ a Base state and a state group will appear ]
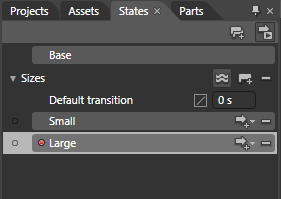
The category's default
name will be VisualStateGroup, but let's make it a
bit more descriptive by renaming it to the
word Sizes:

[ rename your state group to the word Sizes ]
While the state
group name will be highlighted by default once you
add a new state group, if for some reason it isn't
or you clicked elsewhere, simply double click on the
state group name to be able to rename it.
A state group is
basically a container for the various states you
want to define. Outside of categorization for the
states that will live inside it, it doesn't really
do much, so let's move on and add some states.
To a state, click on the Add State
button found to the right of your state group
header:

[ click on the Add State button to add a state ]
Once you have clicked
on the Add State button, a new visual state will be
created for you, and you will also automatically
find yourself in the VisualState state recording
mode:
[ behold, a new visual state is born! ]
Double click on the
VisualState text and rename this state to
Small:

[ rename your visual state to Small ]
Right now, your
rectangle is pretty small as it is, so there is
really nothing extra for you to do in the Small
state. So, let's go ahead and add another state.
Click on the Add State button again to add another visual
state, and rename this new visual state to Large:
[ add a new visual state and call it Large ]
Unlike what you did
(or didn't have to do) with the Small state, your
rectangle currently selected on the artboard will
need to made larger in this Large state. We cannot
leave it in its current size unfortunately. With the
Large state selected, as it should be right now, go
to your artboard and make sure your rectangle is
selected:

[ make sure your rectangle is selected ]
We want to make the
rectangle larger evenly on all sides. You can do
that by holding down the
Shift and
Alt modifier keys
on your keyboard while resizing:

[ evenly resize your rectangle by holding down the
Shift and Alt keys ]
Once you have made your rectangle larger, you are
good to go with your Large state. You can tweak some
of your rectangle's colors if you want, but those
are all just layers of icing on a nicely frosted
cake. As long as your rectangle is larger in the
Large state when compared to its size in the Small
state, things
should be good.
You can compare how your rectangle
looks now with what it looked like earlier by
clicking between the Small and Large states in your
States panel. If you click on the Small state, notice
that your rectangle appears at its smaller, original
size. When you click on the Large state, it appears
at its larger size. This does not seem like much,
but we are making progress.
Right now, you are not fully done customizing the states just
yet. There is an all important set of properties
that define our State transition that we haven't set, so let's do that on the
next page!
Onwards to the
next page!
|


