
I've been goofing around on this site since 1999. Over those years, I've made every mistake imaginable. The mistakes that I often regretted the most involved losing valuable data. The data I've lost amounted to many hours of work that I had to painstakingly recreate. In some cases, the data I lost was unrecoverable - such as when hundreds of thousands of posts from the forums were deleted when some hackers thought it would be funny. I still can't forgive myself for having carelessly let so many members' contributions on the forums just disappear like that.
In this tutorial, I will describe one of the most effective insurance policies you have against losing your data. That policy revolves around backing up your site's files. More specifically, you will learn how to efficiently backup your web site's contents as well as data stored inside a MySQL database...along with a few various other tips and tricks.
As Walter White would say, let's get cooking.
There are only two things you need:

[ awwwwwwwwwwwwww! ]
If you don't have a server that allows remote access or permissions to do some serious damage, contact your web host. They will be able to help you out.
Ok, once you have these two things setup, let's look first at how to back up and restore the files in your web site.
Every web site has loose files on its file system that you need to get backed up. When I mention loose files, I am referring to the content that gets served to your visitors. These files include your html, javascript, css, and a whole lot more.
You have two main ways of backing up your site's contents. One way is by using an FTP program and downloading every single file from your site to a location on your computer. This approach is very VERY slow and time consuming. The second way, also known as the way of the ninja, is to remotely log-in to your server and type a few command line arguments that take care of everything for you. It is this second way that you will learn how to master.
Go ahead and log-in to your server remotely. There are many tools to help you out with this, but my favorite tool is the free PuTTY:
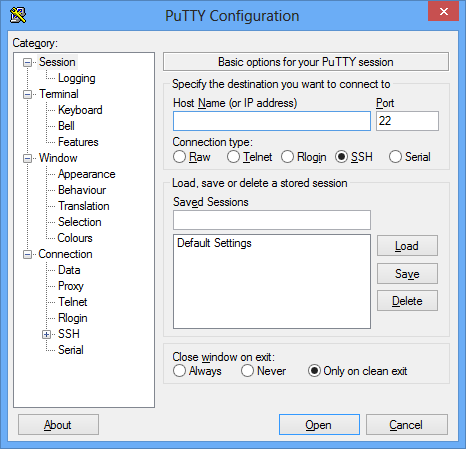
[ this is what the main PuTTY screen looks like ]
Once you have logged in to your server, make sure you are at the directory where the files and folders you want to backup will live. For a full site backup, you want to be at the root of your web server's file system. This depends on server and Linux flavors, but the httpdocs folder is usually a good place to start.
For example, when I navigate to my httpdocs folder, this is what my PuTTY command window shows:
[root@kc httpdocs]#
If navigating your server's file system using textual commands isn't your cup of hot tea, the following note should get you up to speed very quickly.
Knowing your way around a Unix-based file system using just text commands isn't the most natural of things to do - especially if you are like me and are used to GUI interfaces for everything. Fortunately, this is surprisingly easy.
Below, I have provided you with a list of the common commands and what file operations they map to.
ls -l
List all the files and folders in a current directory by
displaying each in a single line.
cd directoryName
Navigate to the directory specified by your
value for directoryName. You can go multiple directories (aka
folders) by specifying the full path using a / character between
directory names. An example of this is cd dirA/dirB/myDirectory
cd ..
Navigate up a directory to go the parent.
mv oldfilename newfilename
Rename a file called oldfilename to
newfilename. Be sure to specify the file extension as well.
mv filename directoryName
Move a file called filename into the
directory specified by directoryName.
cp file1 file2
Copy a file called file1
and paste its contents into a new file called
file2. You can include path information if you are copying a
file in a different directory or wish to paste your file to a
different directory: cp file1 /temp/file2
Central to helping you backup your files is the driver of the white unmarked van known as the tar utility. Wikipedia has a good writeup about its history, and you'll learn a lot on how to use it to accomplish our backing up and restoring needs in the following sections.
To create a compressed archive of all the files in your current folder and its subfolders, type the following:
tar -zcvf myArchive.tar.gz .
Let's quickly break down what this command and its parameters do:
Once you run this command, because you have verbose output enabled, you will see a lot of files flying across your PuTTY window. These are all the files that are being copied into the archive file with the name you specified. After a few moments (or many moments for a large site), a compressed archive of all of your site's files will have been created. The fun isn't over just yet.
Chances are, there are certain files or directories that you don't want to include as part of the archive. These files and directories may include a directory containing your site's traffic logs, a temp location created by certain server-side applications, a folder of already existing backups, embarrassing baby photos, etc.
Excluding files is pretty simple. As part of creating the archive, you can specify parameters using the exclude keyword that tell the tar utility to skip certain files and directories.
Below is an example of me performing a backup while excluding a logs folder and an old folder located inside the backups directory:
tar --exclude='./logs --exclude='./backups/old' -zcvf myArhchive.tgz .
Note the formatting and use of dashes and quotation marks. Also, do not include a slash after specifying a directory you want to exclude. Stop with just ./logs as opposed to ./logs/ for example. Finally, you can specify as many --exclude parameters as you want, so go nuts.
Once you have created your backup/archive, you may find yourself wanting to restore it. To restore an archive, use something that looks like this:
tar xvfz myArchive.tgz
The letters v, f, and z should already be familiar to you. The letter x is new, and it tells the tar utility to perform an extraction of the compressed archive whose path and name that you specify.
This extraction will essentially replicate the original file/folder structure you had when you created the archive in the first place. Make sure you move or copy your archive to the right location before extracting. There are few things more annoying than having restored an archive in the wrong folder.
The next part of this article deals with backing up and restoring MySQL databases. So much of the content that gets served from web applications these days doesn't revolve around loose files arranged in your server's file system. It revolves around being stored and retrieved from a database - of which MySQL is one the most popular flavors.
In this section, let's look at how to backup your database's contents to a file. For good measure, we will also look at restoring the contents of that file to a database as well.
There are two ways of backing up your MySQL database. You can use a web-based application such as phpMyAdmin and use a graphical interface to back up your database, or you can use the "logging into a remote computer" via SSH approach that you've already seen plenty of so far. Let's do it the SSH way...for that is how we roll.
The main reason I like SSH'ing into remote computer for working with MySQL is because you can reliably work with large databases without any fear of things timing out. For small databases, a web-based backup utility is just fine. When your database gets into the hundreds of megabytes in size with many tabls and rows, you will want to manipulate the database by logging into the server directly.
Ok, let's get started. Just like before, make sure you are connected to your server and are logged in as admin, root, or something with sufficient permissions to access the MySQL database and perform operations on it.
Just like with tar for files in your file system, you have a utility called mysqldump that helps you work with your database. More specifically, mysqldump is all about taking content from a specific database and putting it all in one file.
The command for using mysqldump to copy the contents of a file into a database (and compress it!) looks as follows:
mysqldump -u username -p database_name | gzip > backup.sql.gz
Fill in the values for username and database_name with your MySQL database details. Replace the field represented backup.sql.gz with the name of the backup file and the path you want to save the file in. By default, if you do not provide the path along with your backup file name, the backup will be saved in whatever directory you run the mysqldump utility from.
For example, here is an example of what the above command looks like for a database called halo and a username of blarg:
mysqldump -u blarg -p halo | gzip > /backup/vBulletin_8_2012.sql.gz
After you enter the appropriate information for mysqldump and hit Enter, you will be prompted for your database password. Provide that information and hit Enter again. Depending on how large your database is, you will see a fair amount of inactivity where it looks like your console window has hung. That is expected, so just be patient.
I don't like staring at a console window with no feedback shown for what is going on. When I backup a large database, unfortunately, that is all that I see. To alleviate my anxiety, what I do is launch another instance of PuTTY, sign-in to my server, navigate to the directory where I specified the file my database's contents to be archived, and keep typing ls -l every few seconds.
What happens is that you see a listing of all the files in that directory with one of the files being your partially completed dump of your database. The ls command also displays the file size of all the files shown. For an in-progress dump, that file's size will increase each time you run ls -l. As long as I can see that file's size increasing, I know that the archiving is going smoothly.
I do realize that this is neither pretty nor efficient, but it is just enough to let me know that everything is going smoothly.
When your console window displays a new line for taking more commands, your mysqldump operation has completed. You can verify that this worked by entering ls -l in the directory of the backup location to see your backup file.
Now that you have your database backed up to a single file, let's next look at how to uncompress the data and restore all of that back to a database. All you need is your database username, password, database name, and the path/name to your backup file. Once you have that, the command for restoring your database looks as follows:
gunzip < backup.sql.gz | msysql -u username -pPassword database_name
Notice the order in which these commands are being executed. You first uncompress your data using gunzip and pipe the output to the mysql utility which takes care of actually taking the uncompressed data and filling up the database in the exact form in which it found it in.
Using the values from my earlier example, here is what my command for restoring that backup will look like:
gunzip < /backup/vBulletin_8_2012.sql.gz | msysql -u blarg -p1234Password halo
Note the lack of a space between -p and my password, 1234Password. That isn't a typo at all. There is no space between the -p and the password, so be sure to keep that in mind.
Well, this about wraps things up for this article. Once you have your data backed up to a file, you shouldn't keep it exclusively on your server. You should keep a copy locally on your computer, external hard drive, another server with a different host, etc. You could even keep them in all of the locations I mentioned, but that may be a bit overkill.
In an ideal world, you will backup your site's contents very frequently. Almost every change is reflected in a snapshot that you have taken. Realistically, that isn't feasible - especially if your backups run into multiple gigabytes. The frequency of your backup depends entirely on your site's function, but whatever you do, be systematic about it and don't cut corners. The thing about backups is that you rarely enjoy doing this when everything is going fine. When something unexpected happens that causes your data to get lost, at that point, you will be grateful that you had backups handy.
The time you invest to backup your site's contents is one of the smartest things you can do. Watching Breaking Bad is also very VERY smart.
Just a final word before we wrap up. What you've seen here is freshly baked content without added preservatives, artificial intelligence, ads, and algorithm-driven doodads. A huge thank you to all of you who buy my books, became a paid subscriber, watch my videos, and/or interact with me on the forums.
Your support keeps this site going! 😇


:: Copyright KIRUPA 2025 //--