The KIRUPA orange logo! A stylized orange made to look like a glass of orange juice! Tutorials Books Videos Forums

Change the theme! Search!
Rambo ftw!

Customize Theme


Color

Background


Done

Introduction to Animation in Flash

by kirupa   |   28 October 2008

  Have questions? Discuss this Flash tutorial with others on the forums.

Let's assume for a moment you are walking down a street made up of artistic people who know a thing or two about computers. If you had to ask these "artistic people who know a thing or two about computers" what Flash is, they'll almost always say that Flash is an animation tool.

The reason for this answer is simple. Since its early days, Flash has always been known for allowing someone to create animations really easily. In this tutorial, you will get a taste of Flash's historical focus on animation by creating something simple and cool...such as what you see below:

[ this is what you will be creating ]

Let's Get Started

The following steps will help you re-create the above animation while at the same time giving you a whirlwind tour of Flash's big animation features:

  1. Launch Flash CS4 if you have not already. The New Document window will appear. From this window, select Flash File (ActionScript 3.0) and click OK:

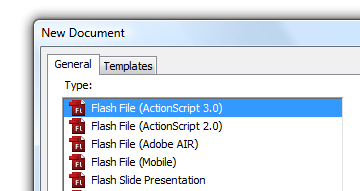
[ select Flash File (ActionScript 3) from the new Document window ]

  1. Once you have done that, the New Document window will disappear and you will see a blank stage that you can work in. The size of your design area is a little large, so let's change that.
     
    On the right, you should see your Properties pane. Click on the Edit button next to Size: 500 x 400 px:

[ click on the Edit button in your Properties pane ]

  1.  Once you have clicked the Edit button, the Document Properties window will appear. Under Dimensions, enter 400 for the width and 250 for the height:

[ set your stage's width to 400 by 250 ]

After you have entered those values, press OK to close the Document Properties window and to have your design area resized to 400 x 250.

  1. Ok, now we have our design area setup. It is time to actually begin creating the animation. First off, copy the following image and paste it anywhere inside your Flash document:

[ copy this image and paste it into your Flash document ]

  1. Once you have pasted this file, make sure it is positioned towards the left edge of your stage:

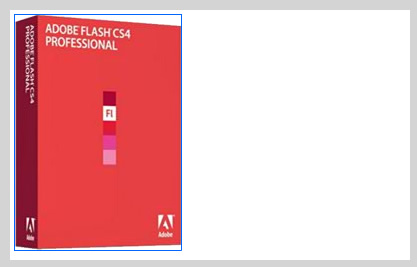
[ move your image to the left edge of your stage ]

  1. With your image in the right location, take a look at your timeline - the large area towards the bottom of your Flash window with all of those numbers and grids.
     
    Find the keyframe (the solid circle) on Frame 1 of your Layer 1 layer:

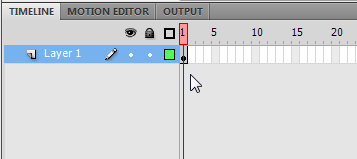
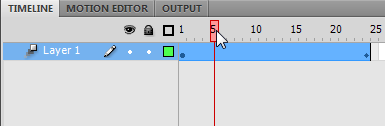
[ there should be a keyframe on Frame 1 of Layer 1 ]

  1. Once you found that keyframe, right-click on it and select Create Motion Tween:

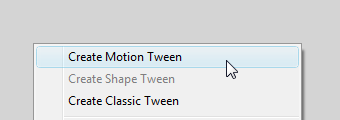
[ creating a tween is an important part of having your animation work ]

  1. A brief moment later, you will see more frames added with your playhead moving to Frame 24, the last frame in our sequence:

[ move your playhead to the last frame of your tween ]

Your playhead is the red rectangle with a vertical line. It is used to indicate where in your animation your design surface is currently at.

  1. With your playhead on Frame 24, look at your stage. Your image is currently on the left edge. Select it, and using your arrow keys, move it towards the right edge:

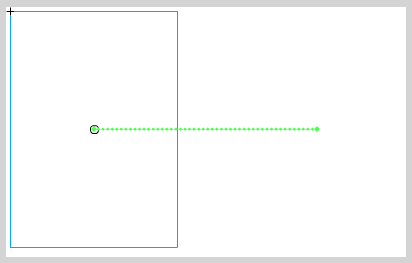
[ while at Frame 24, move your image to the right edge of your stage ]

  1. With your image now on the right edge, press your Enter key. When you press Enter, notice that you are seeing the box animate from the left-hand side of your stage to the right-hand side.

    You can also preview frame-by-frame by clicking on your playhead and dragging it to the frame you want to preview:

[ drag the playhead to see your stage preview your animation ]

  1. Currently, this animation is a little too fast. Let's fix that by increasing the number of frames it takes for our animation to complete. To do that, hover over the right-most edge of your frame sequence (at Frame 24). Your mouse cursor will change to display the horizontal resize cursor:

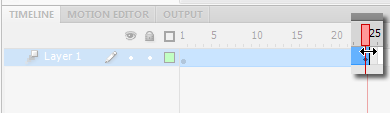
[ drag your tween's last frame to the right to increase the duration of your animation ]

Once you see that cursor, click and drag to the right until you hit Frame 50:

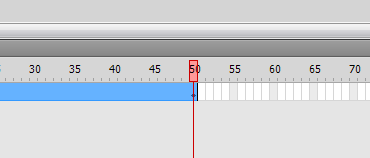
[ don't stop dragging until you hit frame 50 ]

  1. Now that you are at Frame 50, if you happen to preview your animation again, you will notice that it takes about twice as long for the animation to move from one edge of the screen to the other.
     
    If you want to preview your animation independent of your stage, press Ctrl + Enter where your animation will be displayed in the Flash Player window.
     
  2. Getting back to my example, I actually have the image fading in and then fading out. Currently, your image is visible throughout the entire animation. Let's fix that. While you are at Frame 50, make sure your image is selected and look over in the Properties pane.
     
    You should see the Style drop-down inside the Color Effect category:

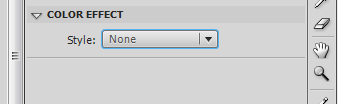
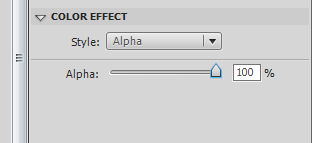
[ find the Style drop-down under the Color Effect category ]

  1. Click on the Style drop-down, and select the menu that appears, select the entry for Alpha. Once you have done that, you will see the Alpha slider appear below it. Slide that slider all the way to the 0 position:

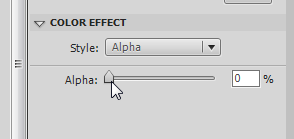
[ set your image's Alpha property to be 0 percent ]

Notice that once you have done that, the image on your stage is now invisible:

[ setting the Alpha to 0 makes your image invisible ]

  1. If you happen to play back your animation, you will see that it starts out as visible and then becomes invisible. This is good, but we want it to start out invisible, fade in to visibility, and then fade back into invisibility towards the end.
     
    To fix this, drag your playhead to Frame 1. Once you are at Frame 1, make sure your image is selected. From the Properties panel, repeat what you did in Steps xiii and xiv to set the Alpha of your image at Frame 1 to be 0 as well:

[ your image at the starting point is also invisible with an Alpha of 0 ]

  1. If you preview your animation now, notice that you nothing is displayed. This doesn't seem like we are heading in the right direction, does it? Actually, we aren't doing too bad.

    We have our starting and ending state of our image set. It is fully invisible at Frame 1 and Frame 50. What we need to do is make sure it is fully visible somewhere in-between those two frames.
     
    Click on Frame 25 to move your playhead slider to that location:

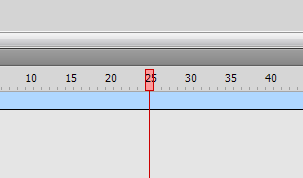
[ move your playhead to the center of your tween at around Frame 25 ]

  1. Once at Frame 25, click on your image again. Because your image is invisible, click somewhere in the middle of the green transition dots to select your invisible image.
     
    With your image selected, look at the Color Effect category of your Properties pane. You should see the Alpha slider already displayed. Move the Alpha slider all the way from 0 to 100:

[ this time, set your Alpha property to 100 ]

  1. Right now, if you look at your stage, notice that your image is fully visible:

[ with an Alpha of 100, your image is now fully visible ]

Better yet, preview your animation now. Notice that you have created the animation that you set out to create! You have an image that starts out invisible, becomes fully visible, and then disappears again.

Conclusion
This tutorial was a broad overview of some of the animation features you have in Flash. If you are familiar with previous versions of Flash, none of the terminology in here was particularly new. What was new is how you actually created your animation.

In the past, you had an instance of your object at your starting point and another instance of your object at the end point. You also inserted two keyframes to represent that. The tweening system calculated the differences between those two objects and presented them to you.

By default, animations you now create since Flash CS4 are property-based where the properties of your object are modified over a period of time. You have the same object throughout the lifespan of your tween, and at various points in time, the properties that make up your object are altered instead of the actual object itself. In our example, it was our image's X and Alpha properties that were changed over a period of time. That seems trivial and the end result doesn't look dramatically different, but this is a major change that the Property Based Animations tutorial covers in more detail.

Future tutorials will focus on that change and other parts of the animation functionality in, so with that, here is the source file for the animation you just created:

Download Final Source

Just a final word before we wrap up. If you have a question and/or want to be part of a friendly, collaborative community of over 220k other developers like yourself, post on the forums for a quick response!

Kirupa's signature!

The KIRUPA Newsletter

Thought provoking content that lives at the intersection of design 🎨, development 🤖, and business 💰 - delivered weekly to over a bazillion subscribers!

SUBSCRIBE NOW

Creating engaging and entertaining content for designers and developers since 1998.

Follow:

Popular

Loose Ends

:: Copyright KIRUPA 2024 //--