Have questions? Discuss this Flash / AS3 tutorial with others on the forums.
Almost everyone these days has a webcam attached to your computer. It is so common that sites, for example, like Facebook integrate with your webcam for allowing you to set your profile picture. There is no reason you shouldn't partake in all of this webcam action yourself.
In this introductory tutorial, I will explain how you build a small application that connects to a webcam and displays the resulting video to your screen.
Below is an example of what you will create:
[ I wonder who that is?! ]
Ok, let's get started!
Launch Flash and create a new ActionScript 3 project:
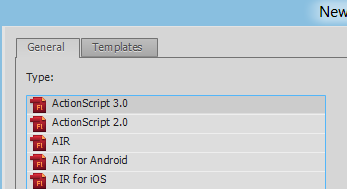
[ create a new AS3 project ]
Once you have created your project, you will see a blank stage where all of the magic will take place.
The way you will get your webcam image to display is made up of two steps:
Let's look at these two steps in greater detail.
You are probably going, "What is a Video symbol?" Even long time Flash users probably have no idea of what this is, but it is basically a symbol similar to a MovieClip, Graphic, or Button that you can add to your stage.
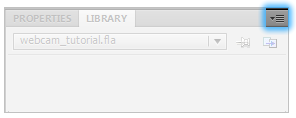
The way you add this is via your Library. Make sure your Library is displayed by going to Window | Library (or by pressing Ctrl + L):

[ your Library awaits ]
Right now, your Library will be empty. Let's fix that by adding your Video symbol. The way you add the Video symbol is by clicking on the obscure Options button found in the top-right corner of the Library panel:
[ I bet you have never clicked on that before! ]
When you click that button, a menu will appear with various things you can do:
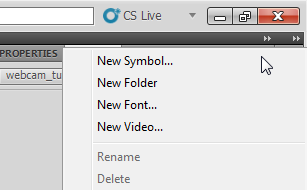
[ there is New Video item there.... ]
One of those things is the ability to add a Video symbol! Go ahead and click the New Video item, and once you have done that, you will see the Video Properties dialog appear.
From this dialog, give your symbol the Name webcamVideo, and make sure the Video option is checked:
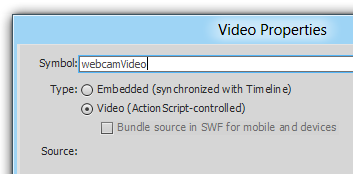
[ specify your Symbol name here ]
After you have made those changes, press OK to create your Video symbol. Your Library will now have your Video symbol created and stored:
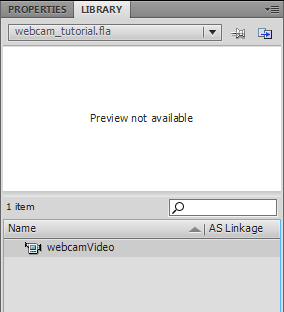
[ your webcamVideo symbol sleeps, sleeps, sleeps in a coil ]
A symbol in your Library isn't particularly helpful, so what we are going to do is actually instantiate it (makin' it real) by adding this symbol to your stage. To do that, simply drag your webcamVideo item from your Library and drop it onto your stage:
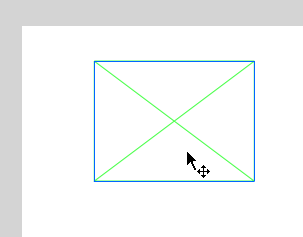
[ your Video object is represented as a box with an X in it ]
When you dropped your Video object, you will see a box with an X through it, and this box is now an instance of your webcamVideo object. There are two changes we need to make.
First, resize this instance to the size of your stage. You can do this by manually resizing the adorners or by setting a width/height explicitly in the Properties panel:
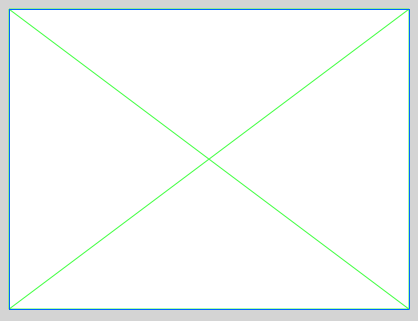
[ make your Video object larger! ]
The final thing we are doing to do is give your Video object an instance name. Make sure it is still selected, look over in your Properties Panel, and give your object the instance name webcamVideo:
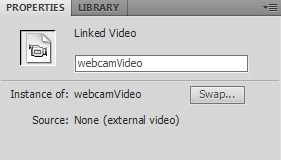
[ give your Video object an instance name ]
Once you have done this, you are done fiddling with your webcamVideo object.
The last step before you have a working example is adding your code. We are going to use a Document Class that associates your stage with a particular class. If you are not familiar with this, please take a few moments and read the Specifying a Document Class tutorial first.
Associate your application with a class called WebcamVideoHelper:
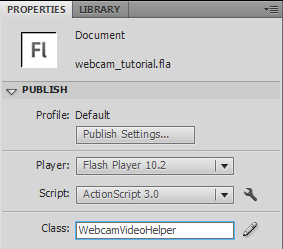
[ set the Document Class name ]
Go ahead and generate the new class file and save it is WebcamVideoHelper.as in the same directory as your FLA file.
Right now, you will see your WebcamVideoHelper.as file open and displayed:
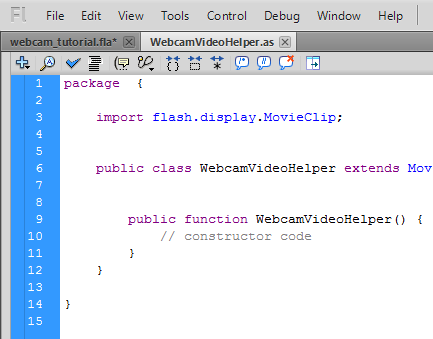
[ the default code that gets inserted for you ]
What you are going to do is add some code to the WebcamVideoHelper constructor function. As a part of doing that, you will declare some import statements outside of that function as custom would dictate.
Go ahead and modify the code that currently lives inside WebcamVideoHelper by adding the non-grayed out lines in similar locations as shown below:
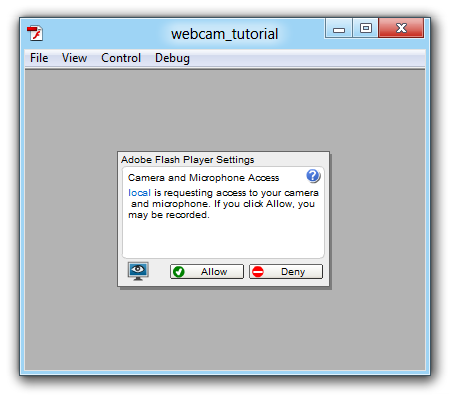
If you make the above additions, save your code file, and preview the animation by pressing Ctrl + Enter, you will see your webcam video showing up in your Flash application.
First, you will see the permissions dialog that Flash will automatically throw up:
Once you select Allow, you will now be able to see the webcam video appear:
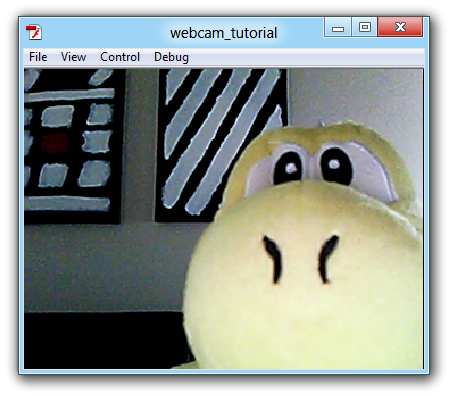
Wohooo! You now have a working application that utilizes your webcam!
Now that you have a working application, let's take a look at why it works the way it does.
Let's start with the code first:
The most important line of code here is the following:
This line initializes our Camera object by calling the getCamera() function. One you have your Camera object, it is time to specify the parameters of the video being recorded.
That specification is handled by the setMode function:
The setMode function takes four arguments:
In our example, we set the capture width and height to be 400 and 300 respectively, and that matches the size of our webcamVideo object in our stage. You should adjust it as you see fit.
The frame rate is set to 30, and I pass in false for our favorArea because I want to override the default values with my own.
Once you have specified the details of how your camera will capture the data, all that is left is to funnel the data to our Video object:
Our video object, lovingly referred to with an instance of webcamVideo, contains the attachCamera method that takes our Camera object as its argument. In case you forgot, the webcamVideo object is what you added to your stage in Flash a short while earlier!
I hope this tutorial helped give you an overview on using the webcam with Flash. There is a lot more you can do, and this tutorial just scratched the surface of what is possible.
If you have any questions or comments, please don’t hesitate to post them on the Forums.
Cheers!
|
|
Gaurav Pandey |

:: Copyright KIRUPA 2025 //--