|
by
paviter singh (sonoport) and
kirupa | 20 October 2010
Have questions? Discuss this Flash / ActionScript tutorial
with others on the forums.
Traditionally, sound isn't always given the same level of
importance as other visual elements. A part of the reason is
because it is simply too difficult to do things that go
beyond simply loading a file and playing it. Having the
sound's properties dynamically react to changes in your
scene is almost out of the question!
To help address some of these shortcomings associated
with working with sounds, Sonoport has created a sound
library and an associated API that makes it easy for you to
dynamically manipulate sounds. In this tutorial, you will
learn how to make your sounds feel alive similar to the
example you will end up creating by the end.
Note
This tutorial describes using the Sonoport SDK. Sonoport
was a sponsor of this site when the
tutorial was written.
First,
you will need the Sonoport SDK, and it requires you creating
a
free account. It is fairly quick, so go ahead and sign
up. Once you have signed up and logged in, you will be in
your Dashboard. Find the Download link and click it:
Once you have downloaded the SDK, extract the files:
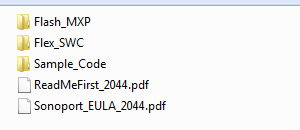
The primary contents of your extracted files are the
components that you need to have installed in Flash or Flex
to have everything work. We'll focus on just the Flash side
of things in this article.
Navigate to the Flash_MXP folder and double click on the
Adobe Extension file:

Once you double-click on the file, the Adobe Extension
Manager will launch. This is a small application that, as
you can guess by the name, makes managing your extensions
easier!
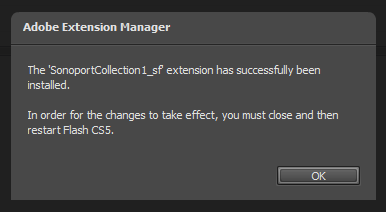
Inside the Adobe Extension Manager, follow the prompts
until your extension is fully installed. You should see a
dialog that looks as follows towards the end:
Now, launch Flash CS5 (or CS4) and jump to your Commands
menu. From this menu, select
AddSonoportToLibraryPath:
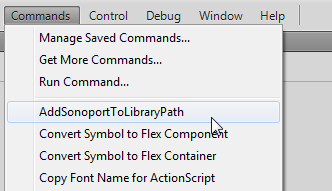
Running this command will allow your application to know
where to look when it encounters a reference to the Sonoport
library. As you will see shortly, the code you will be
working with makes a reference this library which,
thankfully, Flash now knows about.
Next up is for you to download the sample source files
that will get you up and running without giving away the
punchline.
Once you have downloaded and extracted these files, open
ChaseDemo.fla in Flash CS5. You will see something that
looks as follows displayed in your stage:
If you press Ctrl + Enter (or Cmd + Enter) to run your
current application, you will see a simple application where
a spaceship follows the position of your mouse. Great - if
you can see that, you are in good shape.
In this short article, what you will learn to do is add
some code to this project. The code you add will allow you to load some sound and to dynamically adjust the
sound based on where on the screen your space ship actually
is. Let's get started.
Before
going further, let's take a look at the code we have
currently. From the downloaded files, open ChaseDemo.as located in the ChaseDemo folder.
All of the code that you see is what allows your spaceship
to follow the mouse and change its scale when your mouse
moves vertically.
Let's start at the very top with the variable
declarations:
- private
const
wSWF:Number
=
stage.width;
- private
const
hSWF:Number
=
stage.height;
-
- private
var
targetX:Number
= wSWF/2;
- private
var
targetY:Number
= hSWF/2;
All of these variables should be pretty self-explanatory.
The wSWF and hSWF variables hold the size of your stage. The
targetX and targetY variables are just getting the center
point of your stage by dividing the wSWF and hSWF values in
half.
The next variable is the one that references your
spaceship:
- private
var
ship:Sprite;
I am calling this one out separately because this will
reference your spaceship directly - a spaceship that will be
instantiated from your LIbrary. It's pretty cool, so you'll
see it shortly.
Keep these variables under your hat, for you will be
running into them frequently in both the code I will be
explaining as well as the code that you will be adding.
Next up is the constructor and init function:
- public
function
ChaseDemo()
- {
- init();
- }
-
- private
function
init():void
- {
-
- stage.scaleMode
=
StageScaleMode.NO_SCALE;
- stage.align
=
StageAlign.TOP_LEFT;
-
-
- // Creating a new Spacehip
object
- ship
=
new Spaceship();
- addChild(ship);
-
-
- stage.addEventListener(Event.ENTER_FRAME,onEnter);
- stage.addEventListener(MouseEvent.MOUSE_MOVE,
onMove);
-
- }
When your application loads, the ChaseDemo function is
what gets called first. The reason is that it is the
constructor for this class that is referenced directly from
your ChaseDemo.fla file:
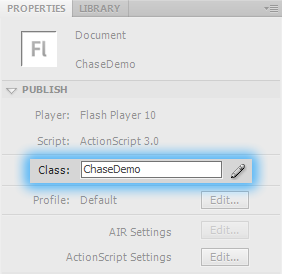
To learn more about how this association between the FLA
and the AS file works, check out the
Specifying a Document Class tutorial. All you need to
know is that, when your application is run, the code in the
ChaseDemo constructor is what runs. All that this code does
is call the init function:
- private
function
init():void
- {
-
- stage.scaleMode
=
StageScaleMode.NO_SCALE;
- stage.align
=
StageAlign.TOP_LEFT;
-
-
- // Creating a new Spacehip
object
- ship
=
new Spaceship();
- addChild(ship);
-
-
- stage.addEventListener(Event.ENTER_FRAME,onEnter);
- stage.addEventListener(MouseEvent.MOUSE_MOVE,
onMove);
-
- }
The first two lines in this function tell your
application's stage to
not resize and to align all of the content from the
top-left corner.
In the next two lines, you actually initiailize your ship
variable to an actual SpaceShip and add it to your stage:
- ship
= new
Spaceship();
- addChild(ship);
This all works because the SpaceShip object is a movie
clip that lives in your FLA's Library:
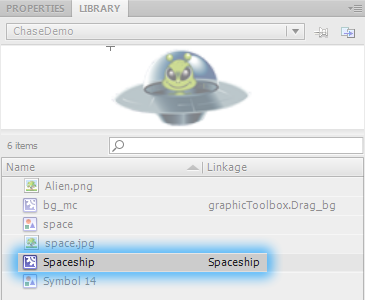
As you can see, the linkage value for that movie clip is
Spaceship, and that is the value you used in your code to
associate it to your ship variable. Displaying content from
the Library is covered in greater detail
here.
The final two lines in this function associate an event
with an event handler:
- stage.addEventListener(Event.ENTER_FRAME,onEnter);
- stage.addEventListener(MouseEvent.MOUSE_MOVE,
onMove);
In the first line, you associate the ENTER_FRAME event
with the onEnter function, and in the second line you
associate the MOUSE_MOVE event with the onMove function.
Let's look at both of those functions in greater detail
next!
The last things we are going to look are the functions
that act as event handlers for the ENTER_FRAME and
MOUSE_MOVE events:
- private
function
onEnter(event:Event):void
- {
- //calculation for
interpolating the ship's position
- ship.x
= (0.90*ship.x
+
0.1*targetX)-1;
- ship.y
= (0.90*ship.y
+
0.1*targetY)-1;
- }
- private
function
onMove(event:MouseEvent):void
- {
- //sets the targetX
whenever the mouse moves
- //this is the target which
the object has to reach
- targetX
=
event.stageX;
- targetY
=
event.stageY;
- if
(
targetX <
30
)
- targetX
=
30;
- if
(
targetX >
wSWF
)
- targetX
=
wSWF;
- if
(
targetY <
30
)
- targetY
=
30;
- if
(
targetY >
hSWF-50
)
- targetY
=
hSWF-50;
- }
Both of these functions are responsible for controlling
the alien spaceship's movement. The onMove() function
calculates the mouse position whenever there is mouse
movement detected, while onEnter() updates the spaceship's
position, with some basic interpolation. I am not going to
go into great detail on what is displayed here because it is
fairly straightforward.
Ok, we've reached the end of our examination of what the
code looks like. In the
next
page, we'll add some some and make modifications to how
the sound...sounds!
Onwards to the
next
page!
|


