|
by
kirupa | 8 December 2009
In the
previous page, you learned how to create a snow
flurry by manually duplicating movie clips. In this page,
you will create a similar effect. The difference is that you
will do that programmatically instead of manually copying
and pasting.
To create snowflakes automatically, first clear your stage
of any snowflakes. That means that your single solitary
snowflake has to be removed as well.

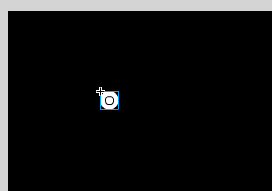
[ yes, I did reuse the image from the previous page ]
What you will have now is nothing more than a black
background with nothing in it. As strange as that sounds,
that is exactly what we want.
Now, go over to your timeline, right click on the first
frame, and select Actions (from the menu that appears). The
Actions window will now be visible. Copy and paste the
following code:
- function
makeItSnow()
- {
- for
(var
i:int
=
0; i
<
100; i++)
- {
- var
newSnowFlake:Snowflake
=
new
Snowflake();
- this.addChild(newSnowFlake);
-
- newSnowFlake.SetInitialProperties();
- }
- }
- makeItSnow();
Don't test your application just yet, for there are some
changes that you need to make to your Snowflake.as file.
Open your Snowflake class file and delete or comment out the
highlighted line:
- package
- {
- import
flash.display.*;
- import
flash.events.*;
-
- public
class
Snowflake
extends
MovieClip
- {
- private
var
xPos:Number
=
0;
- private
var
yPos:Number
=
0;
-
- private
var
xSpeed:Number
=
0;
- private
var
ySpeed:Number
=
0;
-
- private
var
radius:Number
=
0;
-
- private
var
scale:Number
=
0;
- private
var
alphaValue:Number
=
0;
-
- private
var
maxHeight:Number
=
0;
- private
var
maxWidth:Number
=
0;
-
- public
function
Snowflake()
- {
-
SetInitialProperties();
- }
-
- public
function
SetInitialProperties()
- {
- //Setting the
various parameters that need tweaking
- xSpeed
= .05
+
Math.random()*.1;
- ySpeed
= .1
+
Math.random()*3;
- radius
= .1
+
Math.random()*2;
- scale
= .01
+
Math.random();
- alphaValue
= .1
+
Math.random();
-
- var
stageObject:Stage
=
this.stage
as
Stage;
- maxWidth
=
stageObject.stageWidth;
- maxHeight
=
stageObject.stageHeight;
-
- this.x
=
Math.random()*maxWidth;
- this.y
=
Math.random()*maxHeight;
-
- xPos
=
this.x;
- yPos
=
this.y;
-
- this.scaleX
=
this.scaleY
=
scale;
- this.alpha
=
alphaValue;
-
- this.addEventListener(Event.ENTER_FRAME,
MoveSnowFlake);
- }
-
- function
MoveSnowFlake(e:Event)
- {
- xPos
+=
xSpeed;
- yPos
+=
ySpeed;
-
- this.x
+=
radius*Math.cos(xPos);
- this.y
+=
ySpeed;
-
- if
(this.y
-
this.height
>
maxHeight)
- {
- this.y
=
-10
-
this.height;
- this.x
=
Math.random()*maxWidth;
- }
- }
- }
- }
Once you have commented out that line, test your
application by pressing Ctrl + Enter or by going to Control
| Test Movie. You will see 100 snowflakes animating and
falling to the ground. Best of all, you didn't actually have
to manually specify each of the 100 movie clips. They were
automatically placed on the stage for you.
In this
and the previous few pages, you've been exposed to a lot of
code that I never explained fully how it works. Fortunately,
the code presented here is not that much different from the
code that you have seen in some earlier tutorials.
Therefore, instead of explainining the code, I am going to
point you to other tutorials that will help you out instead:
Colorful Explosion,
Classes and MovieClips,
Trigonometric Animations.
I am sure after reading those three tutorials - especially
Colorful Explosion - how to programmatically animate movie
clips will be made very clear.
Anyway, despite me weaseling out of explaining how the
code works, you aren't done yet. In the
next page, let's look at how to make some common changes
and modifications to this falling snow effect.
Onwards to the
next page!
|