by
Sharif Karim aka REEF | 7 July 2006
In the
previous page, we covered setting the stage up to
prepare for the shine effect. We also have the shine
ready and the only thing left is to define the area where
the shine will be.
- Create a new layer named
"Area" and using Flash's drawing tools, draw an area
that you would like the shine to be in. I used the
rectangle tool to draw a shape of the screen. The fill
color doesn't matter but I'd remove any strokes there
are.
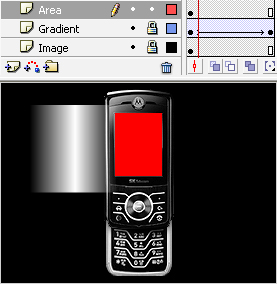
[ with a solid rectangle, cover up
the area of your shine on a new layer ]
- The final step of the
process is now to right-click the "Area" layer
and choose Mask and mask that
layer with the "Gradient" layer. Make sure your layer
order is just like the one below.
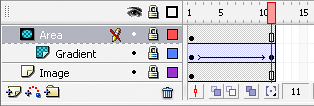
[ ensure your layer is ordered and the Mask is in place
]
- Test your movie by
pressing Ctrl + Enter or by going to your File menu and
previewing in the browser.
Well, that just about wraps up the whole tutorial. Hopefully
this one was much easier and more in-depth than my earlier
tutorial. Some tips I can give is to make sure your layers
are in the right order and to make sure you masked the right
layers correctly. You can always play around with the size
of the gradient and the area of coverage. The shine effect
can be used in a variety of shapes and isn't just limited to
a rectangle.
As usual, I've provided the source file in Flash 8 for you
to see how the effect was done. It's all up to you to decide
what you wanna do with it.

If you have any questions, comments or would
like to show your work, feel free to post on the
forums. You
can right-click the movie at the beginning for other
choices.
 |
Reef
Recycle Old Flash Files!
|
|


