|
by
kirupa | 19 December 2009
Nothing really
captures the Christmas season quite as well as snow.
Probably because I spent most of my life growing up
in places where there would be no snow in December,
over the years I simulated the effect of snow falling on
the computer instead of getting to experience it in
real life. Of course, four years in Boston changed
all of that though

Anyway, simulating falling
snow is pretty fun, and as you will see
shortly in this tutorial, you will learn how to use
Expression Blend to create a small Silverlight
application that does exactly that. Below is
example of what you will have created at the end:
In this and the
subsequent pages, you will learn how to create the
above effect from scratch.
All cool projects
need to start somewhere, so let's start at the very
beginning:
-
Launch Expression
Blend 3 and create a new Silverlight 3
Application + Web Site project:
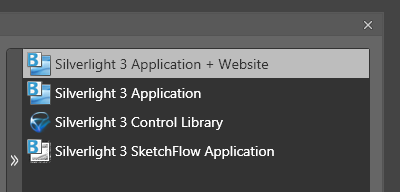
[ create a new Silverlight 3 project with an
associated web site ]
For
your project name, go with whatever you want. I will
be naming my project FallingSnowExample and will
refer to this project as such throughout this
article.
-
Once the project
has been created, you'll see a giant white
artboard with nothing in it. Let's change
that by giving your application a dark
background color.
You can do that
by selecting LayoutRoot on your Objects and
Timeline panel and changing the Background in
your Properties Inspector:

[ give your LayoutRoot a dark background color ]
-
Right now, your
LayoutRoot is a Grid control. While Grids are
fine layout controls, they are not great when
you want to programmatically position elements
inside them like you will be soon. For this
task, you need the real deal - you need a
Canvas.
To change your LayoutRoot from a
Grid to a Canvas, right click on LayoutRoot
from the Objects and Timeline panel, and from the
menu that appears, go to Change Layout Type |
Canvas:
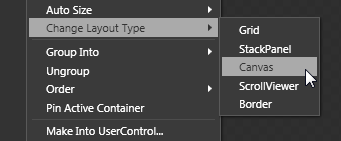
[ changing from a Grid to a Canvas to something else
is pretty easy ]
After you have done this, your LayoutRoot will now
proudly be a Canvas instead of a Grid.
-
With your
background a nice dark color and your LayoutRoot
a healthy Canvas, its time to draw some
snowflakes. For simplicity, I am going to be
using the Ellipse tool and drawing out a bunch
of white circles on our artboard. Draw a fair
number of them into your LayoutRoot, and remember, Copy and Paste is
your friend.
Here is what my stage looks
like at the end:
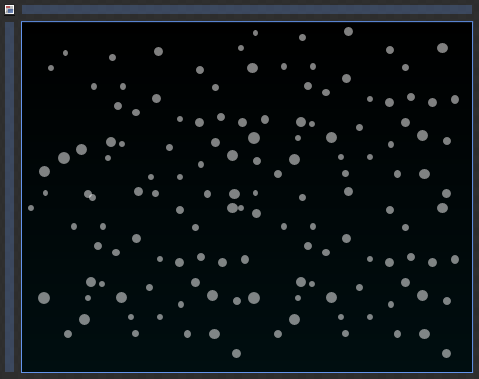
[ a ton of ellipses emulating snowflakes ]
Now that you have your
snowflakes as well, the UI part of this effect is
complete. What remains is creating what is known as
a behavior that
will animate all of these individual snowflakes for
you. We'll look into that on the
next page!
Onwards to the
next page!
|


