 After
Effects - Animation/Key-framing
After
Effects - Animation/Key-framing
Paul Soultis aka
.soulty
This tutorial is now going to continue
where the previous page left
off.
Adding a filter
-
Now that we have our animation, lets apply a filter to the
layer. Filters in AE are very cool and can be very
confusing sometimes, in this tutorial I decided i would
not go through the more complicated filter settings but
rather show you how to apply and use a filter and let you
do some experimenting on your own to see what other
filters can do. Most all filters and its settings in AE
can be keyframed. They basically work to the same
principal as scale, opacity etc.. as you see in a moment.
I decided to use a direction blur on this tutorial because
the filter is easy to understand and will go with the blur
of the rotation of the object. Lets get to it !
-
Select the image and then go to effect / blur & sharpen /
directional blur. Now you will notice that a window will
open up with some setting which contains the directional
blur. this is known as the effect controls window. To
access this window you must first have the Effects control
available in the timeline. To get the effect control
select the layer and press E on your
keyboard, this will bring up any effect that you have
applied to the layer. As before if you wish to have the
other controls up as well, use shift to bring up scale,
opacity, etc.. Now if you ever close the Effects control
window, to access it again just double click on the effect
in the layer and the window will pop up.
-
Almost all elements of Filters in AE can be placed
globally or can be keyframe, this will make more sense
when we apply the filter, so lets do that.
Now with the effects control visible in the timeline,
click on the arrow to expand its options. You will see two
controls , Direction, and Blur length. We want the filter
direction always to be pointing up and we want to keyframe
the blur length to get the effect I'm looking for. To make
it easy lets looks at the effect through the Effects
control window.
With the Effects control window available, expand the
Direction arrow. This will give us a dial (Photoshop users
will recognize this) for this effect we will like to have
that pointing up or at 0.0, but we do not want to keyframe
this, why you ask?, well if we apply a control effect
without Key-framing it , it will be applied globally or
applied all the way through the duration of the clip,
since the effect is only visible through the amount of
blur length we place it doesn't matter if this direction
is applied all the way through.
[ Effects
Control Window ]
-
Now lets put this filter in motion. Go back to your
timeline, and move your timeline slider to frame 20
mark. Place your first keyframe here by switching the
stop-watch on. I decided to place the keyframe here is
because i would like the effect to match the motion blur
of the rotation.
Be sure the motion blur master switch is on if you
would like to match the blur a little more precisely.
[You may want to drop down the preview quality to half
or third depending on the speed of your computer, because
filters can really be processor intensive.]
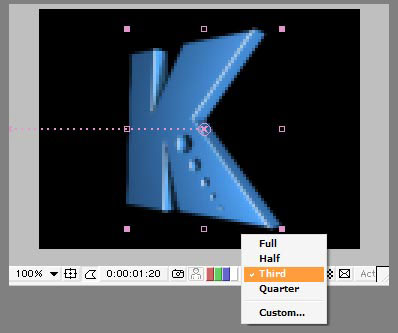
[ Preview
Quality Settings ]
Now move the timeline slider to 1 second mark (30 frames)
and change the blur length value to 50.0, then move the
slider to 1 second 10 frames or 0:00:01:10, change the
blur length value to 100.0 and once more move the slider
to the 1 second 20 frame mark and then change the value to
0,0.
You should now have placed 4 key frames for the filter,
Move the RAM range to 1 second 20 and RAM preview the
animation. Looks good :)
Check and compare your timeline with mine so see how you
went.
Check here.
Exporting to a .mov
(QuickTime)
-
The animation is now complete and we now want to render
this out. Before we go into the Make movie options we need
to make sure of some setting in the timeline are ok before
we render.
-
First we need to make sure that our RAM range covers the
whole length of the timeline, move the slider to the 2
second mark. and shift move the RAM range to the slider.
Next we need to turn on motion blur for our layer. Go to
the left of the timeline, where you found the quality
(anti-aliased) switch earlier in this tutorial, you will
see a M icon and box below it, click that to switch it on.
[ Motion
Blur Switch ]
-
Now when all that's done, go to Composition / Make Movie,
you will be prompted to save at a location, just name it
Klogo and click save ( try to keep all your elements in
one folder, your image, your AE file, and the rendered
movie) Now you will be given a window with a progress bar,
a render button and render queue below.
Click on Current Settings in the render settings, Copy the
setting from my screen shot...here.
then ok the settings.
Now click on Lossless found next to Output Module, Copy
the setting from my screen shot...here.
then ok the settings.
-
That's it click on Render found at the top of this window,
and let it render out the animation, when it has completed
the rendering a beep will alarm you that its complete,
locate the .mov file where you saved to and check out the
final result.
Compare it with my
final render.
That's it! Congratulations on completing
the Animation/Key-framing After effects tutorial, Now once
you have completed this tutorial you should have a better
understanding on how to use AE. Go ahead and use the same
process for multiple elements in AE, try using vectors
instead of imported bitmaps and try using movie files,
Practice and have fun creating some great motion graphics!!
If you have any questions about the tutorial or After
Effects post them in the
Drawing and Design Forum.
|


